
序言
本文为翻译内容,为了避免其中的重要单词遗漏导致的歧义,采取了“中英对照”方式保留了原文。
翻译初衷:
- 很多同学都在学Stable Diffusion,我也在学。而ControlNet则是必学的内容;
- 很多没有研发背景的同学,比如产品运营同学,都比较好奇AI 绘图能做什么,有什么样的能力,如何产品化。
所以,本文希望和大家一起学习下ControlNet 的基础使用,作为小白扫盲贴吧。
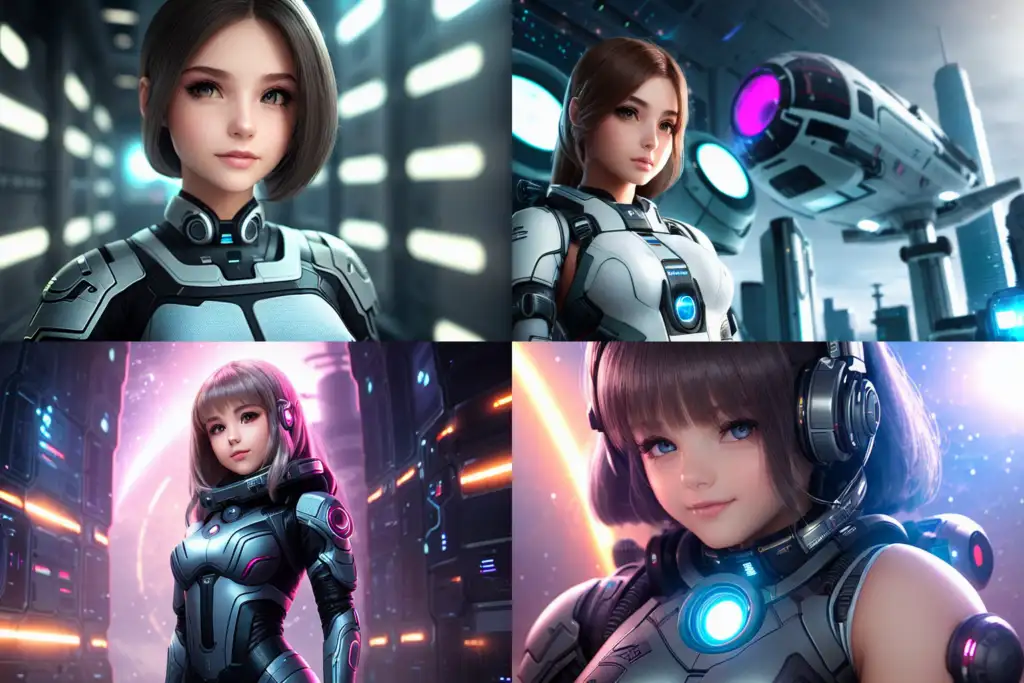
下面Logo 是刚才顺手使用AI 生成的。
为什么要用ControlNet ?
在我看来,简单的使用AI生成图片,很多同学都有玩过。
但是简单的风格生成的内容过于随机和不可控,比如,同样一个提示词,每次生成的结果差异可能过大,是不适合做商业化产品的。
- 图片处理是一件复杂的事儿:
我们想形容一张图片,包含很多种要素,比如:关键背景、关键人物、每个要素的位置、每个要素的尺寸、每种要素的数量、各个要素的颜色风格、各个要素的线条风格、亮度、对比度、饱和度、色温、色调,如果是人物,还包含人物的脸部五官特征、分布,配饰的种类、分布等等。 - 稳定可控是“商业化”的重要前提之一:
从市场角度来看,也验证了这一点,比如最近比较火的“黏土风格”图片,就紧紧锚定了“人像+黏土”这个细分,并且大火。
其中有一个关键因素,就是——效果相对稳定可预期。如果这次是黏土,下次是卡哇伊风格,肯定是不行的。
从市场角度看,商业化落地的图片处理场景,以广告素材二次加工为例,也是稳定锚定在比如背景去除或替换、特定的风格化、图片要素替换等明确的能力和场景。 - ControlNet 是解法,但不能解决一切:
从目前了解到的一些案例来看,ControlNet已经是相对用的比较多和可控得了,但是比如AI不擅长处理的人类手指等要素,还有较大的提升空间。 - 通过ControlNet 掌握一些基础的AI 图片处理能力和维度:
非图形图像相关专业的同学,比如我,刚开始了解图片处理的时候,也是不太能抓到重点,在持续学习的过程中,通过了解和学习 ControlNet 确实能够掌握不少图片处理相关的“能力维度”定义,在继续进一步深入学习的时候,也有了方向。
废话不多说了,下面为中英翻译对照稿。
默认来讲,上面是英文,下面是对照的中文。
简介
ControlNet is a neural network that controls image generation in Stable Diffusion by adding extra conditions. Details can be found in the article Adding Conditional Control to Text-to-Image Diffusion Models by Lvmin Zhang and coworkers.
ControlNet 是一个神经网络,通过添加额外条件来控制Stable Diffusion中的图像生成。详细信息请参阅 Lvmin Zhang 及其同事撰写的文章“向文本到图像扩散模型添加条件控制”。
It is a game changer. You can use ControlNet to, to name a few,
- Specify human poses.
- Copy the composition from another image.
- Generate a similar image.
- Turn a scribble into a professional image.
ControlNet改变了Stable Diffusion的玩法。你可以使用 ControlNet 进行以下操作:
- 指定人体姿势。
- 从另一张图像复制构图。
- 生成类似的图像。
- 将涂鸦变成专业图像。
In this post, You will learn everything you need to know about ControlNet.
- What is ControlNet, and how it works.
- How to install ControlNet on Windows, Mac, and Google Colab.
- How to use ControlNet.
- All ControlNet models explained.
- Some usage examples.
通过本文,你将可以掌握所有关于ControlNet 的知识:
- 什么是ControlNet,它是如何工作的;
- 如何在Windows、Mac和 Google Colab上安装ControlNet;
- 如何使用 ControlNet.
- 对ControlNet 每个模型的挨个解释介绍;
- 一些非常有用的实例;
This guide is for ControlNet with Stable Diffusion v1.5 models. See the guide for ControlNet with SDXL models.
本文是针对Stable Diffusion v1.5 大模型下的ControlNet 的使用说明书。可以查看: ControlNet with SDXL models.
什么是 ControlNet
ControlNet is a neural network model for controlling Stable Diffusion models. You can use ControlNet along with any Stable Diffusion models.
ControlNet 是一个用来控制Stable Diffusion 模型 的神经网络模型,你可以用它来控制任何一个Stable Diffusion 模型;
The most basic form of using Stable Diffusion models is text-to-image. It uses text prompts as the conditioning to steer image generation so that you generate images that match the text prompt.
使用Stable Diffusion模型们最基础的形式就是“文生图”——即使用“文本提示词(prompt)”作为条件判断来引导图片生成,从而生成满足提示词(prompt)的图片。
ControlNet adds one more conditioning in addition to the text prompt. The extra conditioning can take many forms in ControlNet.
除了文本提示此外,ControlNet 还添加了额外的条件控制能力 . 这个额外的控制能力可以使用多种形式来生效。
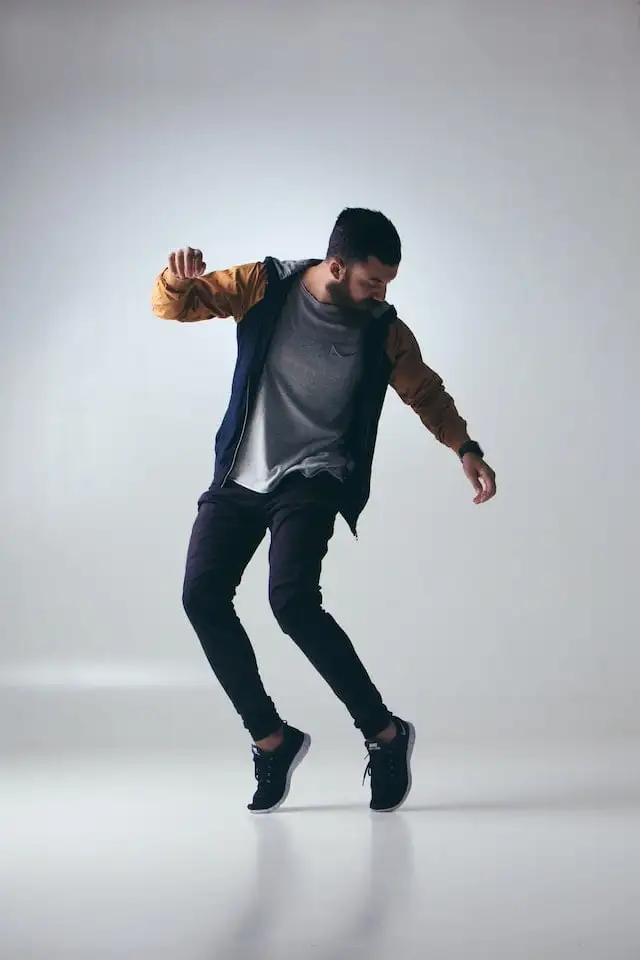
Let me show you two examples of what ControlNet can do: Controlling image generation with (1) edge detection and (2) human pose detection.
我们可以拿两个示例来看下ControlNet 能做什么:
(1)边缘检测来生成图片;
(2)通过人体姿势检测来生成图片;
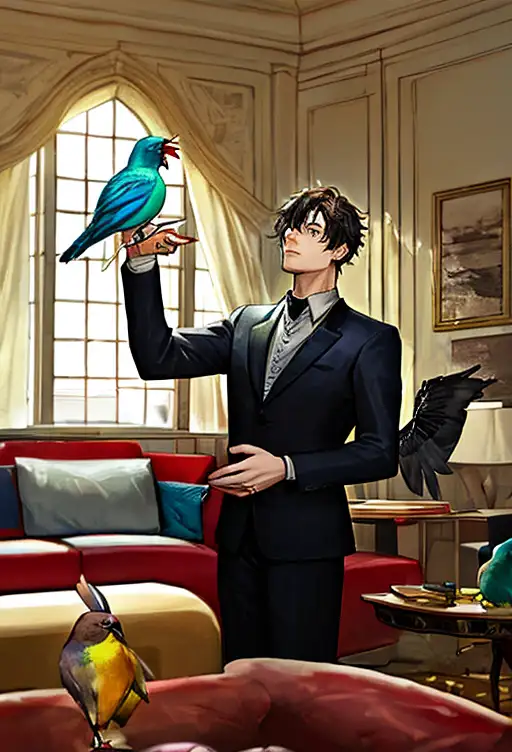
边缘检测示例, Edge detection example
As illustrated below, ControlNet takes an additional input image and detects its outlines using the Canny edge detector. An image containing the detected edges is then saved as a control map. It is fed into the ControlNet model as an extra conditioning to the text prompt.
如下图所示,ControlNet 通过使用Canny 边缘检测器,检测input 输入的图片轮廓边缘。包含已检测出来边缘的图片会被保存为 控制图(control map)。之后这个控制图会作为额外的输入条件,连同文本提示词(prompt)一起喂给ControlNet。
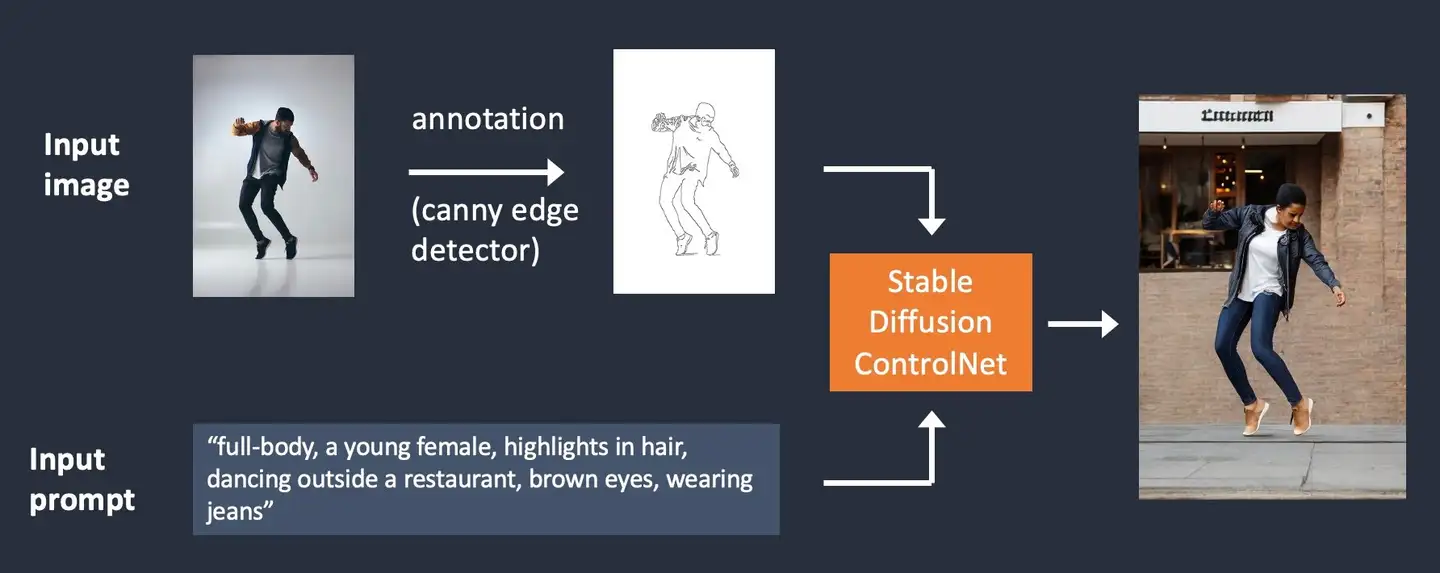
Stable Diffusion ControlNet with Canny edge conditioning.
上图:Stable Diffusion使用 ControlNet的Canny边缘检测器作为输入条件控制。
The process of extracting specific information (edges in this case) from the input image is called annotation (in the research article) or preprocessing (in the ControlNet extension).
从输入的图片中提取特定信息(本例中的“边缘”)的过程,叫做“标注”annotation (研究文件见 research article) 或者“预处理” preprocessing (在ControlNet 扩展中这么叫).
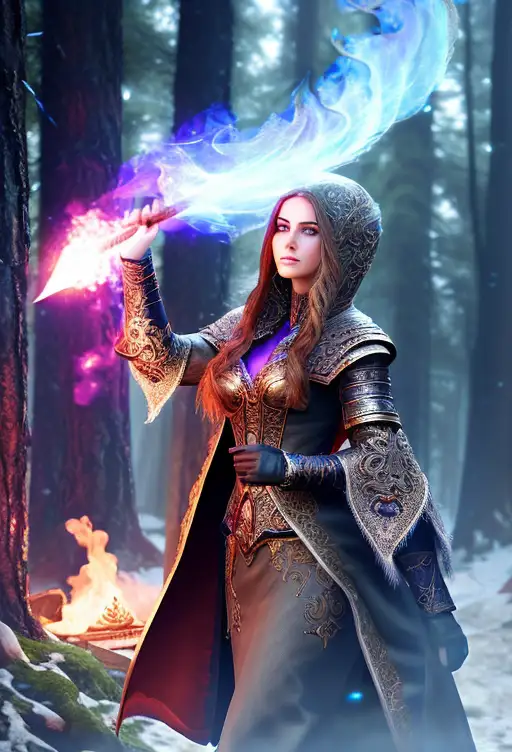
人体姿态检测示例, Human pose detection example
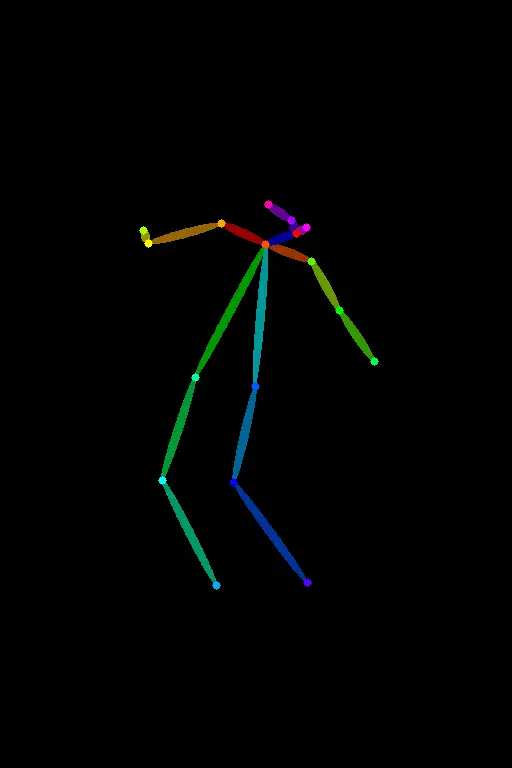
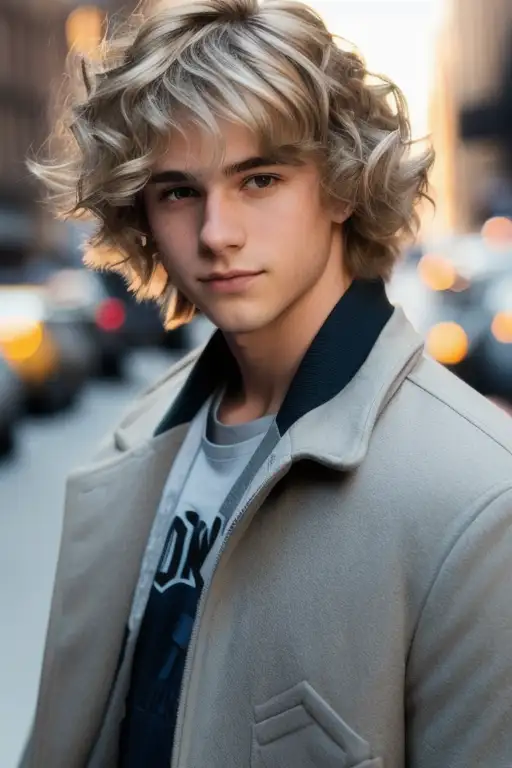
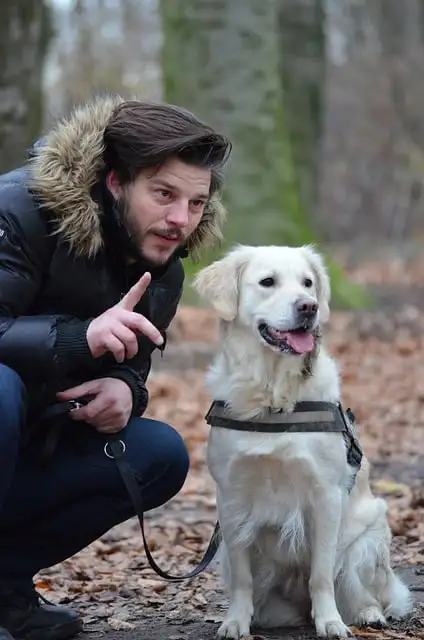
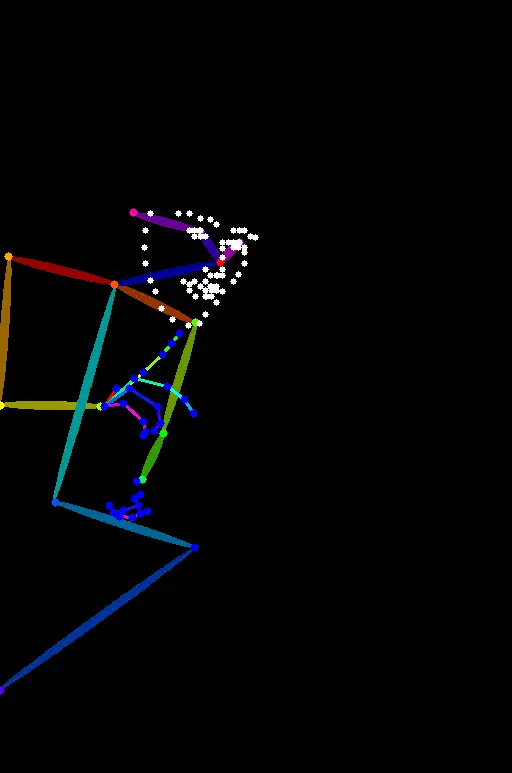
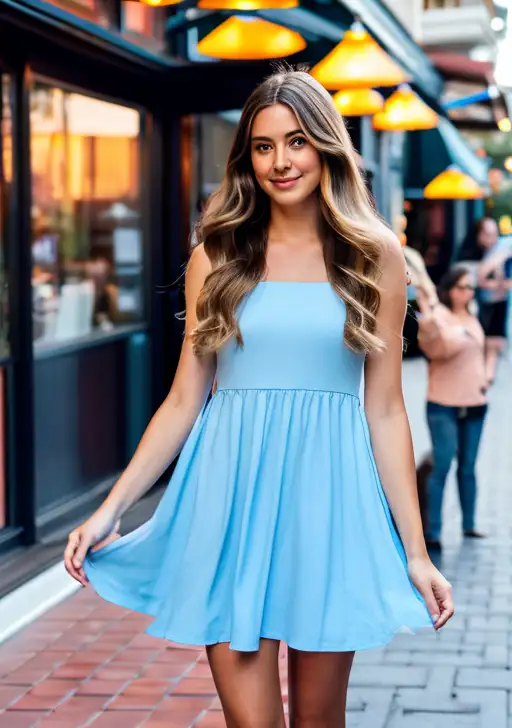
Edge detection is not the only way an image can be preprocessed. Openpose is a fast human keypoint detection model that can extract human poses like positions of hands, legs, and head. See the example below.
边缘检测并不是唯一的图片预处理方式。开放姿态Openpose 是一个快速人体keypoint detection(关键点检测) 模型,这个模型可以把人体姿态的比如手、腿、头部的位置都提取出来。如下示例:
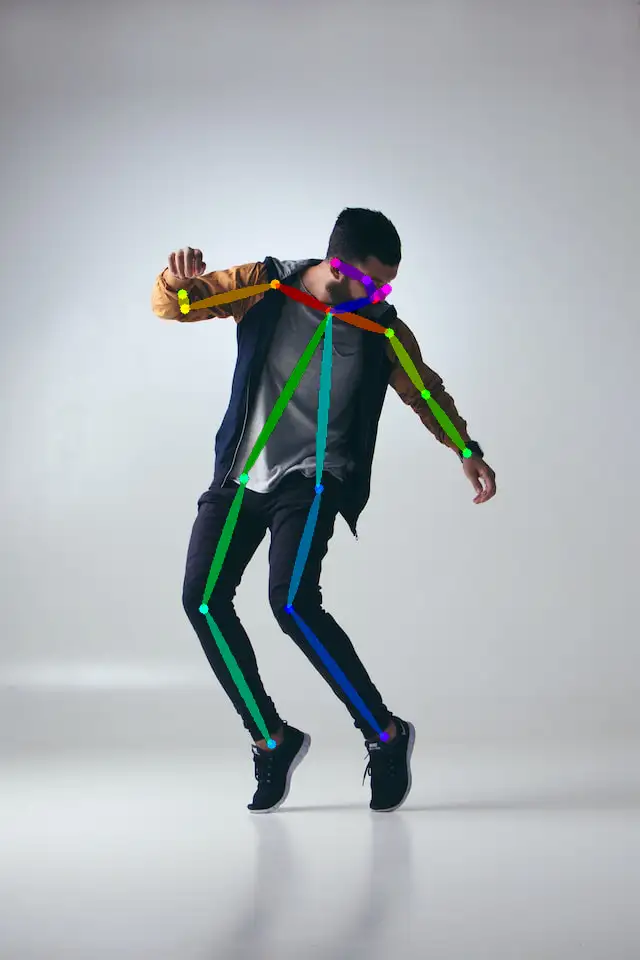
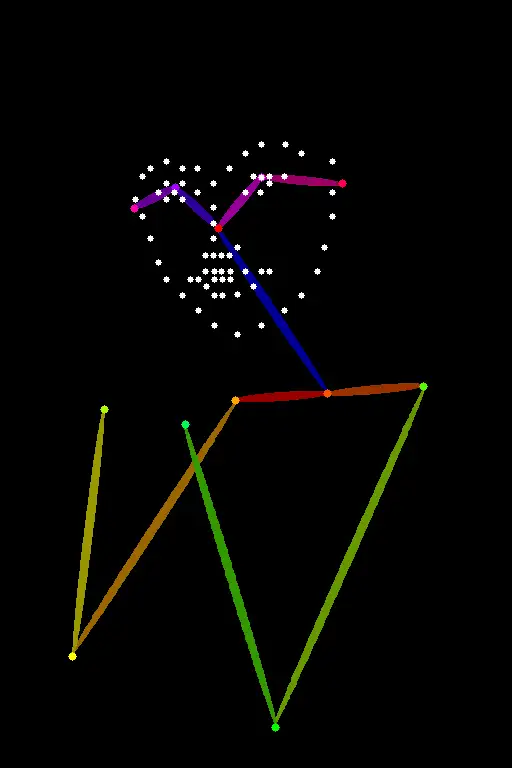
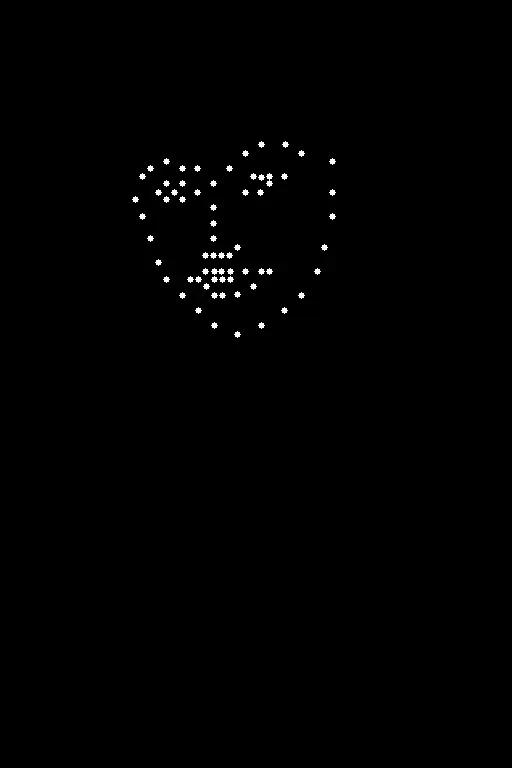
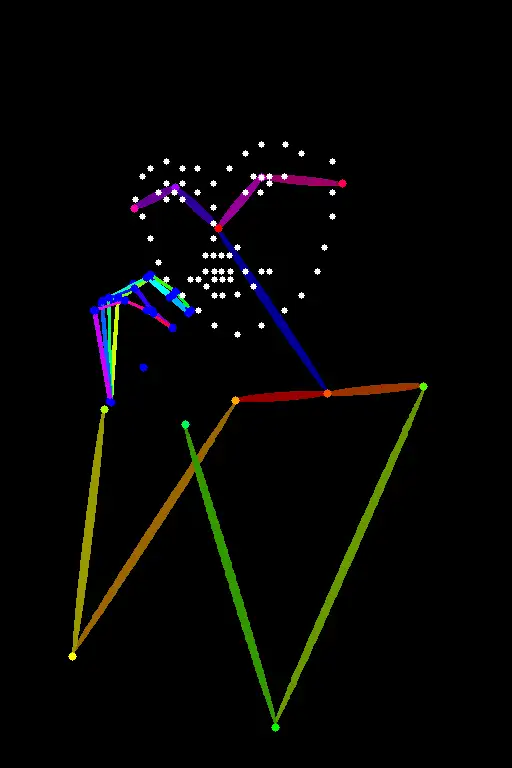
Input image annotated with human pose detection using Openpose.
使用Openpose 检测并标注一张图片,然后整体作为输入。
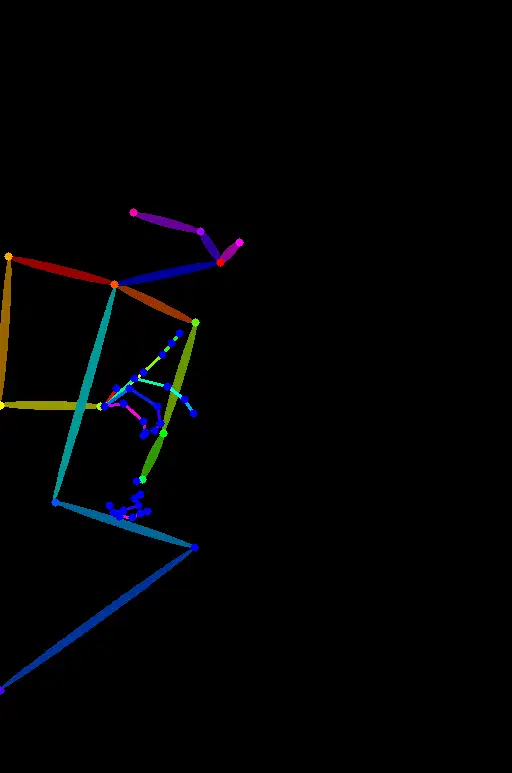
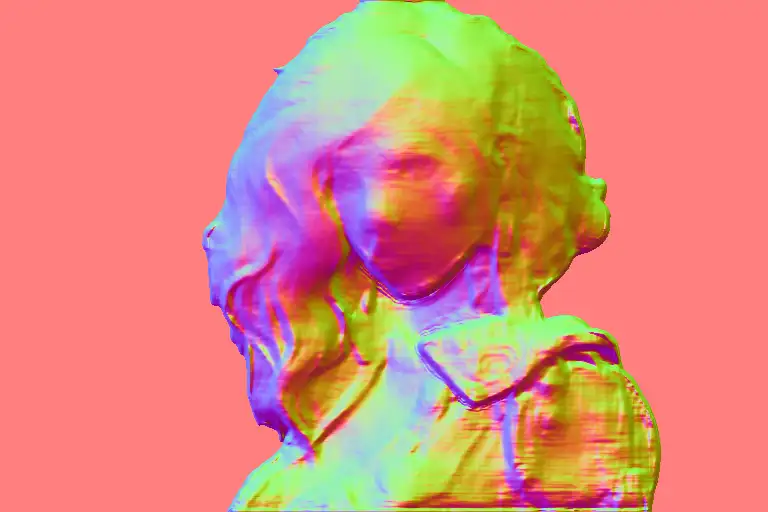
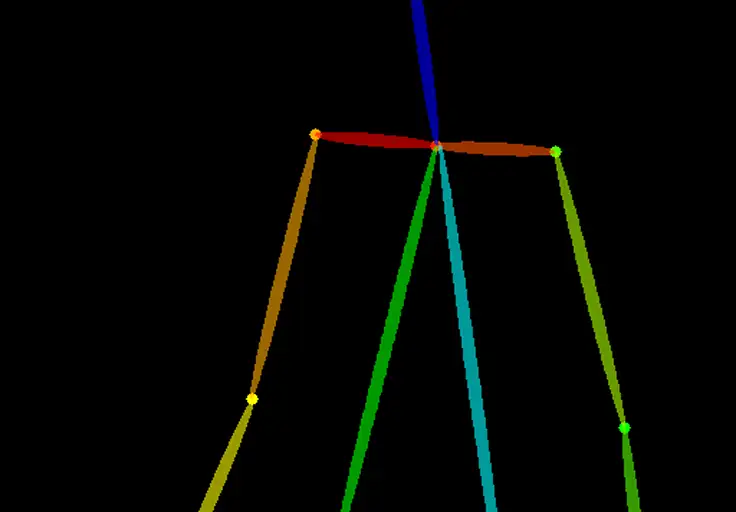
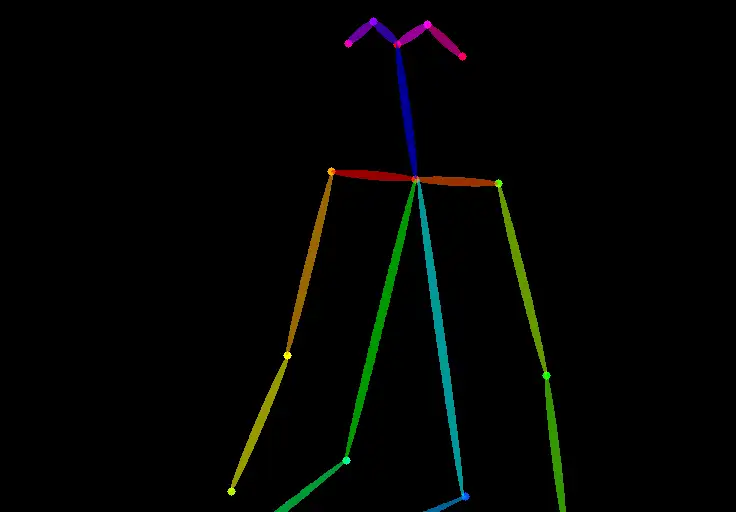
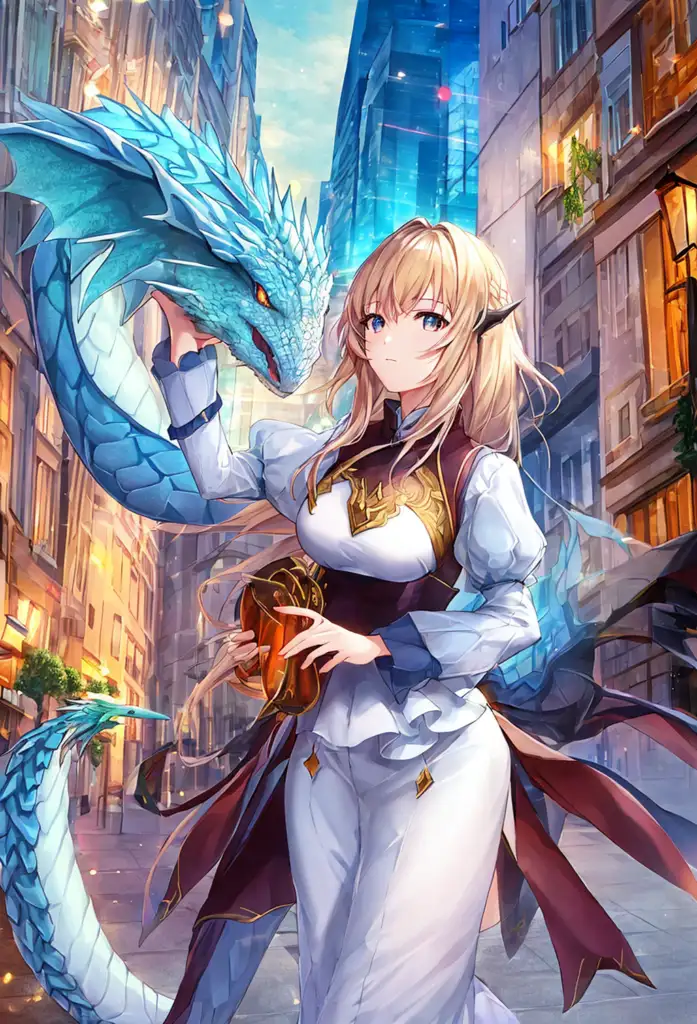
Below is the ControlNet workflow using OpenPose. Keypoints are extracted from the input image using OpenPose, and saved as a control map containing the positions of key points. It is then fed to Stable Diffusion as an extra conditioning together with the text prompt. Images are generated based on these two conditionings.
下图是使用OpenPose的一个ControlNet处理流程。
OpenPose从输入的图片中提取关键点,保存为control map。然后作为额外条件(extra conditioning),和文本提示词(prompt)一起喂(输入)给Stable Diffusion。之后,Stable Diffusion会根据这两个输入来生成图片。

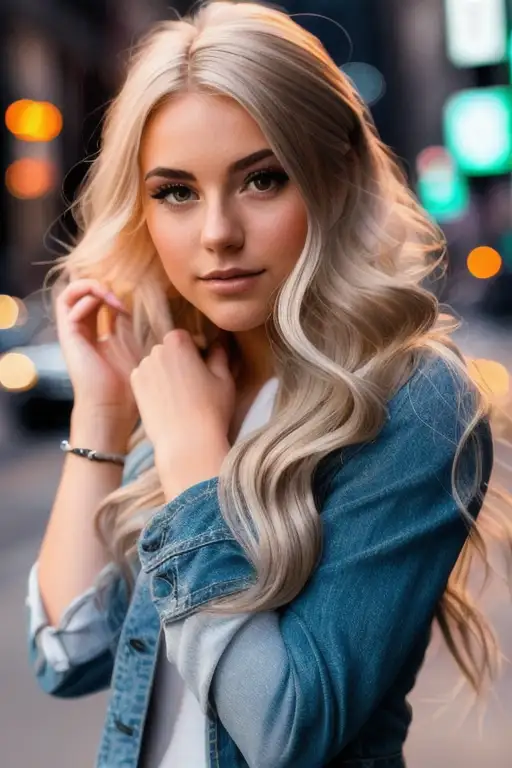
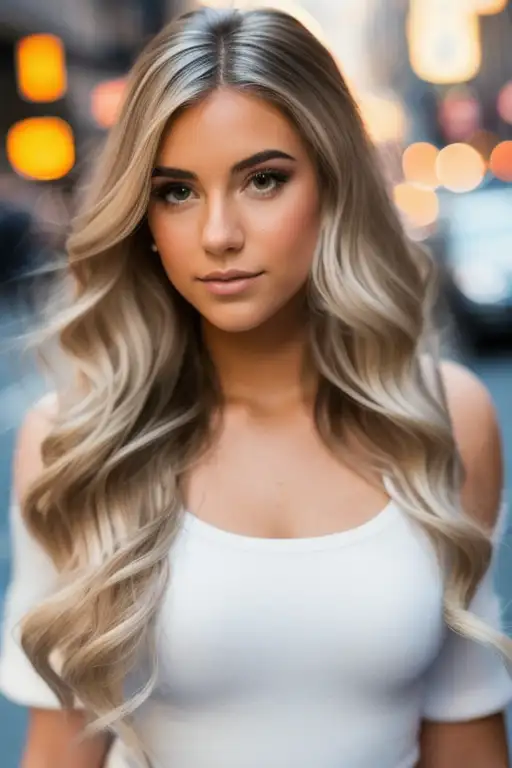
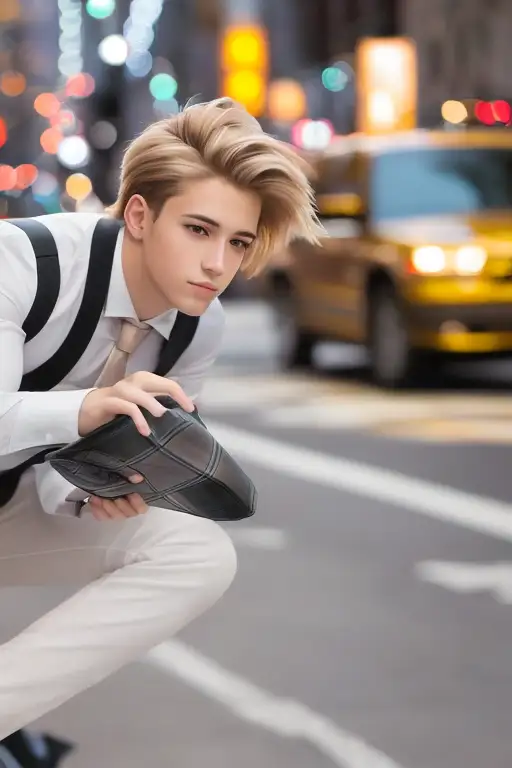
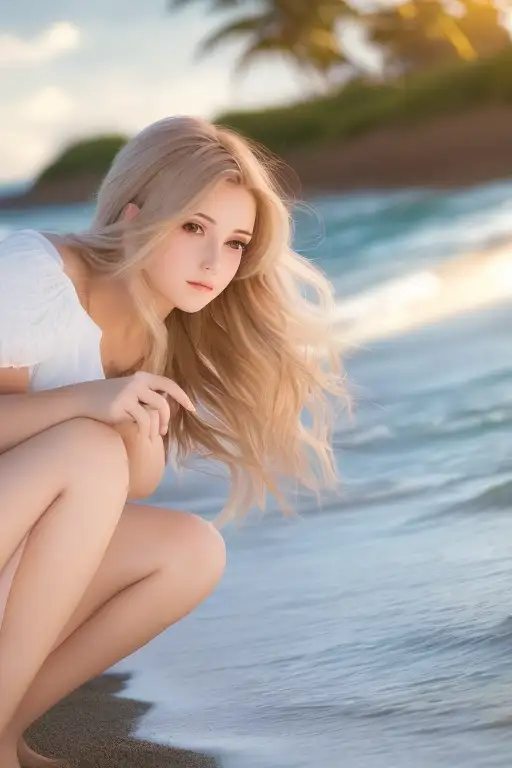
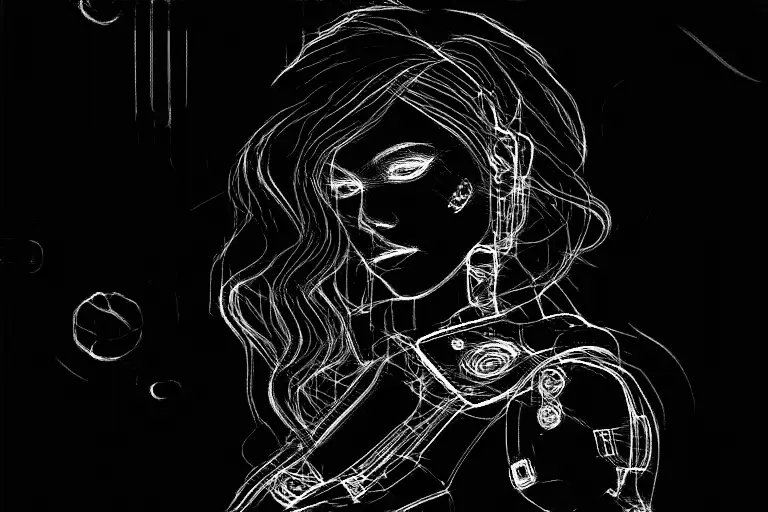
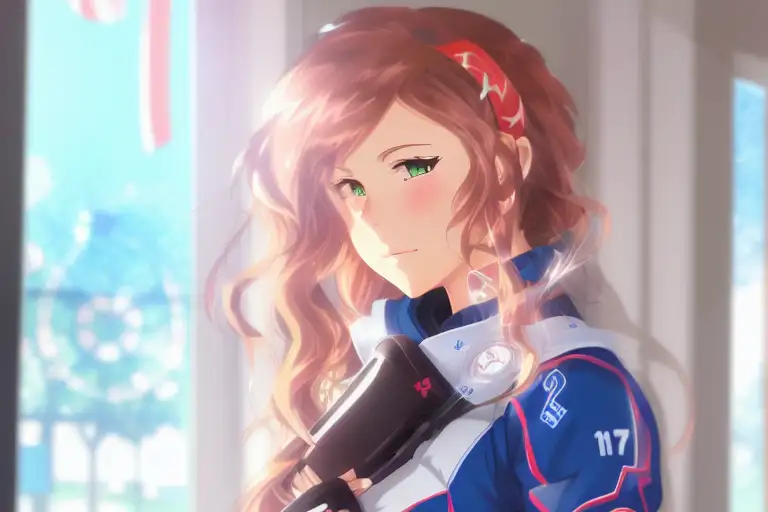
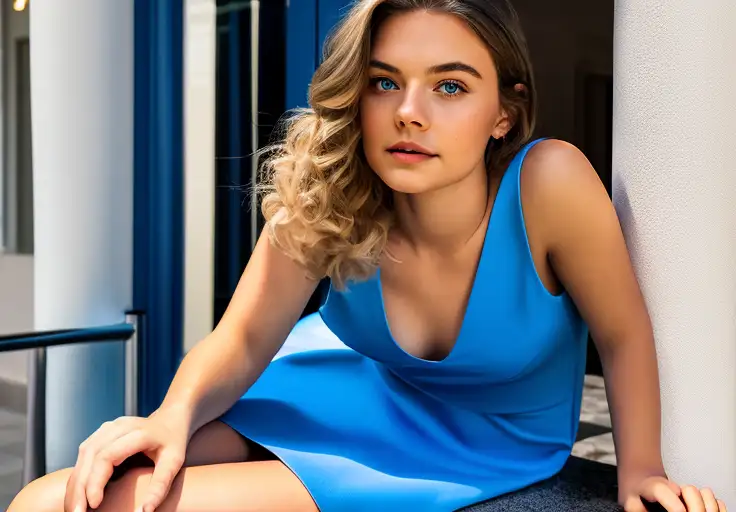
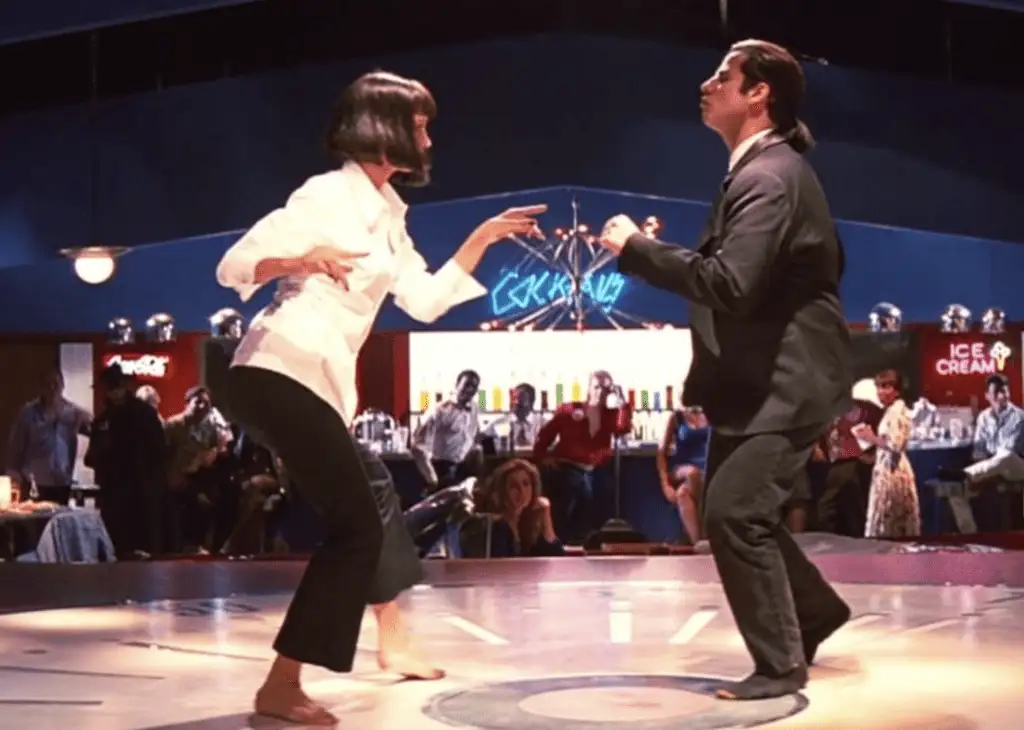
What’s the difference between using Canny edge detection and Openpose? The Canny edge detector extracts the edges of the subject and background alike. It tends to translate the scene more faithfully. You can see the dancing man became a woman, but the outline and hairstyle are preserved.
使用Canny edge边缘检测和Openpose 体态检测的区别是啥呢?
Canny edge边缘检测会提取物体的边缘和背景的边缘。它会更加真实滴翻译图片中的场景。在这种翻译下, 男人可能会被翻译为女人,但是边缘轮廓和发型都保留住了不会发生变化。
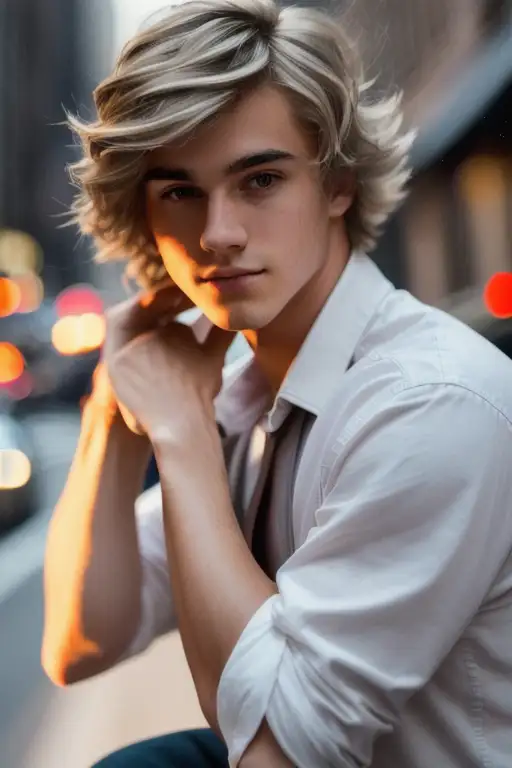
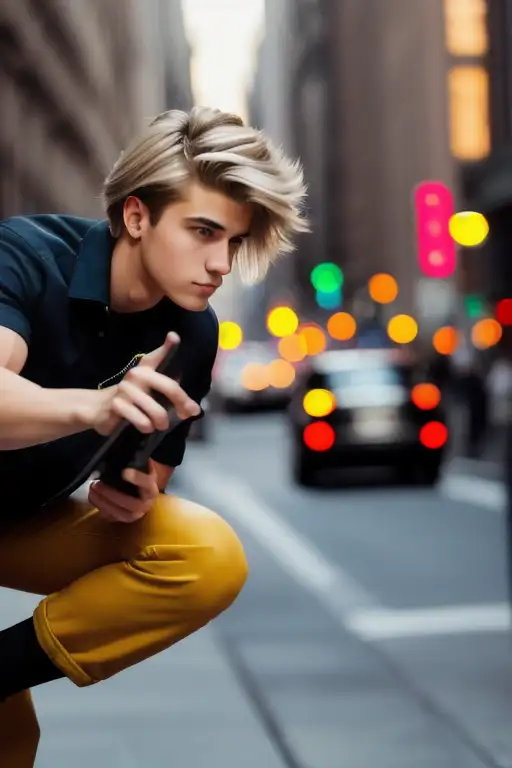
OpenPose only detects human key points such as positions of the head, arms, etc. The image generation is more liberal but follows the original pose.
OpenPose 则只检测人体关键要素,比如头、胳膊或者其他身体部位的位置。生成的图像会更加自由,但是仍然遵循并保留了原始的人体姿态。
The above example generated a woman jumping up with the left foot pointing sideways, different from the original image and the one in the Canny Edge example. The reason is that OpenPose’s keypoint detection does not specify the orientations of the feet.
上述示例生成了一个女子左脚侧向点地跳跃的画面,这与原始图像及Canny Edge示例中的的脚步动作是不一样的。原因在于OpenPose的关键点检测并未指定脚部的方向。
安装ControlNet, Installing Stable Diffusion ControlNet
(The instructions are updated for ControlNet v1.1)
当前安装文档适用于ControlNet v1.1;
Let’s walk through how to install ControlNet in AUTOMATIC1111, a popular and full-featured (and free!) Stable Diffusion GUI. We will use this extension, which is the de facto standard, for using ControlNet.
让我们看下如何在 AUTOMATIC1111中安装 ControlNet。
AUTOMATIC1111 是一个非常流行并且功能齐全的(并且免费的)Stable Diffusion 可视化工具。
我们将使用这个扩展来安装,这个扩展其实是一个事实上的ControlNet 使用标准。
If you already have ControlNet installed, you can skip to the next section to learn how to use it.
如果你已经安装完了 ControlNet ,你可以跳到下一段 来学习如何使用它。
在 Google Colab 中安装ControlNet, Install ControlNet in Google Colab
It’s easy to use ControlNet with the 1-click Stable Diffusion Colab notebook in our Quick Start Guide.
使用这个快速开始指南,可以点一下就把Stable Diffusion安装到Colab notebook 中。
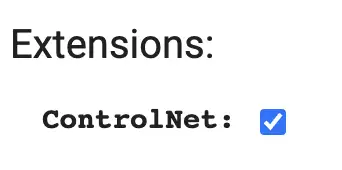
In the Extensions section of the Colab notebook, check ControlNet.
在Colab notebook的 Extensions(扩展) 部分能找到ControlNet。
按 Play 按钮,就可以启动AUTOMATIC1111。
在Windows或者Mac上安装 ControlNet,Install ControlNet on Windows PC or Mac
You can use ControlNet with AUTOMATIC1111 on Windows PC or Mac. Follow the instructions in these articles to install AUTOMATIC1111 if you have not already done so.
通过这两个链接里的内容,你可以在 Windows PC 或者 Mac 上安装AUTOMATIC1111,然后来调用和使用ControlNet。
If you already have AUTOMATIC1111 installed, make sure your copy is up-to-date.
如果你已经安装完了AUTOMATIC1111,需要确保你安装的是最新版。
在(Windows/Mac)上安装ControlNet 扩展, Install ControlNet extension (Windows/Mac)
- Navigate to the Extensions page.
打开Extensions(扩展) 页面。 - Select the Install from URL tab.
点Install from URL(从网址安装) tab。 - Put the following URL in the URL for extension’s repository field.
把下面这个url 输入到 URL for extension’s repository(从url 输入扩展库) 的框中。
https://github.com/Mikubill/sd-webui-controlnet-
Click the Install button.
点击 Install(安装) 按钮; -
Wait for the confirmation message saying the extension is installed.
一直等到显式扩展安装成功(extension is installed)的确认提示信息; -
Restart AUTOMATIC1111.
重启 AUTOMATIC1111; -
Visit the ControlNet models page.
访问ControlNet models 页面; -
Download all model files (filename ending with
.pth).
下载所有的模型文件(扩展名为.pth的文件)
(If you don’t want to download all of them, you can download the openpose and canny models for now, which are most commonly used.)
如果你不想下载所有的模型,可以只下载openpose 和 canny模型,这两个是最常用的模型。
- Put the model file(s) in the ControlNet extension’s models directory.
把模型文件们放到ControlNet extension 的模型目录(models directory) 中。
stable-diffusion-webuiextensionssd-webui-controlnetmodelsRestart AUTOMATIC1111 webui.
重启AUTOMATIC1111 界面。
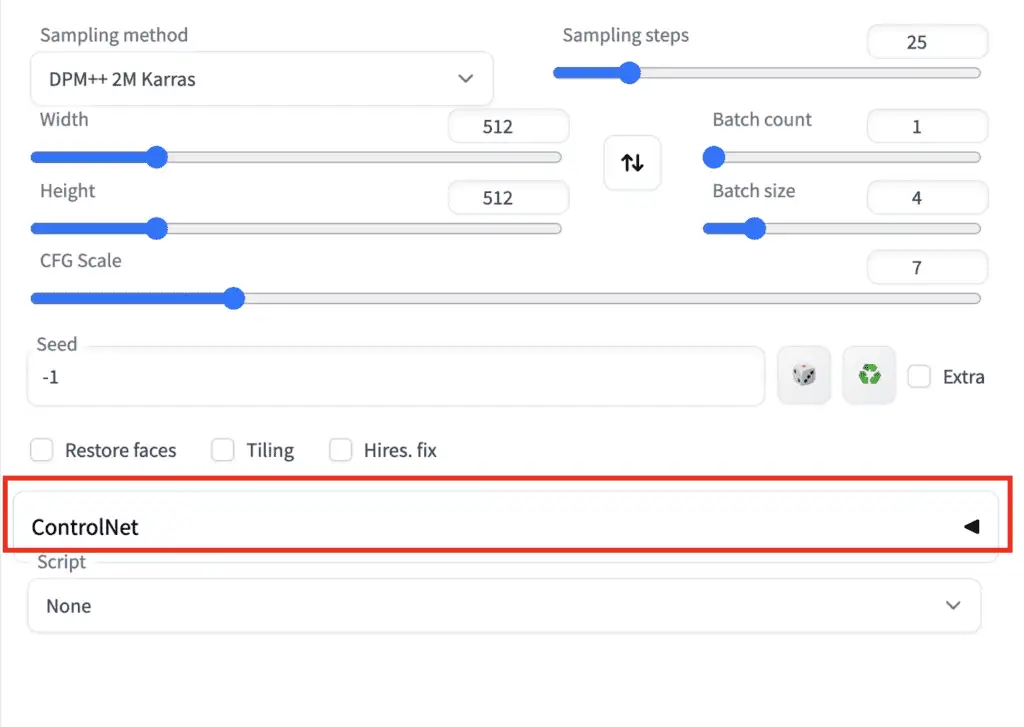
If the extension is successfully installed, you will see a new collapsible section in the txt2img tab called ControlNet. It should be right above the Script drop-down menu.
如果扩展安装成功,你会在txt2img tab 下看到一个名为ControlNet的可折叠选项区——位于脚本下拉框(Script drop-down)的正上方。

This indicates the extension installation was successful.
这表明扩展安装成功。
安装T2I 适配器们, Installing T2I adapters
T2I adapters are neural network models for providing extra controls to image generations of diffusion models. They are conceptually similar to ControlNet but with a different design.
T2I adapters 是一类神经网络模型,旨在为扩散模型(diffusion models)的图像生成提供额外的控制手段。它们在概念上类似于ControlNet,但在设计上有所不同。
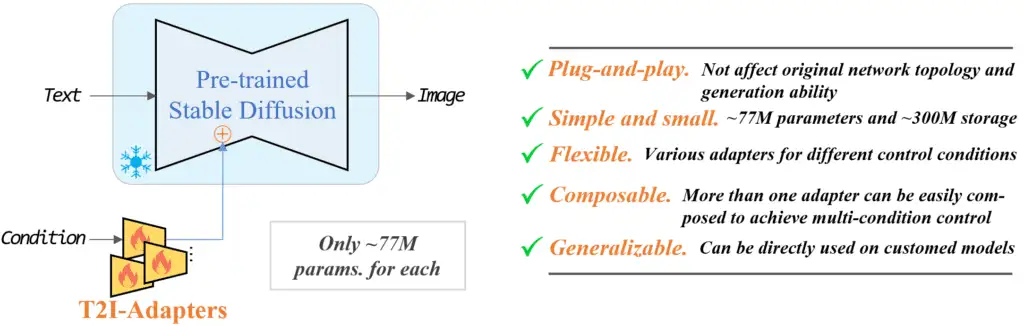
T2I adapters model (source).
T2I 适配器模型 (source).
The A1111 ControlNet extension can use T2I adapters. You will need to download the models here. Grab the ones with file names that read like t2iadapter_XXXXX.pth
ControlNet 的A1111 扩展可以使用 T2I 适配器。 你需要从这里 下载这些模型——名字类似t2iadapter_XXXXX.pth 格式的文件们。
The functionalities of many of the T2I adapters overlap with ControlNet models. I will only cover the following two.
许多T2I适配器和ControlNet 模型的能力有重叠,我这里只介绍两个。
Put them in ControlNet’s model folder.
把他们放到ControlNet 的模型文件夹中。
stable-diffusion-webuiextensionssd-webui-controlnetmodels更新ControlNet 扩展,Updating the ControlNet extension
ControlNet is an extension that has undergone rapid development. It is not uncommon to find out your copy of ControlNet is outdated.
ControlNet 是一个经历了快速发展的扩展。发现自己的 ControlNet 版本过时是很常见的情况。
Updating is needed only if you run AUTOMATIC1111 locally on Windows or Mac. The Colab notebook of the site always runs the latest of the ControlNet extension.
只有在你本机的Windows 或者Mac电脑上,你需要经常更新,而在Google 的Colab notebook 则不需要你手动更新,会自动更新城最新的版本。
To determine if your ControlNet version is up-to-date, compare your version number in the ControlNet section on the txt2img page with the latest version number.
你可以通过 这里的最新版本号和你本地的“txt2img”页面中的 ControlNet选项区中的版本进行对比,来确定你本地的版本是不是最新的。
方式1:从web界面更新,Option 1: Update from Web-UI
The easiest way to update the ControlNet extension is using the AUTOMATIC1111 GUI.
更新ControlNet extension最简单的方式,就是使用AUTOMATIC1111 图形化管理界面。
-
Go to the Extensions page.
-
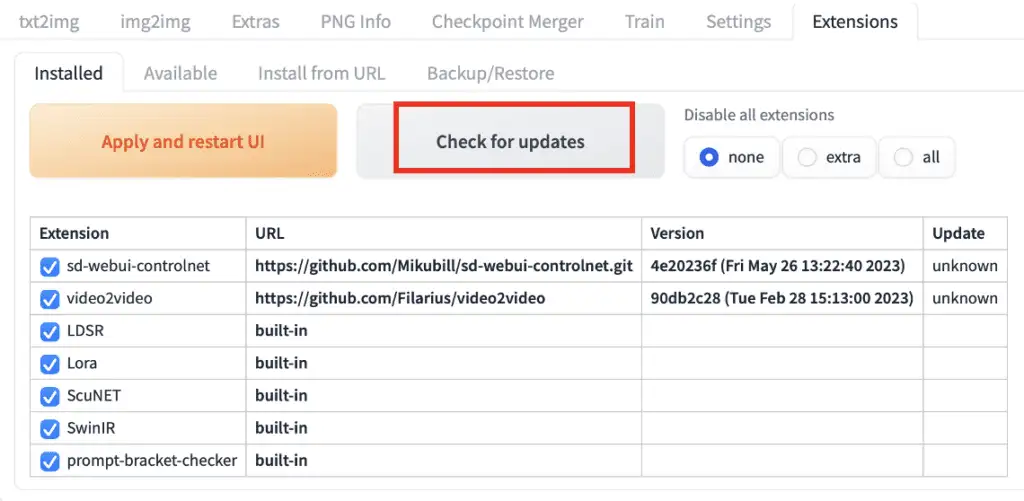
In the Installed tab, click Check for updates.
-
Wait for the confirmation message.
-
Completely close and restart AUTOMATIC1111 Web-UI.
-
打开 Extensions 页面;
-
在 Installed tab下, 点击 Check for updates ;
-
等待确认信息;
-
等待更新完成,之后重新AUTOMATIC1111 的web 图形化管理界面;
方式2:通过命令行更新,Option 2: Command line
If you are comfortable with the command line, you can use this option to update ControlNet, which gives you the comfort of mind that the Web-UI is not doing something else.
如果你比较习惯实用命令行,你可以实用命令行更新——这样会让你感觉更爽一些。
Step 1: Open the Terminal App (Mac) or the PowerShell App (Windows).
第1步: 打开 Terminal App(终端) (Mac上) 或者PowerShell 程序 (在Windows上).
Step 2: Navigate to ControlNet extension’s folder. (Adjust accordingly if you installed somewhere else)
第2步: 转到 ControlNet extension 文件夹(根据你的安装位置自行调整)
cd stable-diffusion-webui/extensions/sd-webui-controlnetStep 3: Update the extension by running the following command.
第3步:使用如下命令执行更新扩展:
git pull使用ControlNet 的一个简单示例,Using ControlNet – a simple example
Now you have ControlNet installed, let’s go through a simple example of using it! You will see a detailed explanation of each setting later.
在安装完ControlNet 之后,让我们来通过一个简单的示例试用一下。一步步的给你解释下具体是怎么玩儿的。
You should have the ControlNet extension installed to follow this section. You can verify by seeing the ControlNet section below.
你需要安装完成ControlNet 扩展才能进行本节操作。你可以通过查看下面的ControlNet 部分来进行验证。
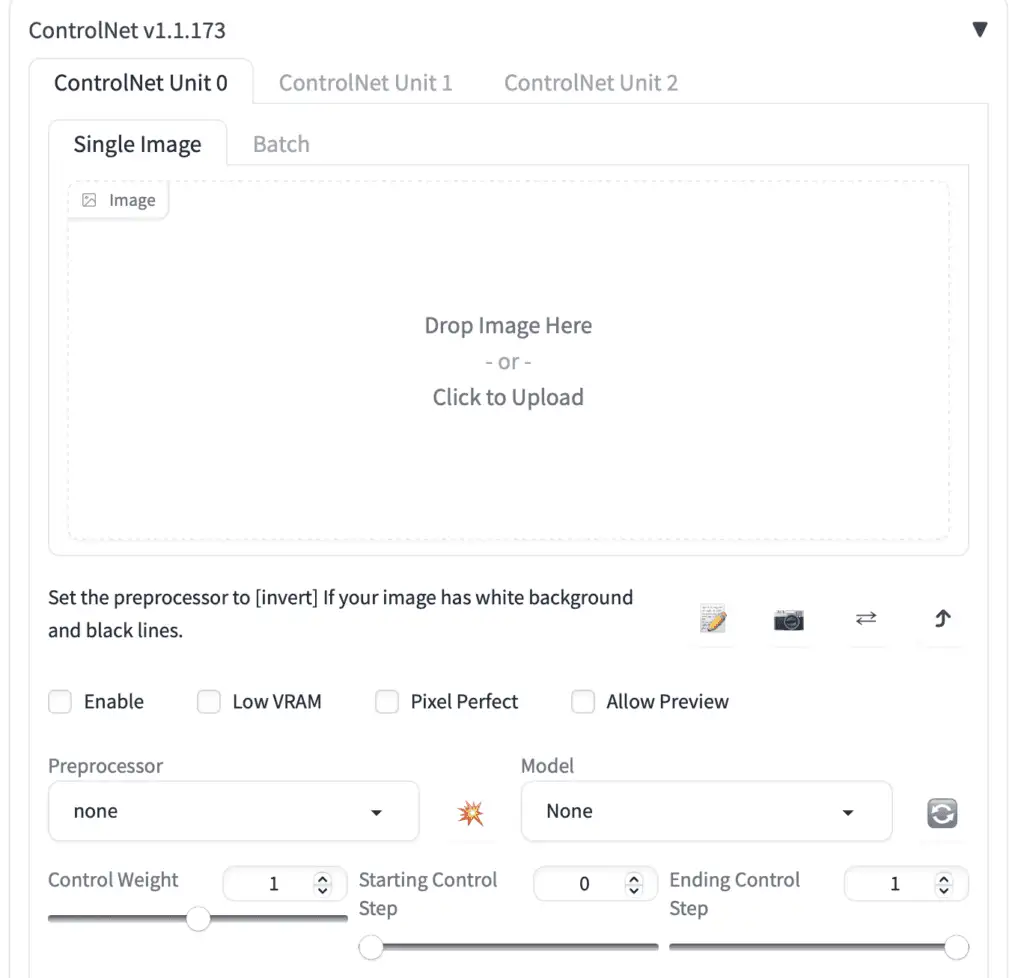
Press the caret on the right to expand the ControlNet panel. It shows the full section of control knobs and an image upload canvas.
按右侧的三角形箭头符号展开ControlNet面板。它会显示所有的可控制选项和一个图像上传的画布。
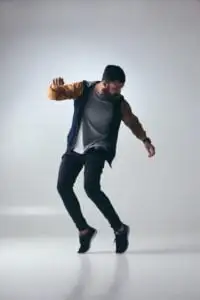
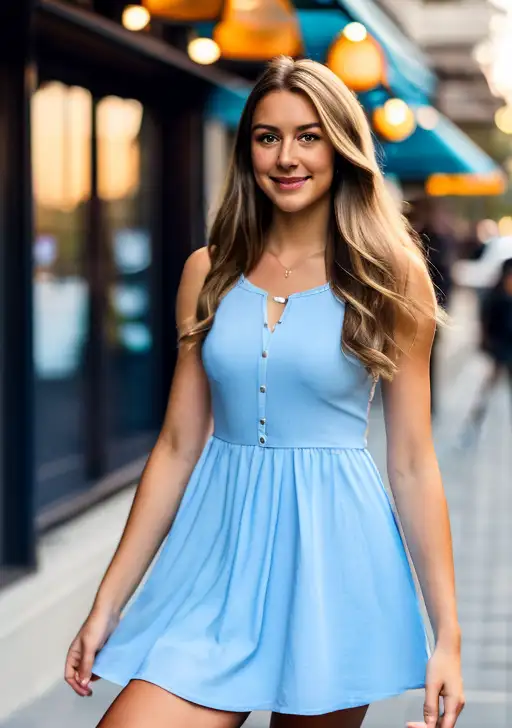
I will use the following image to show you how to use ControlNet. You can download the image using the download button to follow the tutorial.
我将使用以下图像来向你展示如何使用ControlNet。你可以使用下载按钮下载图像以跟着我一起操作,搞起来。
文生图设置,Text-to-image settings
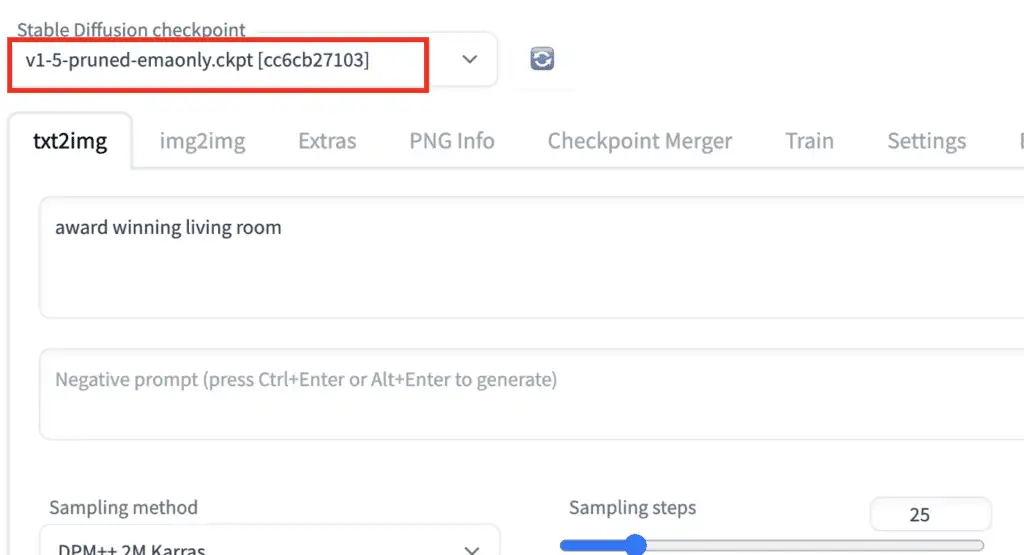
ControlNet will need to be used with a Stable Diffusion model. In the Stable Diffusion checkpoint dropdown menu, select the model you want to use with ControlNet. Select v1-5-pruned-emaonly.ckpt to use the v1.5 base model.
ControlNet 需要与 Stable Diffusion 模型一起使用。在 Stable Diffusion checkpoint 下拉菜单中,选择你要与 ControlNet 一起使用的模型。选择 v1-5-pruned-emaonly.ckpt 以使用 v1.5 基础模型。
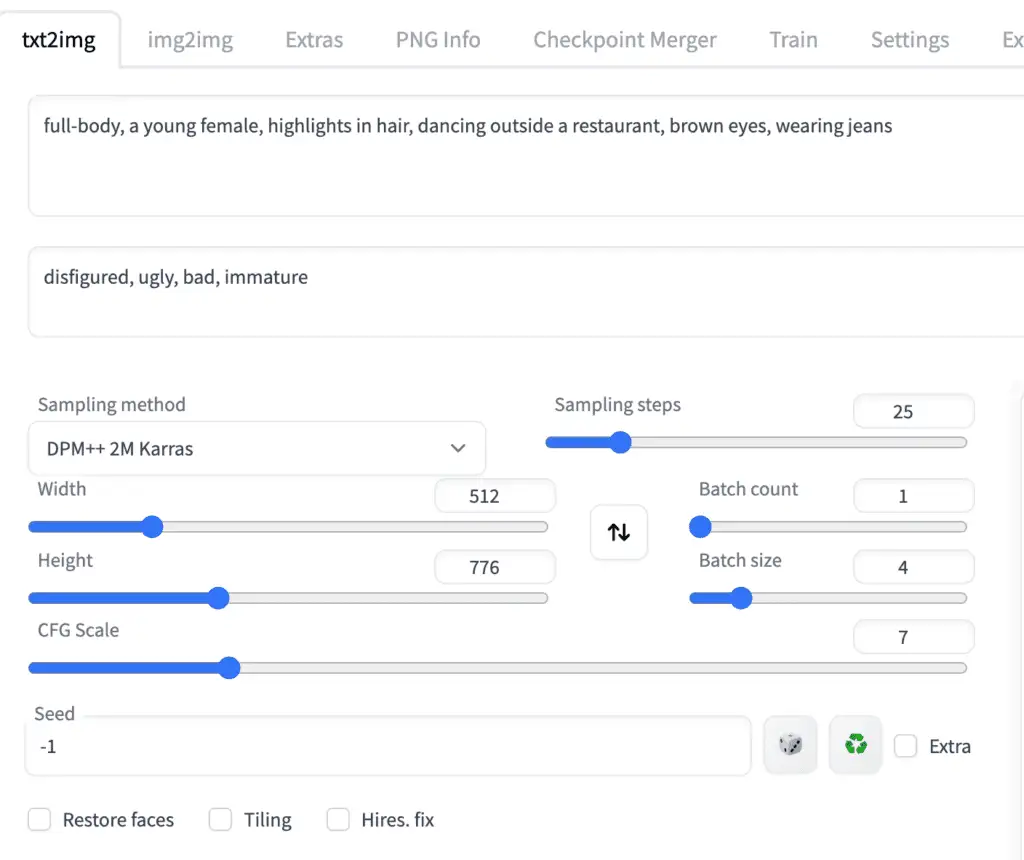
In the txt2image tab, write a prompt and, optionally, a negative prompt to be used by ControlNet. I will use the prompts below.
在 txt2image 标签中,编写一个 prompt(提示词) 和(可选)一个 negative prompt(反向提示词) 供 ControlNet 使用。我将使用下面的提示词(prompt)。
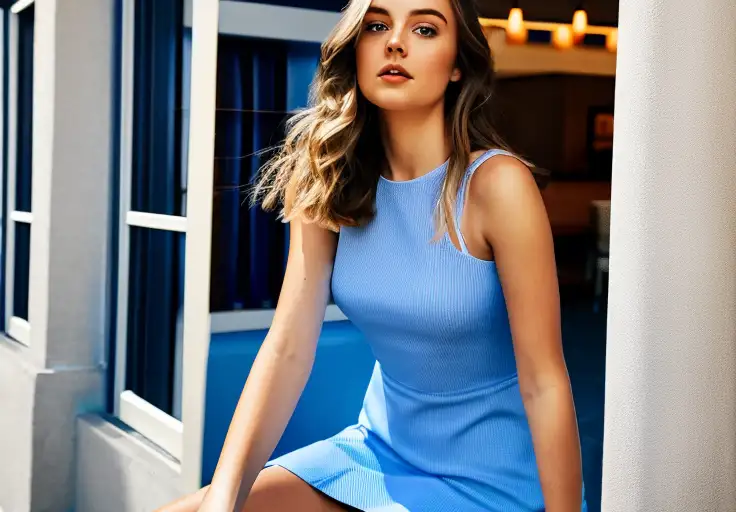
提示词 Prompt:
full-body, a young female, highlights in hair, dancing outside a restaurant, brown eyes, wearing jeans
全身镜头,一位年轻的女性,头发有高光效果,在餐厅外跳舞,棕色眼睛,穿着牛仔裤
反向提示词 Negative prompt:
disfigured, ugly, bad, immature
畸形、丑陋、糟糕、不成熟
Set image size for image generation. I will use width 512 and height 776 for my demo image. Note that the image size is set in the txt2img section, NOT in the ControlNet section.
设置图像生成的 尺寸 image size。在我的演示图像中,我将使用宽度512和高度776。请注意,图像大小是在 txt2img 部分设置的,而不是在 ControlNet 部分。
The GUI should look below.
此时图形化界面里,应该是这样的。
ControlNet 设置,ControlNet settings
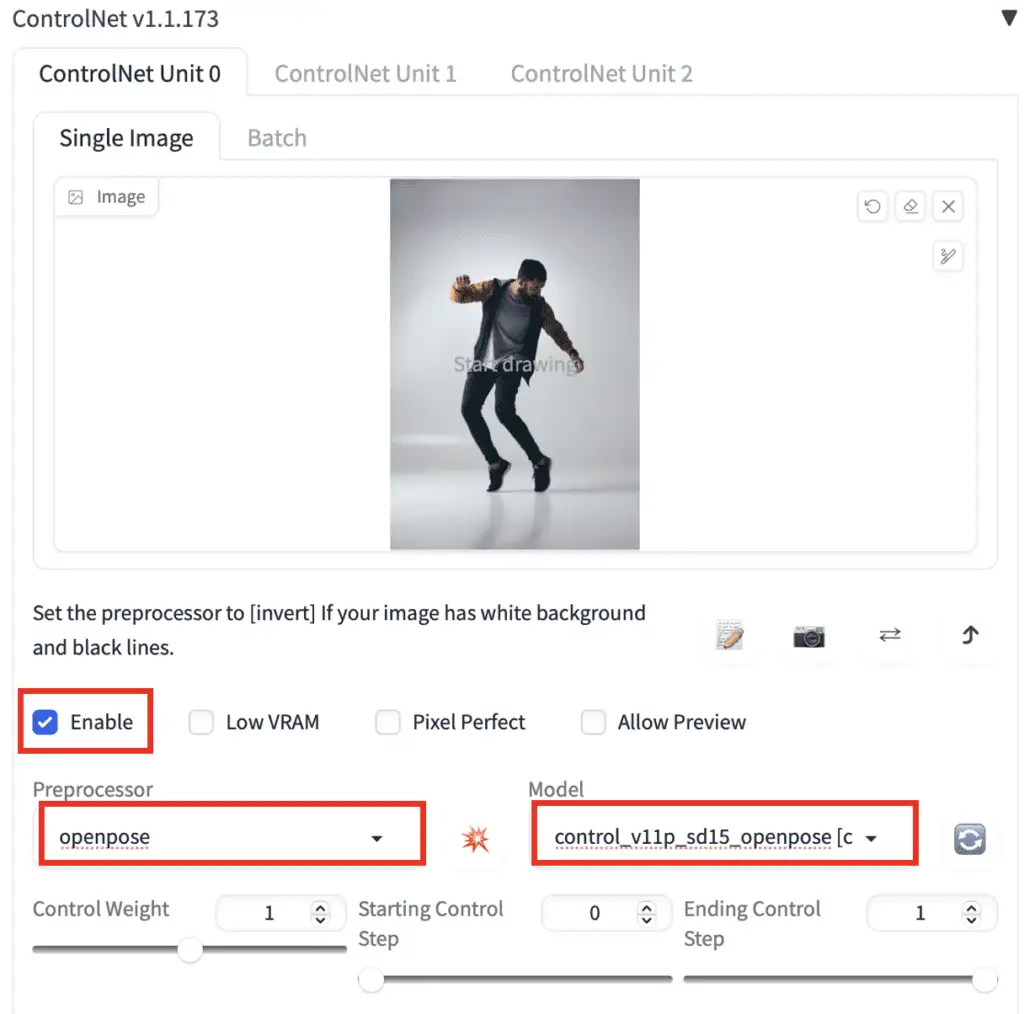
Now let’s move on to the ControlNet panel.
an image** to the image canvas.
First, upload 现在让我们进入ControlNet面板。
Check the Enable checkbox.
You will need to select a preprocessor and a model. Preprocessor is just a different name for the annotator mentioned earlier, such as the OpenPose keypoint detector. Let’s select openpose as Preprocessor**.
首先,上传一张图像(upload an image)到图像画布。
勾选 选中复选框(Enable checkbox)。
你需要选择一个 preprocessor(预处理) 和一个 model(模型)。Preprocessor(预处理器) 就是之前提到的 annotator(标注器) 的另一个名字,例如 OpenPose 关键点检测器。让我们选择 openpose 作为 Preprocessor(预处理器)。
The selected ControlNet model has to be consistent with the preprocessor. For OpenPose, you should select control_openpose-fp16 as the model.
所选的ControlNet 模型必须与preprocessor(预处理器)一致。对于OpenPose,你应该选择 control_openpose-fp16 作为模型。
The ControlNet panel should look like this.
此时ControlNet 图形化界面里,应该是这样的。
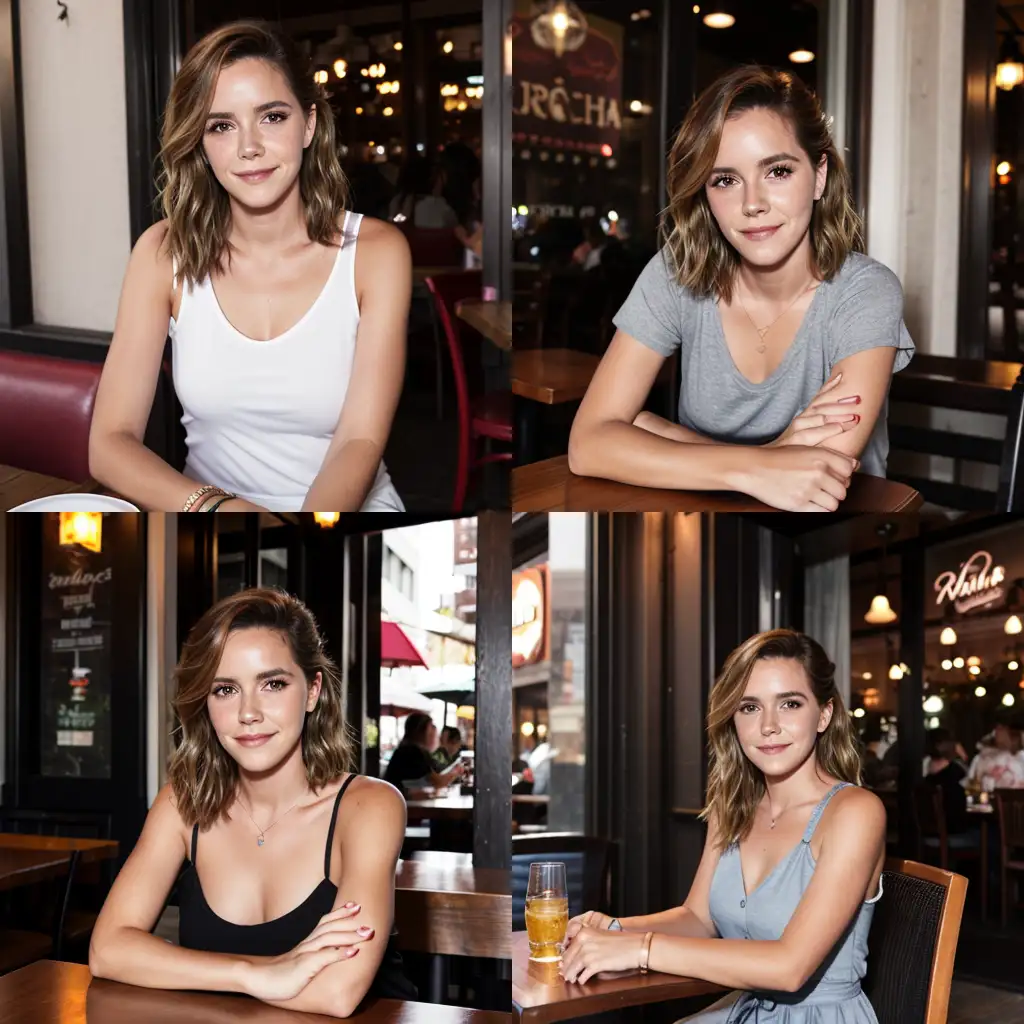
That’s all. Now press Generate to start generating images using ControlNet.
现在按下 Generate 开始使用ControlNet生成图像。
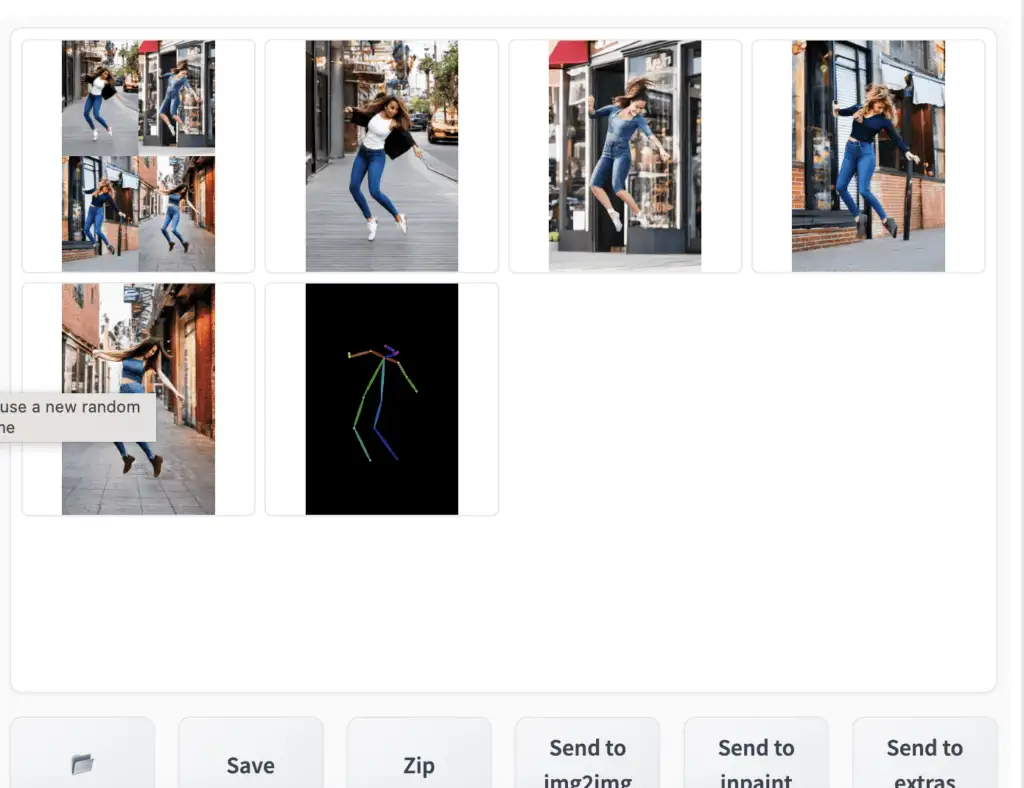
You should see the images generated to follow the pose of the input image. The last image is straightly from the preprocessing step. In this case, it is the keypoints detected.
你应该会看到生成的图像跟随输入图像的姿态。最后一张图像直接来自预处理步骤。在这种情况下,它是检测到的关键点。
When you are done, uncheck the Enable checkbox to disable the ControlNet extension.
完成后,取消勾选 Enable 复选框以禁用 ControlNet 扩展。
This is the basics of using ControlNet!
讲完了,这就是使用 ControlNet 的基础知识!
你已经基本会使用ControlNet 了,可以给自己鼓个掌了。
The rest is to understand
- What preprocessors are available (There are many!)
- ControlNet settings
接下来需要了解的是:
- 有哪些可用的预处理器(有很多!)
- ControlNet 的设置咋设置;
预处理器和模型,Preprocessors and models
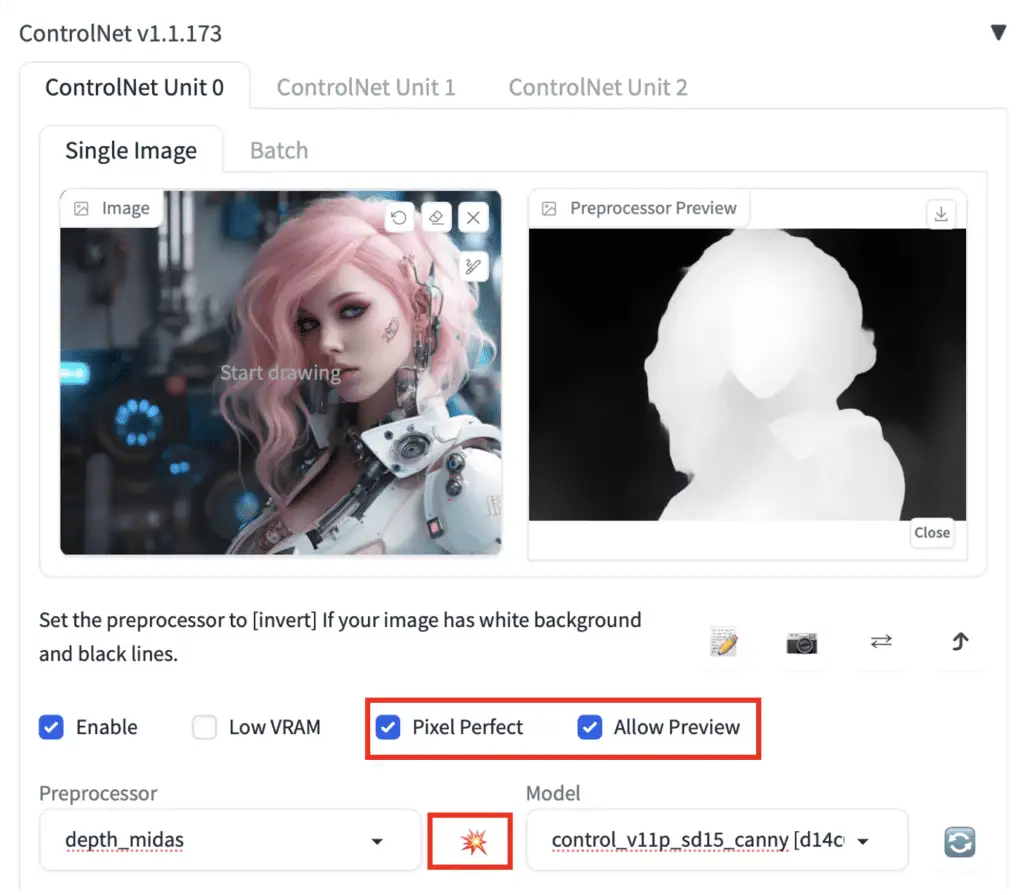
The first step of using ControlNet is to choose a preprocessor. It is helpful to turn on the preview so that you know what the preprocessor is doing. Once the preprocessing is done, the original image is discarded, and only the preprocessed image will be used for ControlNet.
使用 ControlNet 的第一步是选择一个preprocessor(预处理器)。开启预览(turn on the preview) 是有帮助的,这样你就可以知道预处理器在做什么。一旦预处理完成,原始图像会被丢弃,只有预处理后的图像会用于 ControlNet。
To turn on the preview:
- Select Allow Preview.
- Optionally select Pixel Perfect. ControlNet will use the image height and width you specified in text-to-image to generate the preprocessed image.
- Click on the explosion icon next to the Preprocessor dropdown menu.
开启预览:
- 选择 Allow Preview。
- 可选地选择 Pixel Perfect。ControlNet 将使用你在 text-to-image 中指定的图像高度和宽度生成预处理后的图像。
- 点击 Preprocessor 下拉菜单旁边的 爆炸图标(explosion icon),就能看到预览了。
Some Control models may affect the image too much. Reduce the Control Weight if you see color issues or other artifacts.
某些控制模型可能会对图像产生过大影响。如果你看到颜色问题或其他瑕疵,可以减少 Control Weight(也就是Control map的影响权重)。
选择合适的模型,Choosing the right model
Once you choose a preprocessor, you must pick the correct model.
一旦选择了预处理器(preprocessor),你必须选择对应的模型 model。
It is easy to tell which is the correct model to use in v1.1. All you need to do is to select the model with the same starting keyword as the preprocessor.
在v1.1中,很容易判断哪个是正确的模型。你只需要选择与preprocessor(预处理器)具有相同起始关键词的模型即可。
For example:
| Preprocessor | Model |
|---|---|
| depth_xxxx | control_xxxx_depth |
| lineart_xxxx | control_xxxx_lineart |
| openpose_xxxx | control_xxxx_openpose |
例如:
| Preprocessor(预处理器) | Model(模型) |
|---|---|
| depth_xxxx | control_xxxx_depth |
| lineart_xxxx | control_xxxx_lineart |
| openpose_xxxx | control_xxxx_openpose |
OpenPose 模型,OpenPose
There are multiple OpenPose preprocessors.
OpenPose detects human key points such as positions of the head, shoulders, hands, etc. It is useful for copying human poses without copying other details like outfits, hairstyles, and backgrounds.
目前有多个OpenPose预处理器。
OpenPose 检测人体关键点,例如头部、肩膀、手的位置等。它对于复制人体姿势非常有用,而无需复制服装、发型和背景等其他细节。
All openpose preprocessors need to be used with the openpose model in ControlNet’s Model dropdown menu.
所有的OpenPose preprocessors(预处理器)都需要与ControlNet的Model 下拉菜单中的 openpose 模型一起使用。
The OpenPose preprocessors are:
- OpenPose: eyes, nose, eyes, neck, shoulder, elbow, wrist, knees, and ankles.
- OpenPose_face: OpenPose + facial details
- OpenPose_hand: OpenPose + hands and fingers
- OpenPose_faceonly: facial details only
- OpenPose_full: All of the above
- dw_openPose_full: An enhanced version of OpenPose_full
Pro tip: Use Dw OpenPose to extract all details.
OpenPose 预处理器包括下面这几个,用途还是有差别的:
- OpenPose:眼睛、鼻子、眼睛、脖子、肩膀、肘部、手腕、膝盖和脚踝。
- OpenPose_face:OpenPose + 面部细节
- OpenPose_hand:OpenPose + 手和手指
- OpenPose_faceonly:仅面部细节
- OpenPose_full:以上所有
- dw_openPose_full:OpenPose_full的增强版
小贴士:使用 dw_openPose 提取所有细节。
OpenPose
OpenPose is the basic OpenPose preprocessor that detects the positions of the eyes, nose, eyes, neck, shoulder, elbow, wrist, knees, and ankles.
OpenPose 是基础的 OpenPose preprocessor(预处理器),它检测眼睛、鼻子、眼睛、脖子、肩膀、肘部、手腕、膝盖和脚踝的位置。
OpenPose_face
OpenPose_face does everything the OpenPose processor does but detects additional facial details.
It is useful for copying the facial expression.
OpenPose_face 执行所有 OpenPose preprocessor(预处理器) 的功能,但还检测额外的面部细节。
它对于复制面部表情非常有用。

示例图片 Sample images:
OpenPose_faceonly
OpenPose face only detects only the face but not other keypoints. This is useful for copying the face only but not other keypoints.
OpenPose_faceonly 只检测面部,不检测其他关键点。这对于仅复制面部而不复制其他关键点非常有用。

See samples from text-to-image below. The body is not constrained.
请参见下面的 text-to-image 示例。身体部分则不做检测和限制。
OpenPose_hand
OpenPose_hand detects the keypoint as OpenPose and the hands and fingers.
OpenPose_hand 使用 OpenPose 模型来检测关键点,主要检测手和手指。

示例图片 Sample images:

OpenPose_full
OpenPose full detects everything openPose face and openPose hand do.
OpenPose_full 检测所有 OpenPose_face 和 OpenPose_hand 检测的内容。
示例图片 Sample images:
dw_openpose_full
DWPose is a new pose detection algorithm based on the research article Effective Whole-body Pose Estimation with Two-stages Distillation. It accomplishes the same task as OpenPose Full but does a better job. You should use dw_openpose_full instead of openpose_full.
DWPose 是一种基于研究文章 Effective Whole-body Pose Estimation with Two-stages Distillation 的新姿态检测算法。它完成与 OpenPose_full 相同的任务,但效果更好。你应该使用 dw_openpose_full 而不是 openpose_full。
Update ControlNet if you don’t see dw_openpose_full in the preprocessor menu.
如果在 preprocessor(预处理器) 菜单中没有看到 dw_openpose_full,请更新 ControlNet。

Reference image for OpenPose and DW OpenPose.
OpenPose 和 DW OpenPose 的参考图像。
OpenPose Full
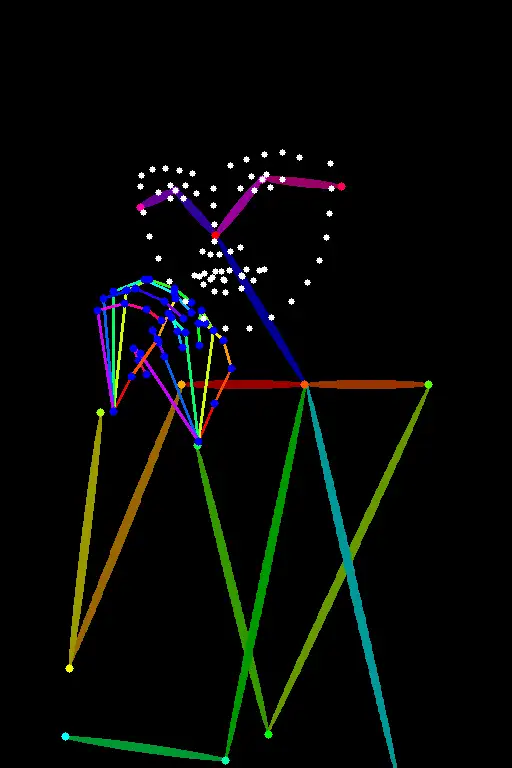
DW OpenPose Full
DW OpenPose does a better job of detecting hands and fingers.
DW OpenPose 在检测手和手指方面表现更好。
Tile resample 瓦片重采样模型
The Tile resample model is used for adding details to an image. It is often used with an upscaler to enlarge an image at the same time.
Tile resample model(模型) 用于为图像添加细节。它通常与放大器一起使用,以同时放大图像。
可以点这里查看 ControlNet Tile Upscaling 方法。
Reference 引用模型
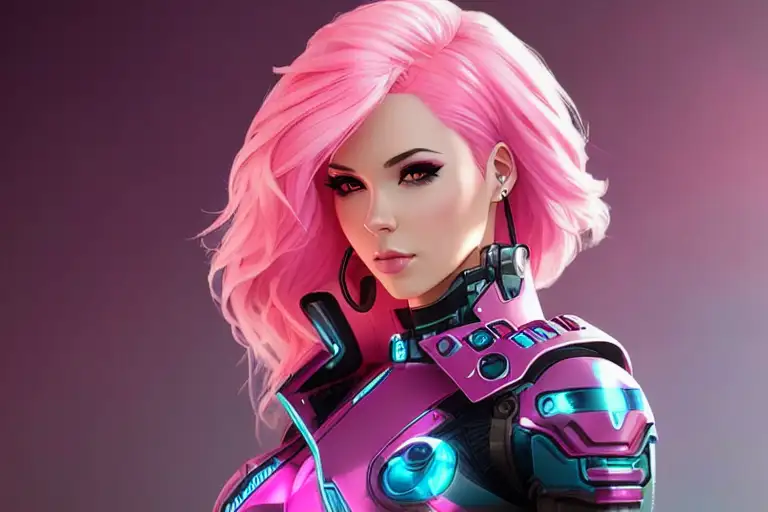
Reference is a set of preprocessors that lets you generate images similar to the reference image. The Stable Diffusion model and the prompt will still influence the images.
Reference 是一组 preprocessor(预处理器),它们可以让你生成与参考图像相似的图像。Stable Diffusion 模型和提示词(prompt)仍然会影响生成的图像。
Reference preprocessors do NOT use a control model. You only need to select the preprocessor but not the model. (In fact, the model dropdown menu will be hidden after selecting a reference preprocessor.)
Reference preprocessor(预处理器) 不使用 control model(控制模型)。你只需要选择 preprocessor(预处理器),而不是模型。(实际上,选择参考 preprocessor(预处理器) 后,模型下拉菜单会被隐藏。)
There are 3 reference preprocessors.
- Reference adain: Style transfer via Adaptive Instance Normalization. (paper)
- Reference only: Link the reference image directly to the attention layers.
- Reference adain+attn: Combination of above.
共有3个 reference preprocessor(预处理器)
- Reference adain:通过 Adaptive Instance Normalization 进行风格迁移。(论文)
- Reference only:将参考图像直接链接到注意力层。
- Reference adain+attn:以上两者的结合。
Select one of these preprocessors to use.
Below is an example.
选择其中一个 preprocessor(预处理器) 使用。
以下是一个示例。

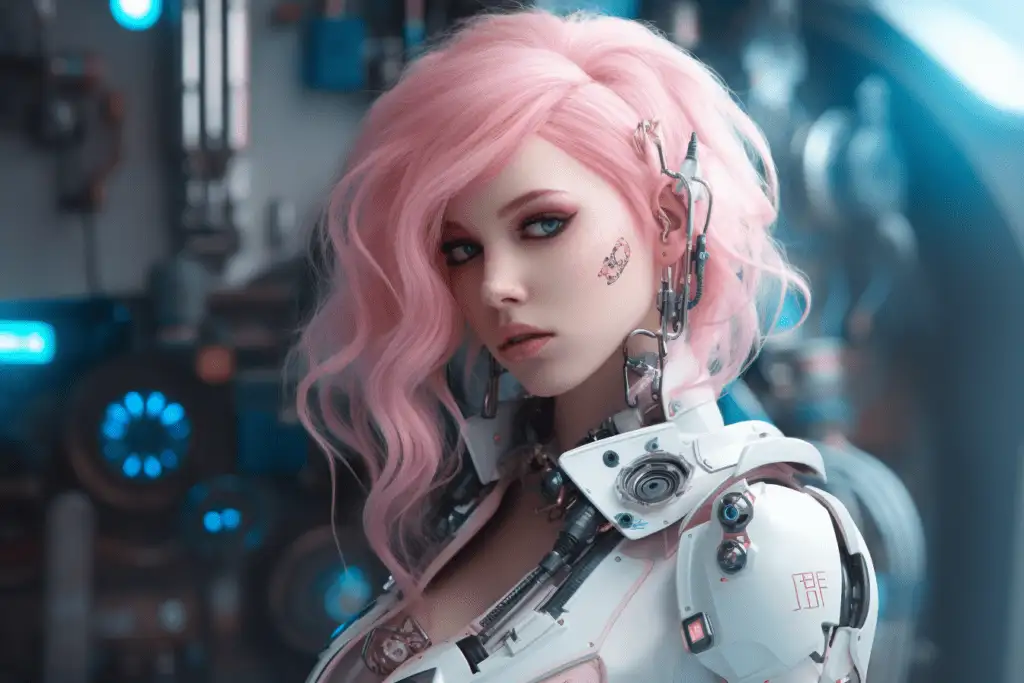
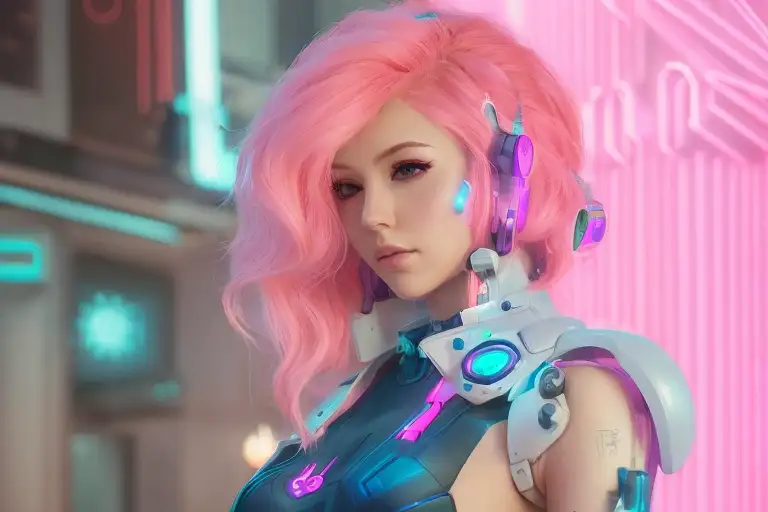
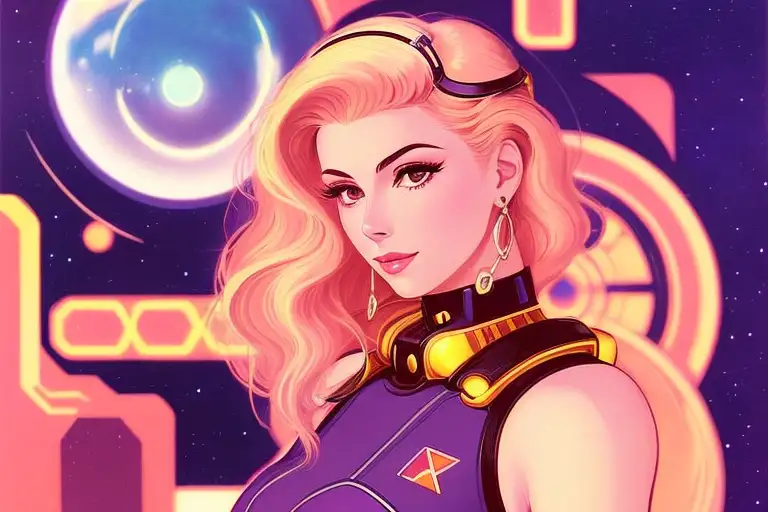
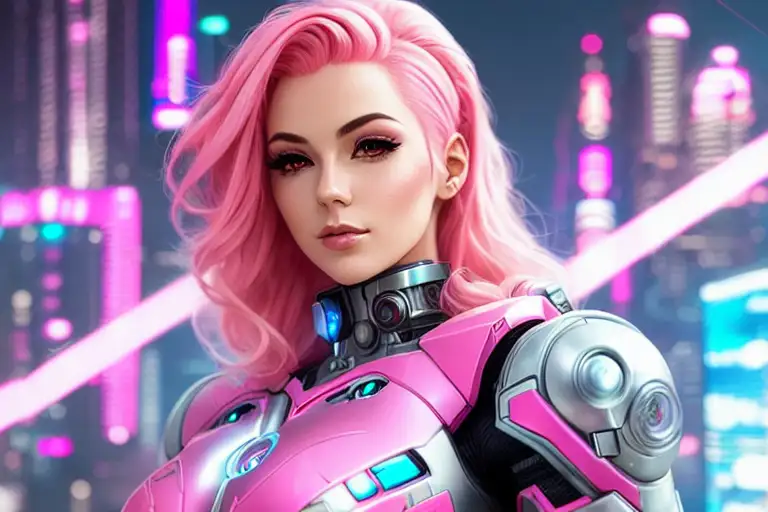
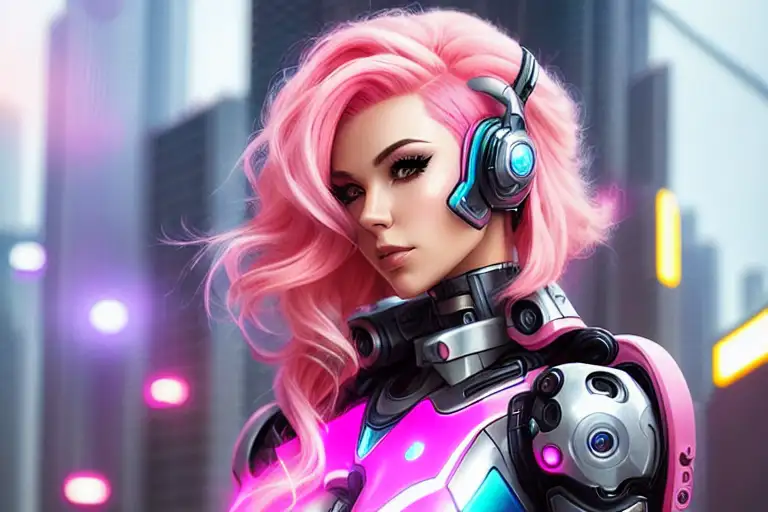
Reference image (Input).
Using CLIP interrogator to guess the prompt.
参考图像(输入)。
使用 CLIP interrogator 来推测 prompt。
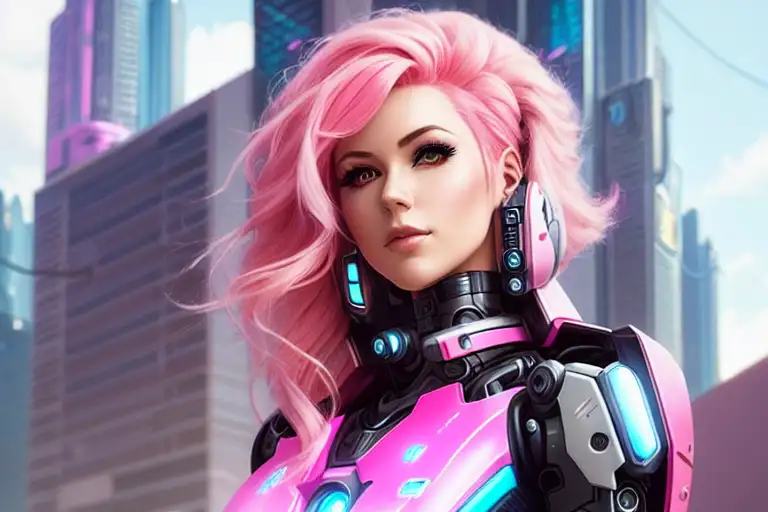
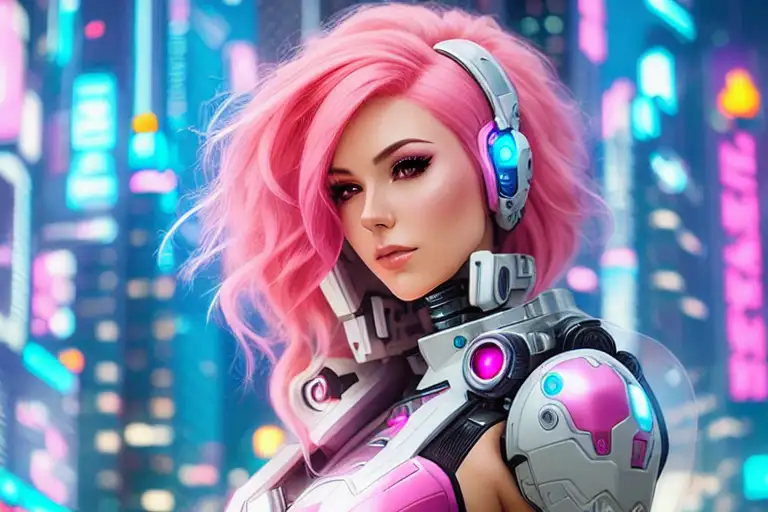
a woman with pink hair and a robot suit on, with a sci – fi, Artgerm, cyberpunk style, cyberpunk art, retrofuturism
一个有粉色头发、穿着机器人装的女人,具有科幻、Artgerm、赛博朋克风格、赛博朋克艺术、复古未来主义。
disfigured, ugly, bad, immature
畸形、丑陋、糟糕、不成熟
Model: Protogen v2.2
模型:Protogen v2.2
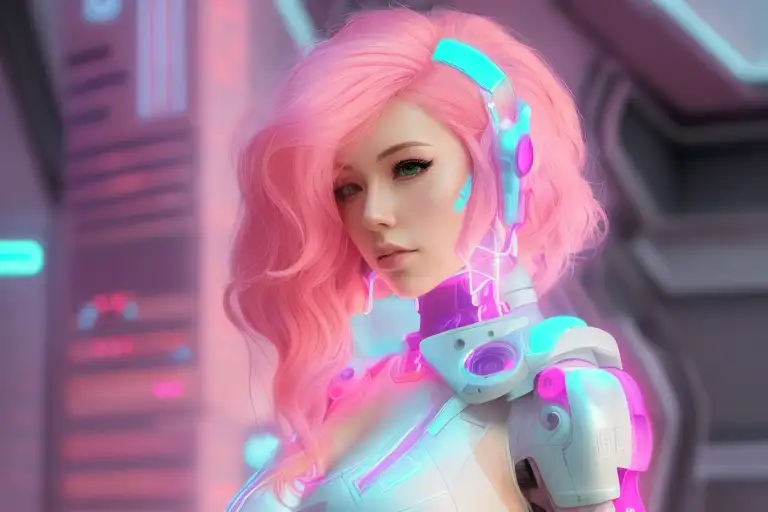
Reference adain
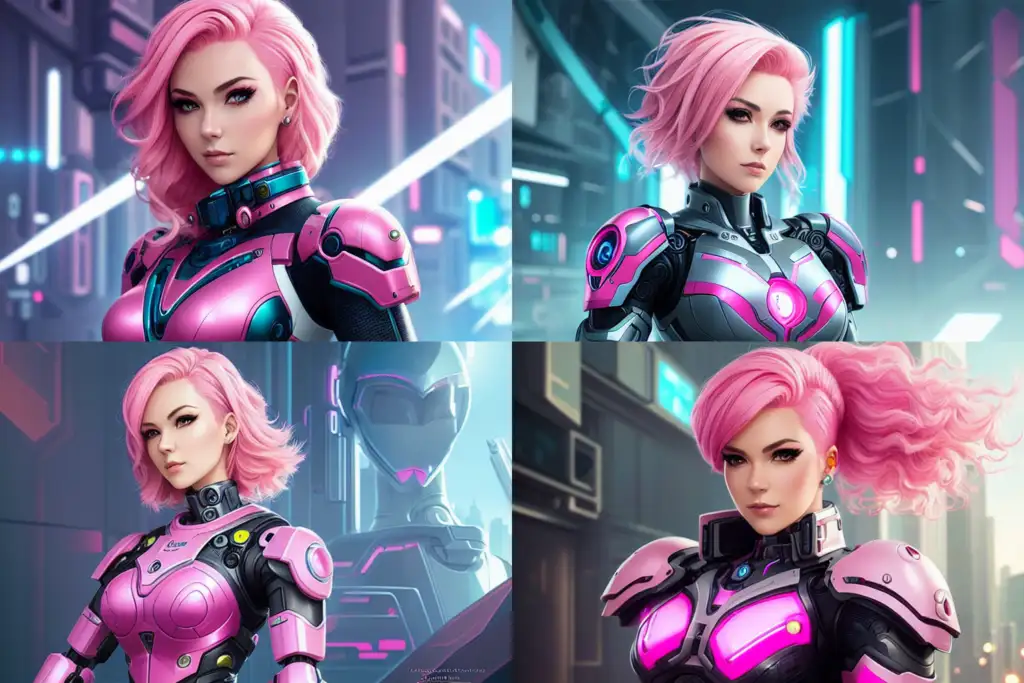
Reference only
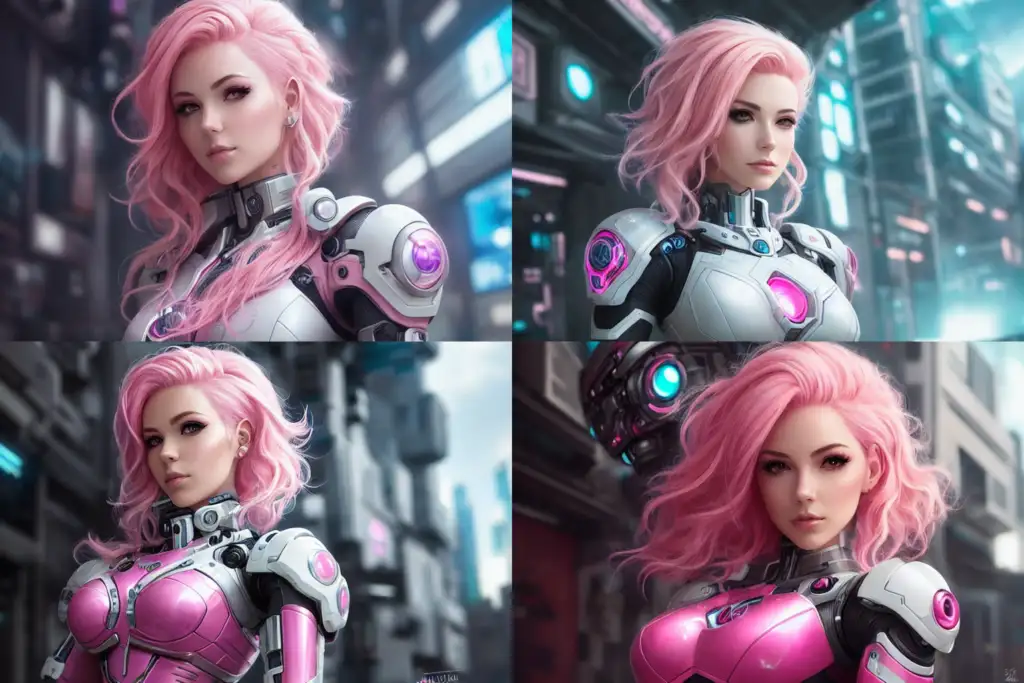
Reference adain+attn
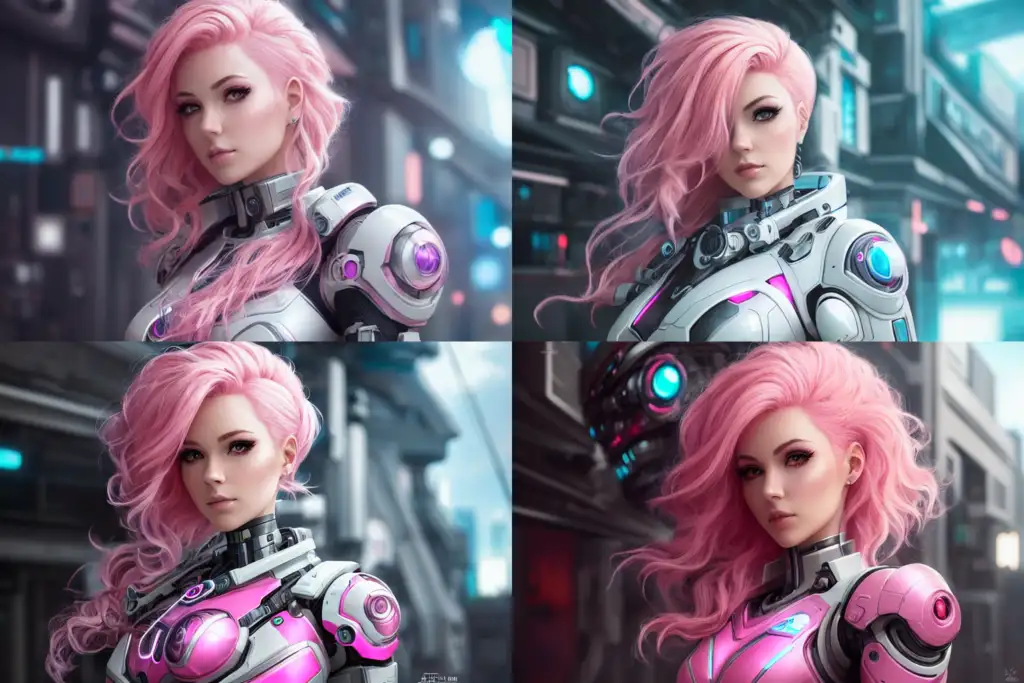
I would say reference-only works best if you twist my arm.
如果你一定要我选,我会说 reference-only 效果最好。
The above images are all from the balance mode. I don’t see a big difference in changing the style fidelity.
上面的图像都是来自 balance 模式。我没有看到改变 style fidelity 有很大的区别。
图像提示词适配器 Image Prompt adapter (IP-adapter)
An Image Prompt adapter (IP-adapter) is a ControlNet model that allows you to use an image as a prompt. Read the article IP-Adapter: Text Compatible Image Prompt Adapter for Text-to-Image Diffusion Models by He Ye and coworkers and visit their Github page for implementation details.
图像提示适配器 (IP-adapter) 是一种 ControlNet model(模型),它允许你使用图像作为提示词(prompt)。请阅读 He Ye 和他的同事们的文章IP-Adapter: Text Compatible Image Prompt Adapter for Text-to-Image Diffusion Models,并访问他们的Github 页面了解实现细节。
安装IP适配器模型,Install IP-adapter models
Before using the IP adapters in ControlNet, download the IP-adapter models for the v1.5 model.
Put them in ControlNet’s model folder.
stable-diffusion-webui > extensions > sd-webui-controlnet > models
在使用 ControlNet 中的 IP-adapter 之前,下载 v1.5 模型的 IP-adapter 模型。
将它们放入 ControlNet 的模型文件夹中。
stable-diffusion-webui > extensions > sd-webui-controlnet > models
使用IP-adapter, Using IP-adapter
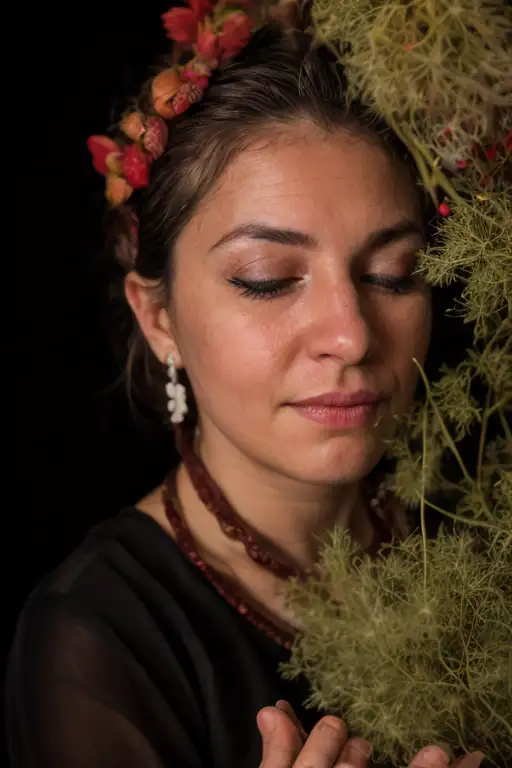
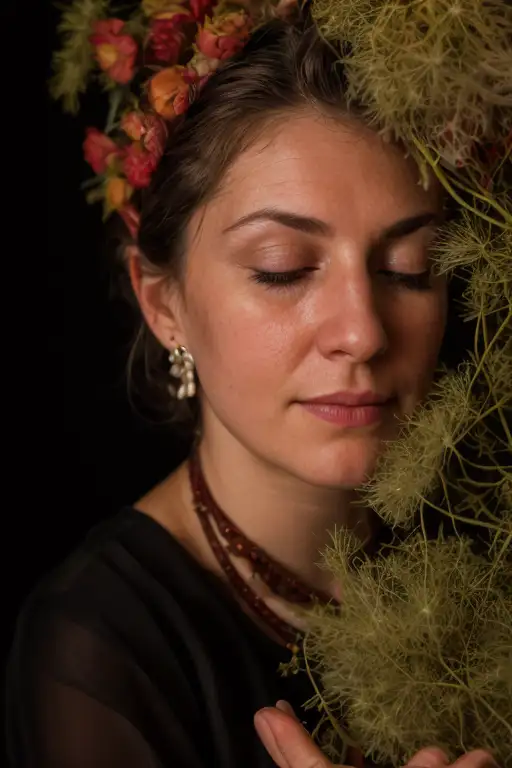
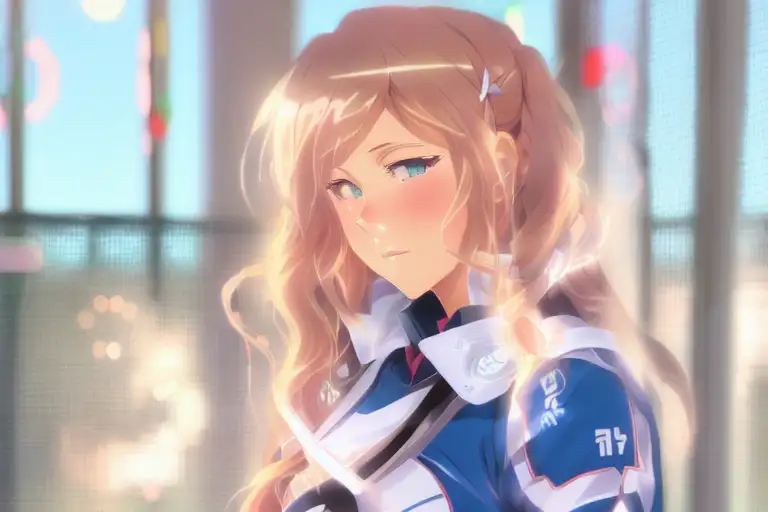
The IP-adapter allows you to use an image as a prompt, so you will need to supply a reference image. Let’s use the following image.
IP-adapter 允许你使用图像作为提示词(prompt),因此你需要提供一个参考图像。比如我们用下面这个图。
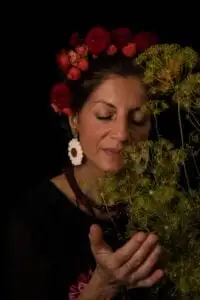
Reference image for image prompt.
In the ControlNet section, upload the image to the image canvas.
图像提示的参考图像。
在 ControlNet 部分,将图像上传到图像画布。
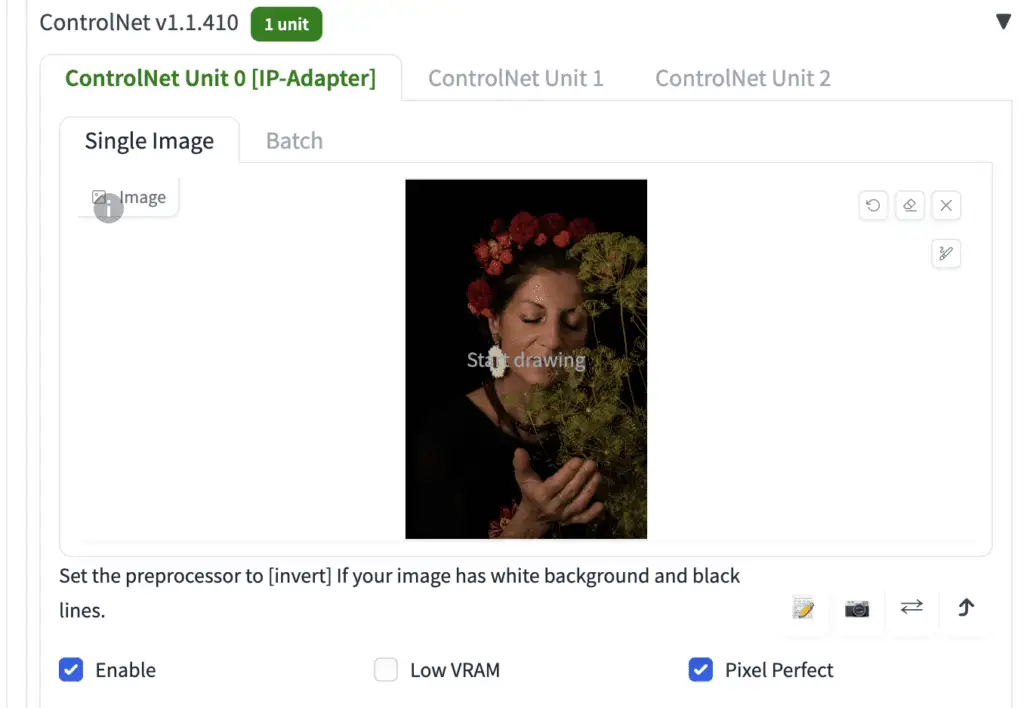
Here are the rest of the ControlNet settings to use IP-adapter
- Enable: Yes
- Pixel Perfect: Yes
- Control Type: IP-Adapter
- Preprocessor: ip-adapter_clip_sd15
- Model: ip-adapter_sd15
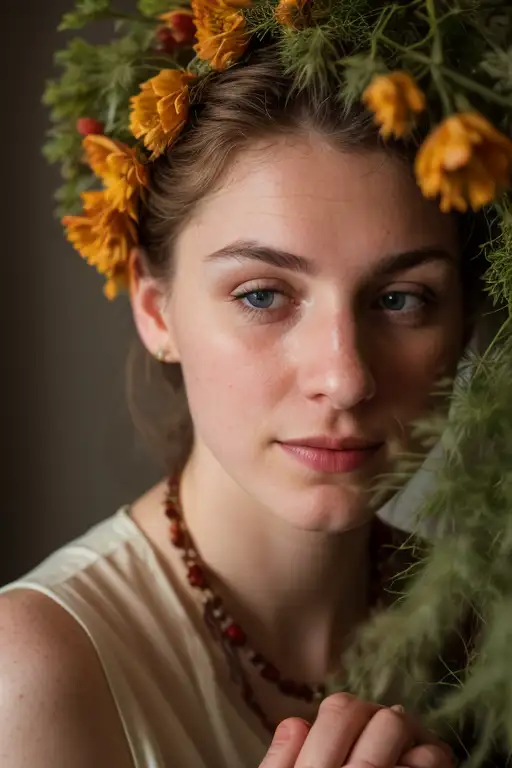
Below are images with and without the IP-adapters.
下面是是使用 IP-adapter 的 ControlNet 设置:
- Enable: 是
- Pixel Perfect: 是
- Control Type: IP-Adapter
- Preprocessor(预处理器): ip-adapter_clip_sd15
- Model(模型): ip-adapter_sd15
下面是使用和不使用 IP-adapter 的图像对比。
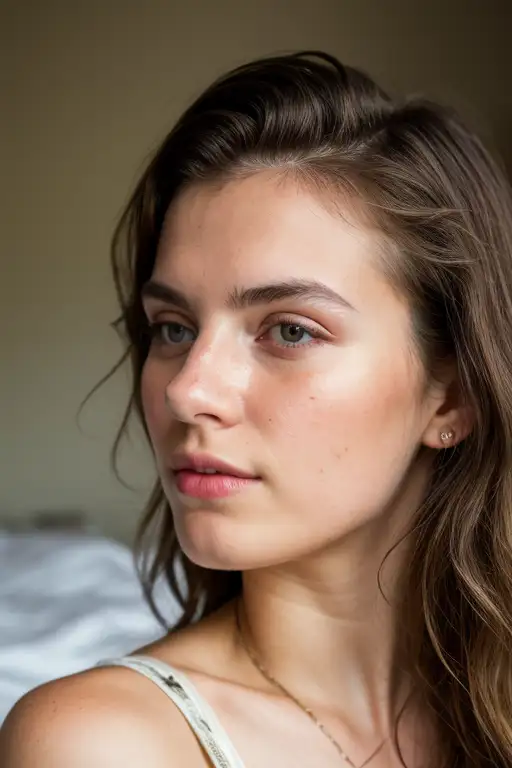
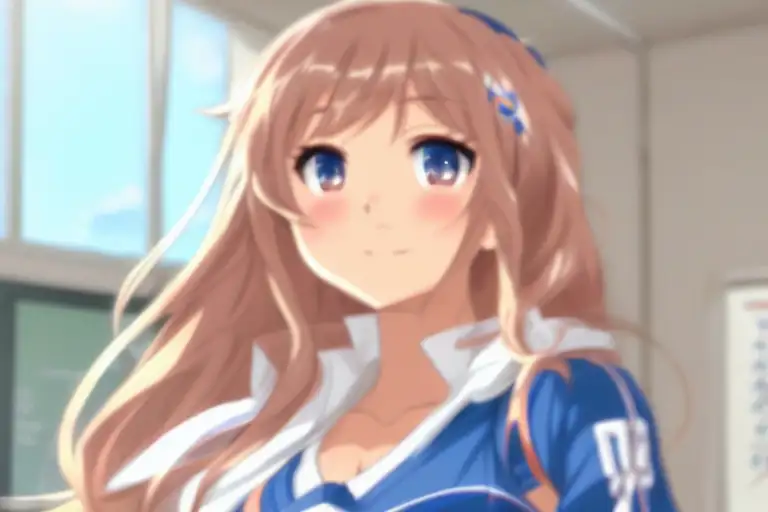
Without IP-adapter.
不使用 IP-adapter.
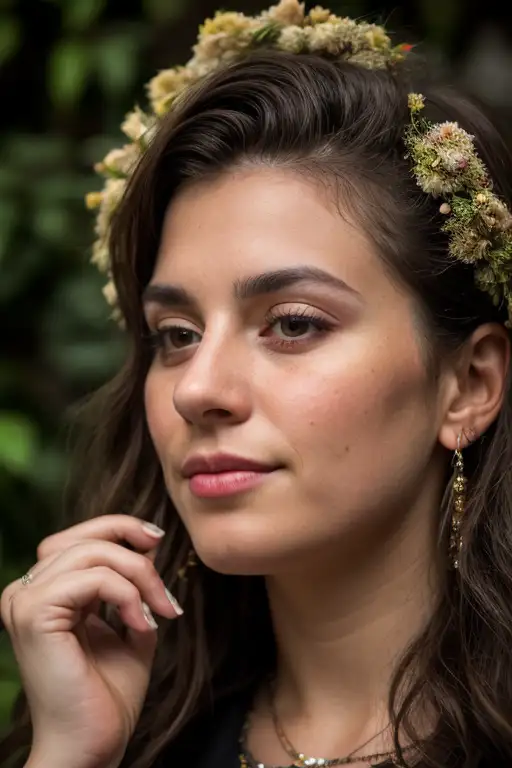
With IP-adapter SD1.5
使用 IP-adapter SD1.5
See the features of the reference image like the flowers and darker colors transferred to the generated image!
可以看到参考图像中的特征,如花朵和较暗的颜色,被转移到了生成的图像中!
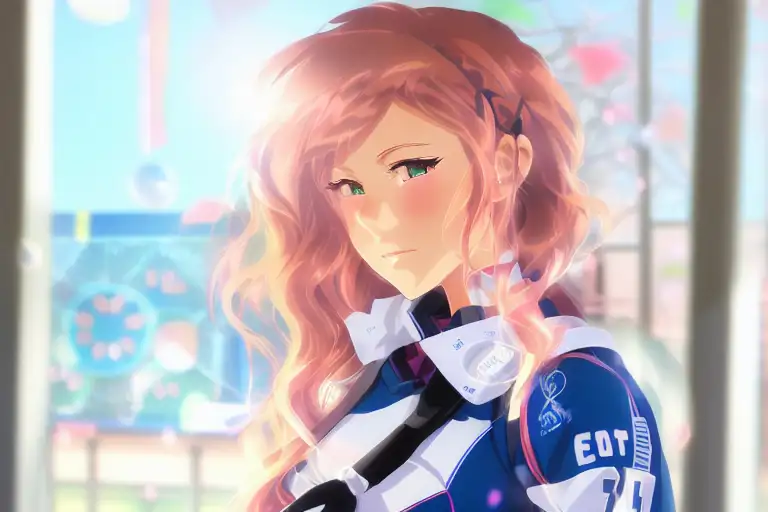
The SD 1.5 Plus IP-Adapter model does something similar but exerts a stronger effect.
SD 1.5 Plus IP-Adapter 模型也有类似的效果,但作用更强。
Without IP-adapter.
不使用 IP-adapter.
With IP-adapter SD1.5 Plus
使用 IP-adapter SD1.5 Plus
The SD1.5 Plus model is very strong. It will almost copy the reference image. You can reduce the Control Weight to tune it down.
SD1.5 Plus 模型非常强大。它几乎会完全复制参考图像。你可以降低 Control Weight 来调节强度。
Control Weight: 1
控制权重:1
Control Weight: 0.5
控制权重:0.5
Control Weight: 0.2
控制权重:0.2
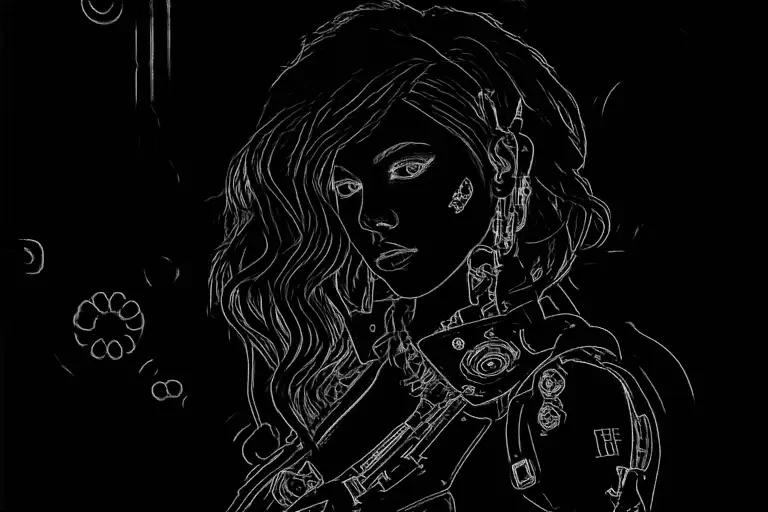
Canny 边缘检测算法
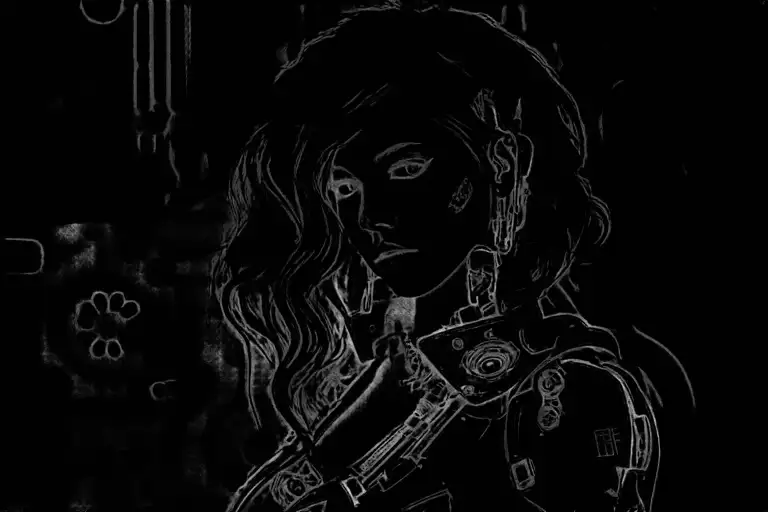
Canny edge detector is a general-purpose, old-school edge detector. It extracts the outlines of an image. It is useful for retaining the composition of the original image.
Select canny in both Preprocessor and Model dropdown menus to use.
Canny edge detector 是一种通用的、传统的边缘检测器。它提取图像的轮廓,对于保留原始图像的构图非常有用。
在 Preprocessor(预处理器) 和 Model(模型) 下拉菜单中都选择 canny 进行使用。
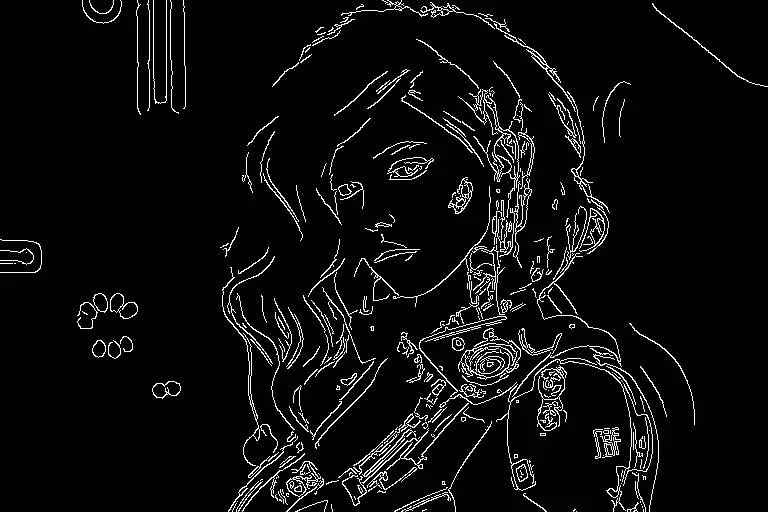
The generated images will follow the outlines.
生成的图像将follow这些轮廓特征。
Depth 深度检测
The depth preprocessor guesses the depth information from the reference image.
- Depth Midas: A classic depth estimator. Also used in the Official v2 depth-to-image model.
- Depth Leres: More details but also tend to render background.
- Depth Leres++: Even more details.
- Zoe: The level of detail sits between Midas and Leres.
- Depth Anything: A newer and enhanced depth model.
- Depth Hand Refiner: For fixing hands in inpainting.
depth preprocessor(深度预处理器) 推测计算 输入图像的深度信息。
- Depth Midas:经典的深度估计器,也用于官方v2 depth-to-image模型。
- Depth Leres:更多细节,但也倾向于渲染背景。
- Depth Leres++:更多更多细节。
- Zoe:细节水平介于 Midas 和 Leres 之间。
- Depth Anything:更新且增强的深度模型。
- Depth Hand Refiner:用于修复图像修补中的手部。
Reference Image:
相关图像:

Depth maps:
深度控制图:
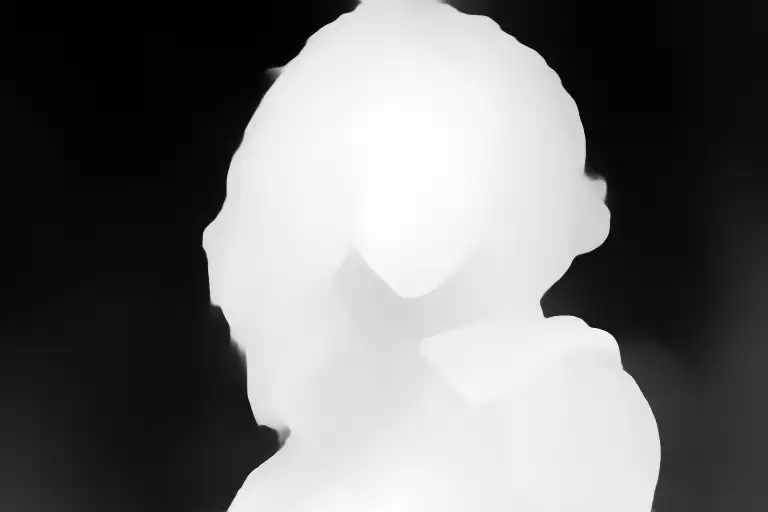
Midas
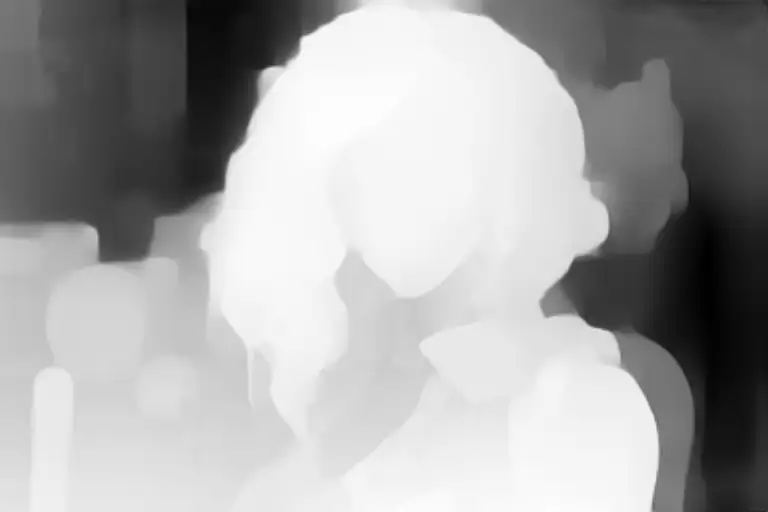
Leres
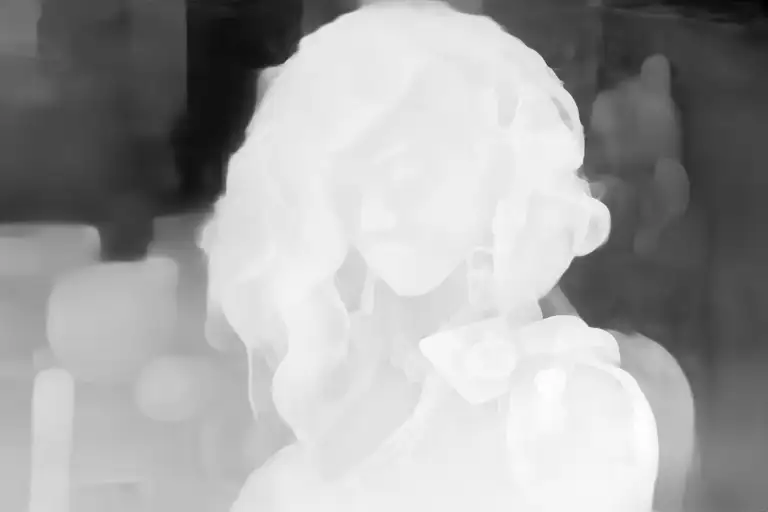
Leres++
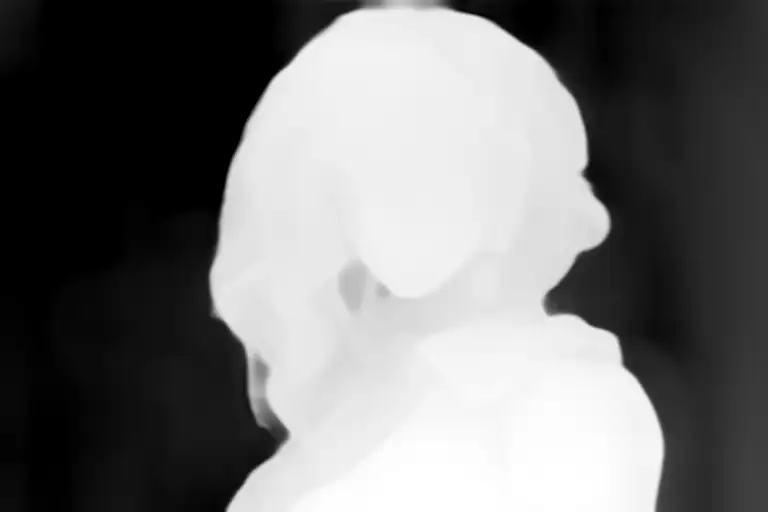
Zoe
Prompt and negative prompt:
a woman retrofuturism
disfigured, ugly, bad, immature
You can see the generated image follows the depth map (Zoe).
Zoe
提示词(prompt)和反向提示词(negative prompt):
一个女性 复古未来主义
畸形、丑陋、糟糕、不成熟
你可以看到生成的图像遵循深度图(Zoe)。
Text-to-image with Depth Zoe.
Compare with the more detailed Leres++:
使用 Depth Zoe 的 text-to-image。
与细节更多的 Leres++ 进行比较:

Text-to-image with Depth Leres.
使用 Depth Leres 的 text-to-image。
线条图 Line Art
Line Art renders the outline of an image. It attempts to convert it to a simple drawing.
Line Art 渲染图像的轮廓,尝试将其转换为简单的绘图。
There are a few line art preprocessors.
- Line art anime: Anime-style lines
- Line art anime denoise: Anime-style lines with fewer details.
- Line art realistic: Realistic-style lines.
- Line art coarse: Realistic-style lines with heavier weight.
Use with the lineart control model.
Images below are generated with Control Weight setting to 0.7.
有几种 line art preprocessor(预处理器):
- Line art anime:动漫风格的线条
- Line art anime denoise:细节较少的动漫风格线条
- Line art realistic:真实风格的线条
- Line art coarse:重量较重的真实风格线条
与 lineart control model(控制模型) 一起使用。
下图是使用 Control Weight 设置为 0.7 生成的。
Line Art Anime
去噪 Line Art Anime Denoise

Line Art Realistic
Line Art Coarse
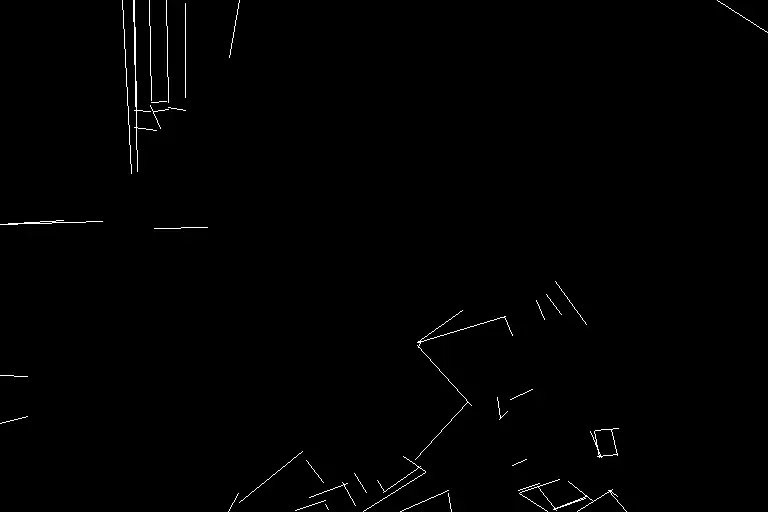
MLSD
M-LSD (Mobile Line Segment Detection) is a straight-line detector. It is useful for extracting outlines with straight edges like interior designs, buildings, street scenes, picture frames, and paper edges.
M-LSD (Mobile Line Segment Detection) 是一种直线检测器。它对于提取具有直边轮廓的图像非常有用,例如室内设计、建筑物、街景、画框和纸张边缘。
Curves will be ignored.
曲线将被忽略。
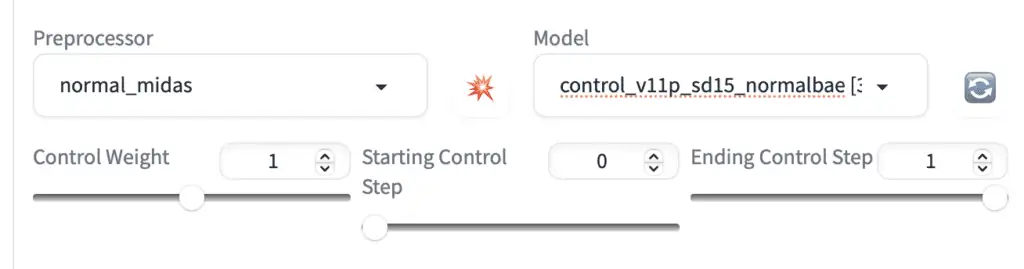
Normal maps
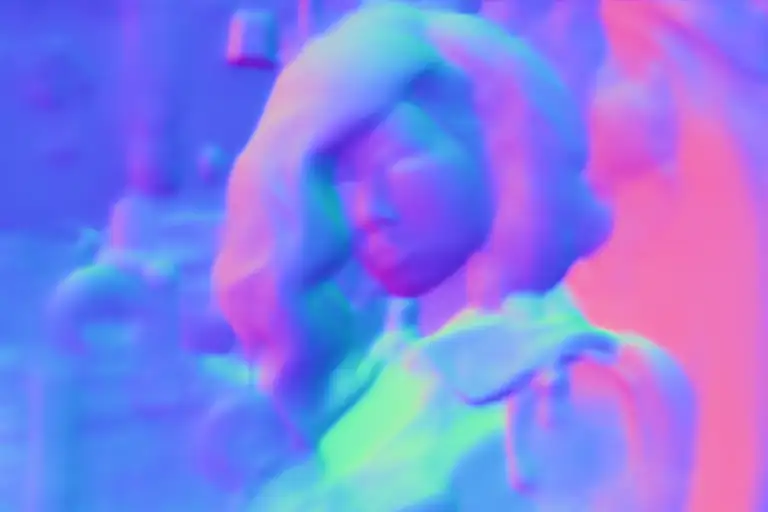
A normal map specifies the orientation of a surface. For ControlNet, it is an image that specifies the orientation of the surface each pixel rests on. Instead of color values, the image pixels represent the direction a surface is facing.
Normal map 用来指定“平面(表面)的方向”。对于 ControlNet 来说,它是一种图像,指定每个像素所在表面的方向。图像像素表示表面的朝向,而不是颜色值。
The usage of normal maps is similar to the depth maps. They are used to transfer the 3D composition of the reference image.
normal map 的使用类似于深度图。它们用于传递参考图像的3D构图。
Normal map preprocessors:
- Normal Midas: Estimate the normal map from the Midas depth map.
- Normal Bae: Estimate the normal map using the normal uncertainty method proposed by Bae et al.
Normal map preprocessor(预处理器):
- Normal Midas:从 Midas 深度图估计 normal map。
- Normal Bae:使用 Bae 等人提出的 normal uncertainty method 估计 normal map。
法线控制图 Normal Midas
Like the Midas depth map, the Midas normal map is good for isolating subject from the background.
与 Midas 深度图类似,Midas normal map(法线图) 也适合将主体与背景分离。
Normal Bae
The Bae normal map tends to render details in both background and foreground.
Bae normal map(法线图) 往往会在背景和前景中渲染细节。

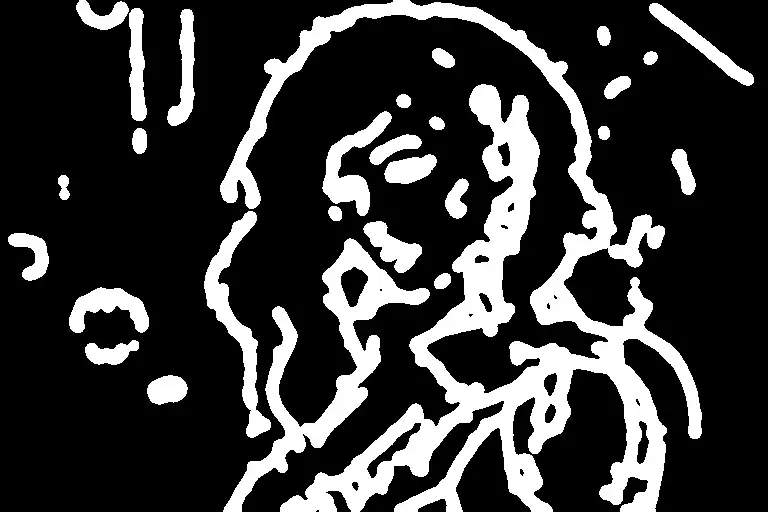
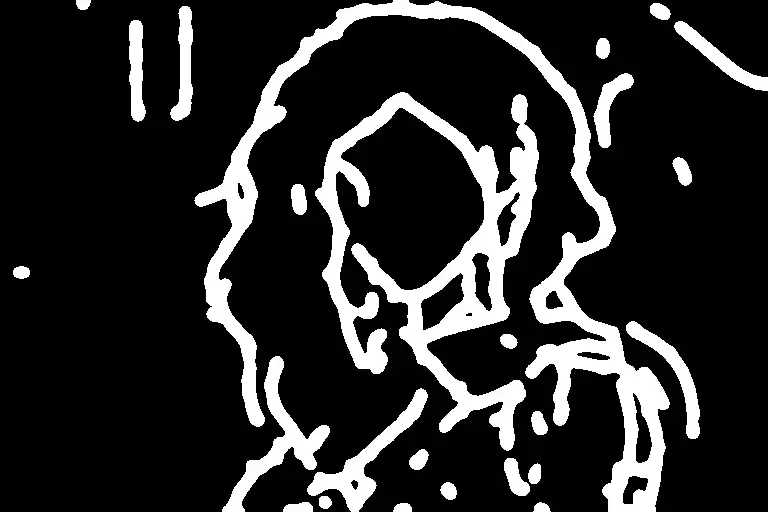
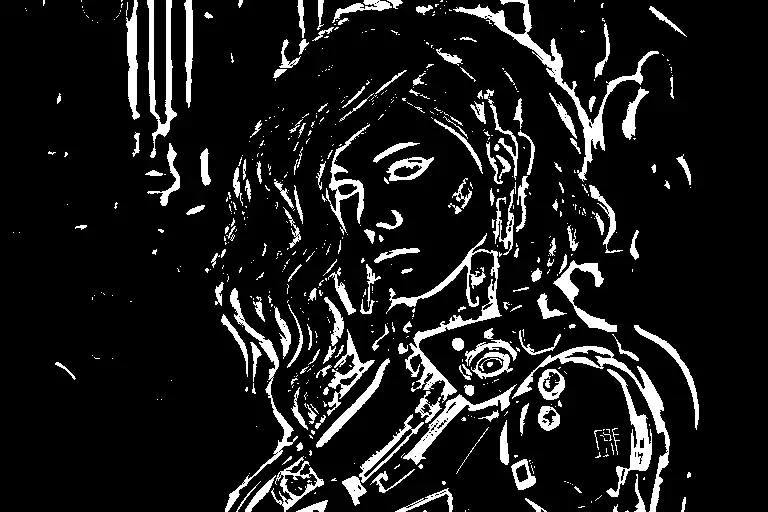
Scribbles 涂鸦
Scribble preprocessors turn a picture into a scribble, like those drawn by hand.
- Scribble HED: Holistically-Nested Edge Detection (HED) is an edge detector good at producing outlines like an actual person would. According to ControlNet’s authors, HED is suitable for recoloring and restyling an image.
- Scribble Pidinet: Pixel Difference network (Pidinet) detects curves and straight edges. Its result is similar to HED but usually results in cleaner lines with fewer details.
- Scribble xdog: <a href="https://users.cs.northhttp://western.edu/~sco590/winnemoeller-cag2012.pdf">EXtended Difference of Gaussian (XDoG) is an edge detection method technique. It is important to adjust the xDoG threshold and observe the preprocessor output.
All these preprocessors should be used with the scribble control model.
Scribble preprocessor(涂鸦预处理器) 可以将图像转换为手绘的涂鸦效果。
- Scribble HED:Holistically-Nested Edge Detection (HED) 是一种边缘检测器,擅长生成类似实际人物绘制的轮廓。据ControlNet的作者称,HED适合重新上色和重新设计图像。
- Scribble Pidinet:Pixel Difference Network (Pidinet) 检测曲线和直边。其结果类似于HED,但通常线条更干净,细节更少。
- Scribble xdog:<a href="https://users.cs.northhttp://western.edu/~sco590/winnemoeller-cag2012.pdf">EXtended Difference of Gaussian (XDoG) 是一种边缘检测技术。调整 xDoG threshold 并观察 preprocessor(预处理器) 的输出是很重要的。
所有这些预处理器都应与 scribble 控制模型一起使用。
Scribble HED
HED produces coarse scribble lines.
HED 生成粗略的涂鸦线条。
Scribble Pidinet
Pidinet tends to produce coarse lines with little detail. It’s good for copying the board outline without fine details.
Pidinet 倾向于生成粗线条,细节较少。它适合复制大致轮廓而无需精细细节。
Scribble xDoG
The level of detail is controllable by adjusting the XDoG threshold, making xDoG a versatile preprocessor for creating scribbles.
通过调整 XDoG threshold 可以控制细节水平,使 xDoG 成为创建涂鸦的多功能 preprocessor(预处理器)。
分割 Segmentation
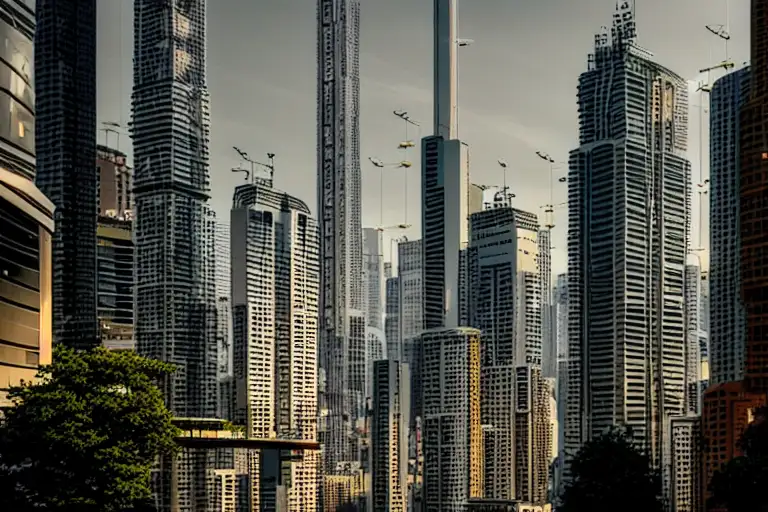
Segmentation preprocessors label what kind of objects are in the reference image.
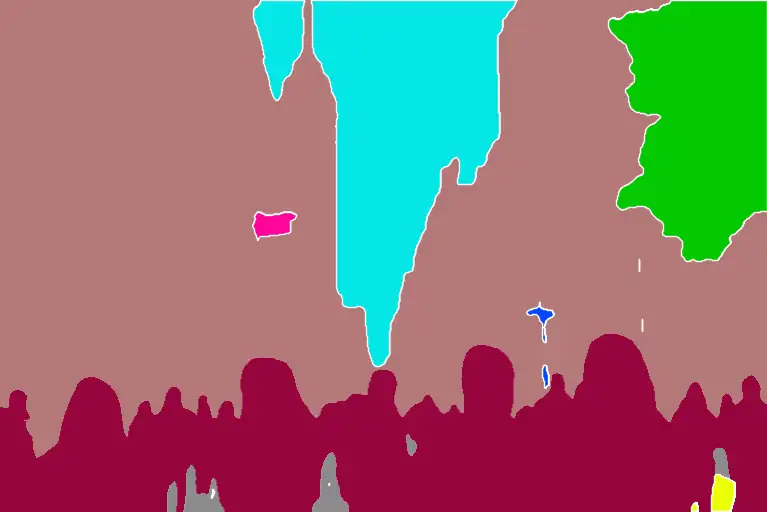
Below is a segmentation processor in action.
Segmentation preprocessor(预处理器) 标记参考图像中物体的种类。
下面是一个 segmentation preprocessor 的实际应用示例。
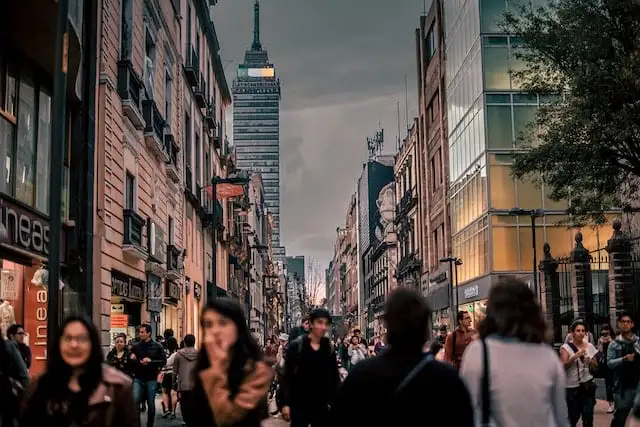
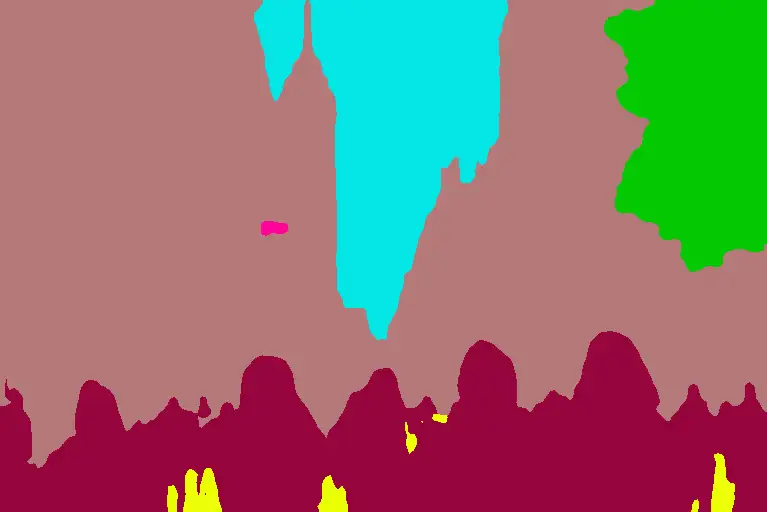
The buildings, sky, trees, people, and sidewalks are labeled with different and predefined colors.
You can find the object categories and colors in the color map here for ufade20k and ofade20k.
There are a few segmentation options
- ufade20k: UniFormer (uf) segmentation trained on ADE20K dataset.
- ofade20k: OneFormer (of) segmentation trained on ADE20k dataset.
- ofcoco: OnFormer segmentation trained on COCO dataset.
Note that the color maps of ADE20k and COCO segmentations are different.
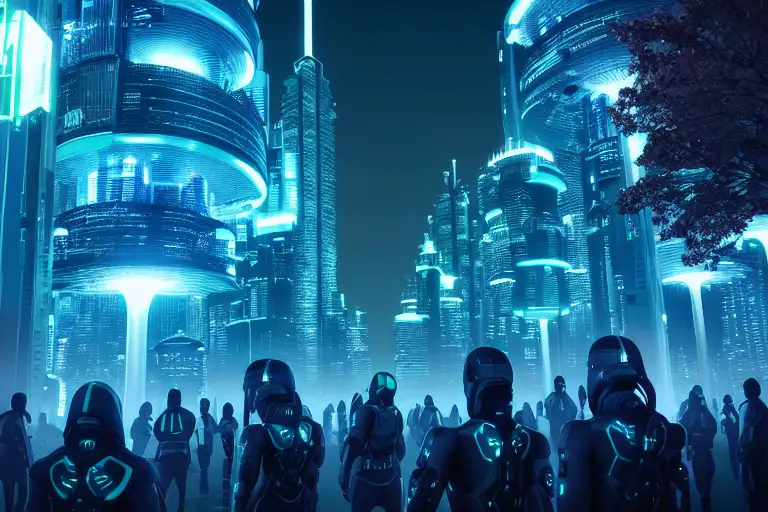
You can use segmentation preprocessors to transfer the location and shape of objects.
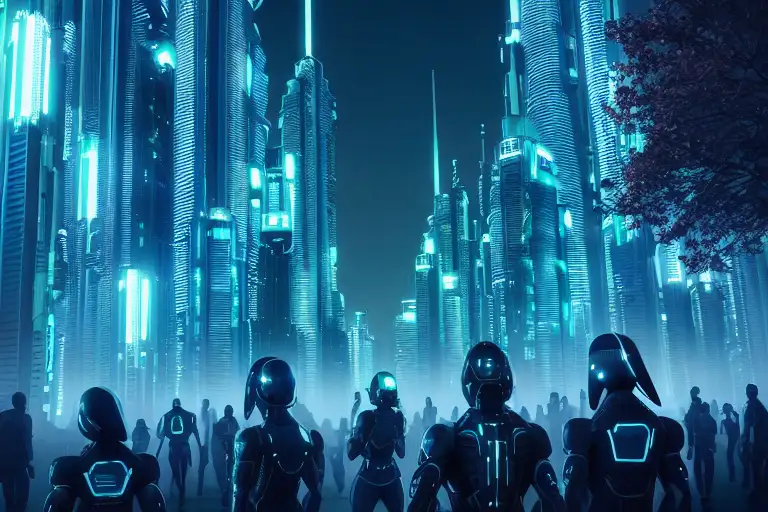
Below are using these preprocessors with the same prompt and seed.
Futuristic city, tree, buildings, cyberpunk
建筑物、天空、树木、人群和人行道用不同的预定义颜色标记。
你可以在这里的颜色图中找到 ufade20k 和 ofade20k 的物体类别和颜色。
有几种分割选项:
- ufade20k:UniFormer (uf) 分割模型,在 ADE20K 数据集上训练。
- ofade20k:OneFormer (of) 分割模型,在 ADE20K 数据集上训练。
- ofcoco:OneFormer 分割模型,在 COCO 数据集上训练。
请注意,ADE20k 和 COCO 分割的颜色图是不同的。
你可以使用分割预处理器传递物体的位置和形状。
下面是使用这些预处理器并配合相同的提示词(prompt)和种子的示例:
未来城市、树木、建筑物、赛博朋克
UniFormer ADE20k (ufade20k)
Uniformer labels everything accurately in this example.
在这个例子中,Uniformer 准确地标记了所有内容。

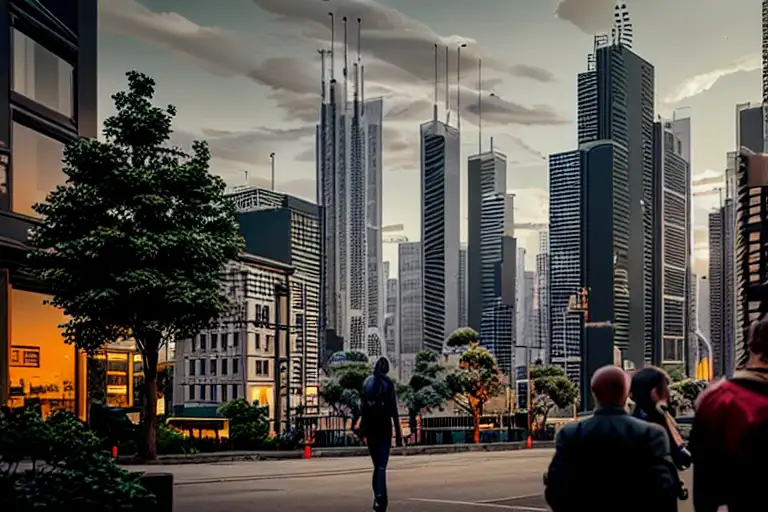
OneFormer ADE20k (ofade20k)
OneFormer is a bit more noisy in this case, but doesn’t affect the final image.
在这种情况下,OneFormer 的噪点略多,但不影响最终图像。
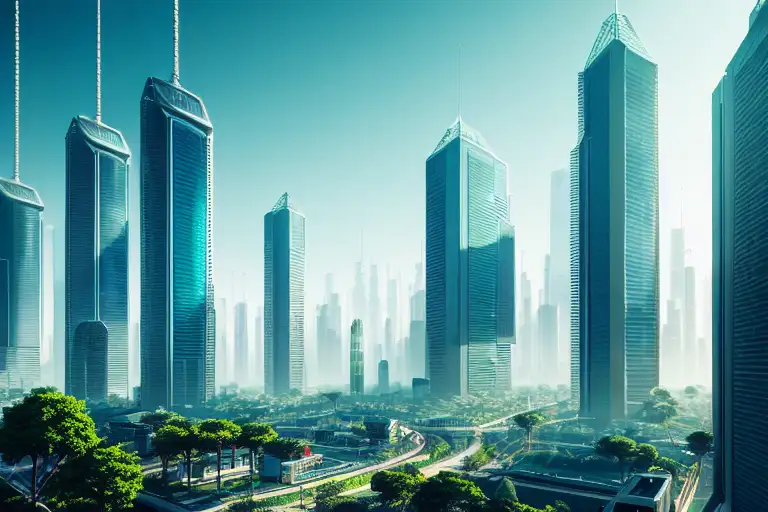
OneFormer COCO (ofcoco)
OneFormer COCO performs similarly, with some mislabels.
OneFormer COCO 的表现类似,有一些误标。
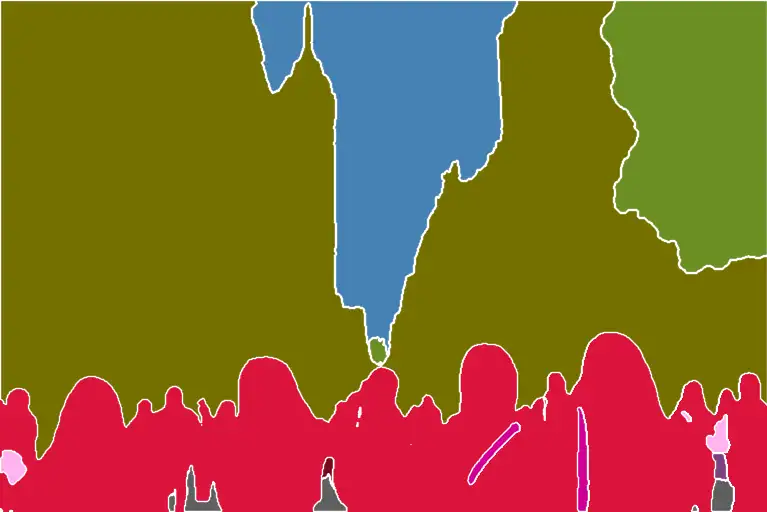
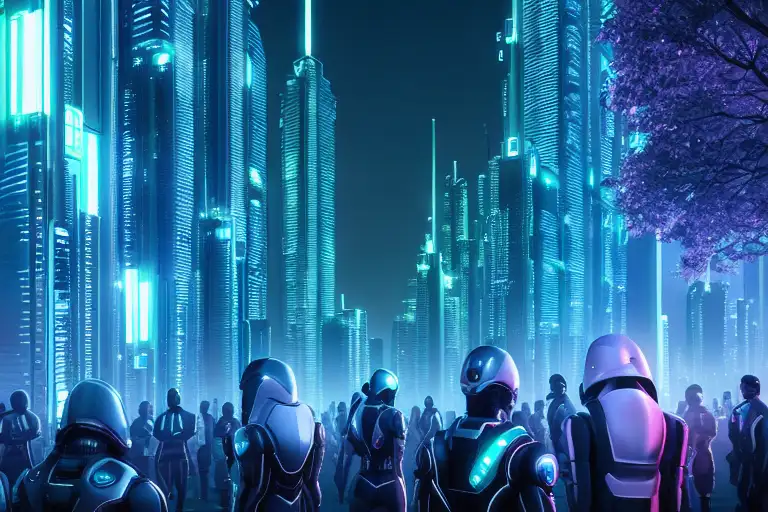
Segmentation is a powerful technique. You can further manipulate the segmentation map to put objects at precise locations. Use the color map for ADE20k.
打乱 Shuffle
The Shuffle preprocessor stirs up the input image. Let’s see the shuffle in action.
Together with the Shuffle control model, the Shuffle preprocessor can be used for transferring the color scheme of the reference image.
Shuffle preprocessor(打乱预处理器) 会搅动输入图像。让我们看看 Shuffle 的实际效果。
与 Shuffle 控制模型一起使用时,Shuffle preprocessor 可以用于传递参考图像的 配色方案。
Input image:
输入图片:

Shuffle preprocessor:
Shuffle 预处理器:
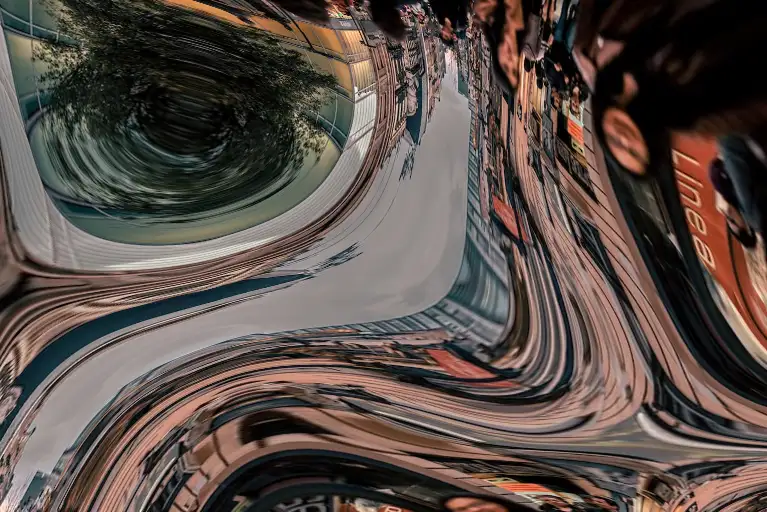
Unlike other preprocessors, the Shuffle preprocessor is randomized. It will be affected by your seed value.
Use the Shuffle preprocessor with the Shuffle control model. The Shuffle control model can be used with or without the Shuffle preprocessor.
The image below is with ControlNet Shuffle preprocessor and Shuffle model (Same prompt as the last section). The color scheme roughly follows the reference image.
与其他预处理器不同,Shuffle preprocessor(预处理器) 是随机化的。它会受到你的种子值的影响。
使用 Shuffle preprocessor 时要搭配 Shuffle 控制模型。Shuffle 控制模型可以与 Shuffle preprocessor 一起使用,也可以单独使用。
下图使用了 ControlNet Shuffle preprocessor 和 Shuffle 模型(与上一节相同的提示词(prompt))。配色方案大致遵循参考图像。
The image below is with the ControlNet Shuffle model only (Preprocessor: None). The image composition is closer to the original. The color scheme is similar to the shuffled.
下图仅使用了 ControlNet Shuffle 模型(Preprocessor: None)。图像构图更接近原始图像。配色方案与打乱后的图像相似。
For your reference, the image below is with the same prompt without ControlNet. The color scheme is drastically different.
供参考,下图是在没有使用 ControlNet 的情况下生成的图像,使用了相同的提示词(prompt)。配色方案与之前的图像有显著不同。

Color grid T2I adapter
Color grid T2i adapter preprocessor shrinks the reference image to 64 times smaller and then expands it back to the original size. The net effect is a grid-like patch of local average colors.
Color grid T2i adapter preprocessor(预处理器) 将参考图像缩小到原来的64倍,然后再将其扩展回原始大小。其最终效果是局部平均颜色的网格状补丁。
Original reference image:
原始输入图片:

Preprocessed with t2ia_color_grid:
使用 t2ia_color_grid 预处理器:
The preprocessed image can then be used with the T2I color adapter (t2iadapter_color) control model.
The image generation will loosely follow the color scheme spatially.
预处理后的图像可以与 T2I color adapter (t2iadapter_color) 控制模型一起使用。
图像生成将大致遵循颜色方案的空间分布。
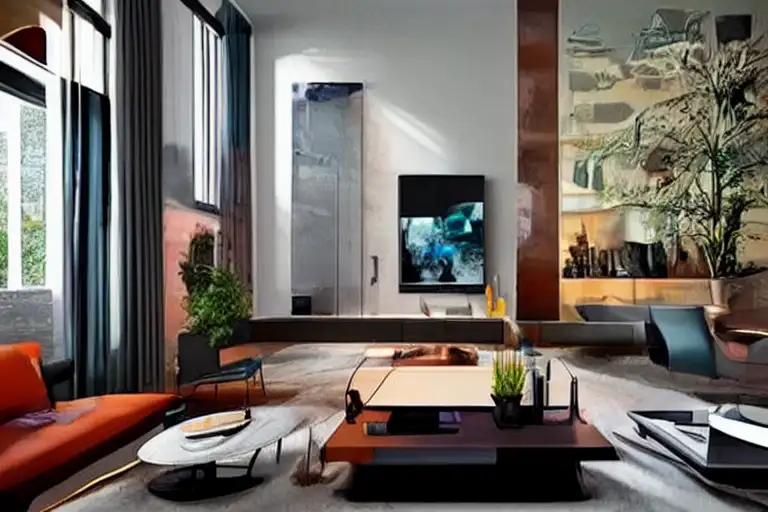
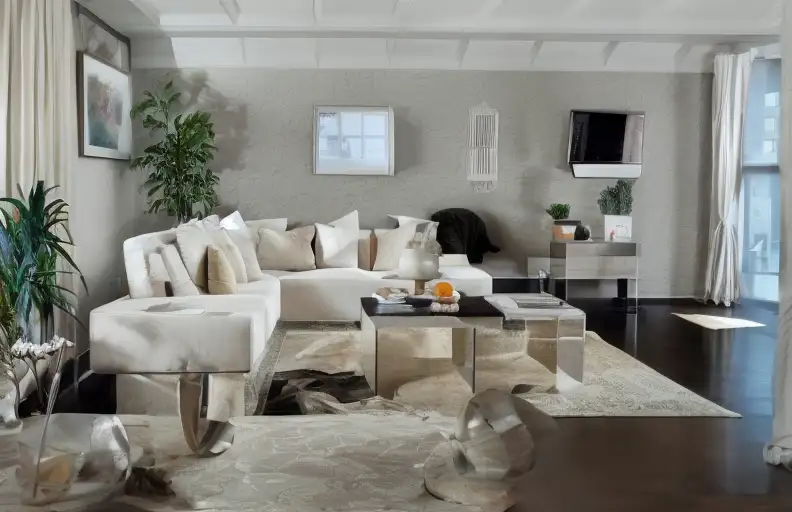
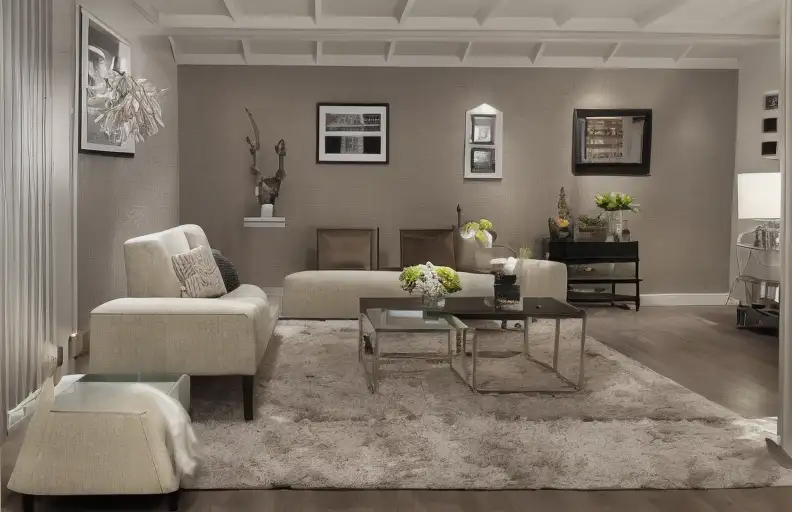
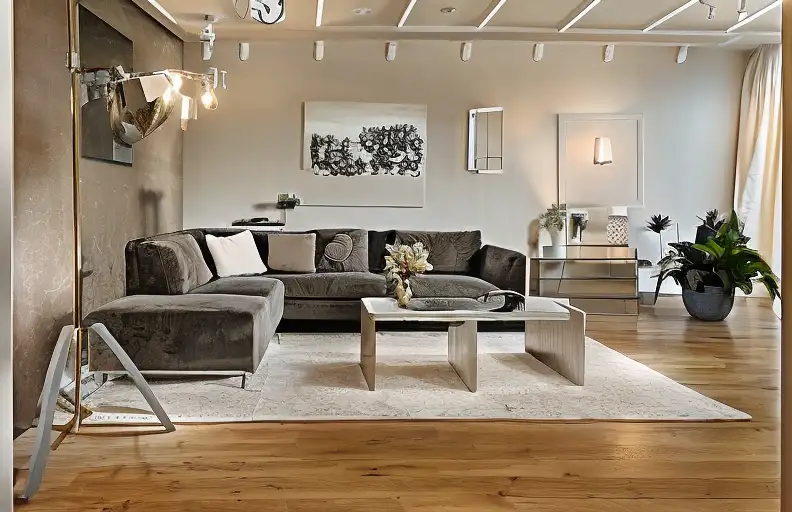
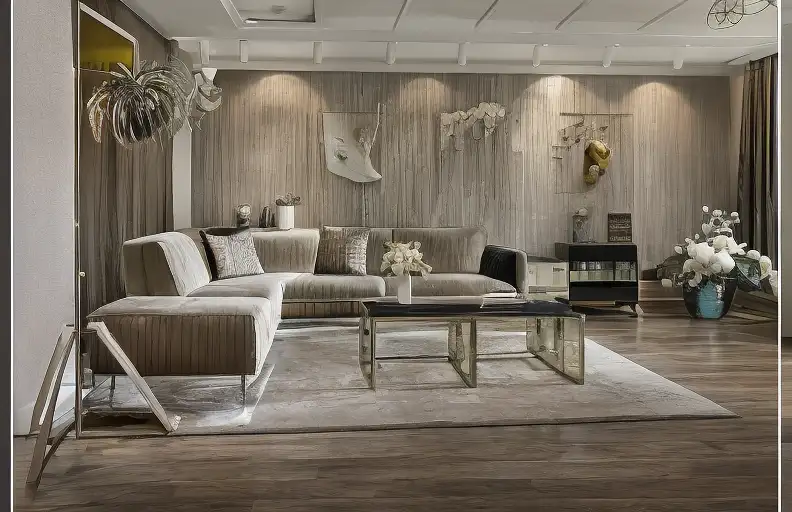
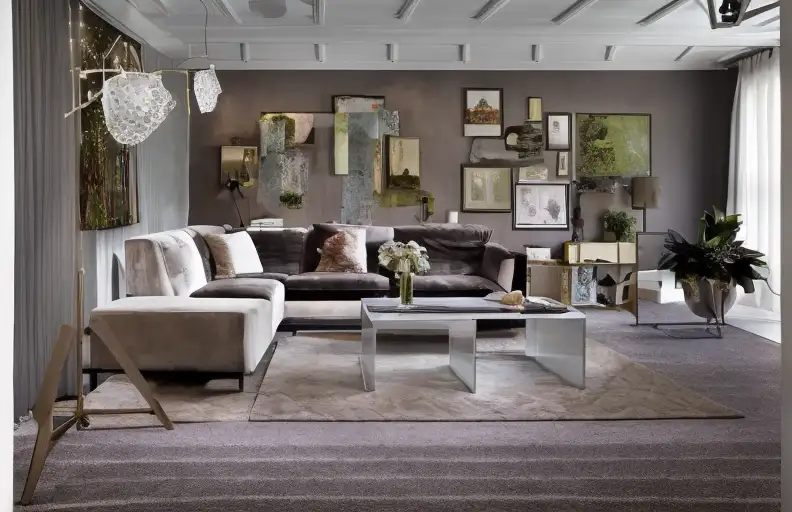
A modern living room
一个现代化的客厅
Increase the ControlNet weight to have it follow more closely.
You can also use preprocessor None for this T2I color model.
In my opinion, it is pretty similar to image-to-image.
增加 ControlNet weight(权重) 以使其更加紧密地遵循颜色方案。
对于这个 T2I color 模型,你也可以使用 preprocessor None。
在我看来,它与image-to-image 相当相似。
Clip vision style T2I adapter
t2ia_style_clipvision converts the reference image to the CLIP vision embedding. This embedding contains rich information on the image’s content and style.
You will need to use the Control model t2iadapter_style_XXXX.
t2ia_style_clipvision 将参考图像转换为 CLIP vision embedding。这个 embedding 包含了关于图像内容和风格的丰富信息。
你需要使用控制模型 t2iadapter_style_XXXX。
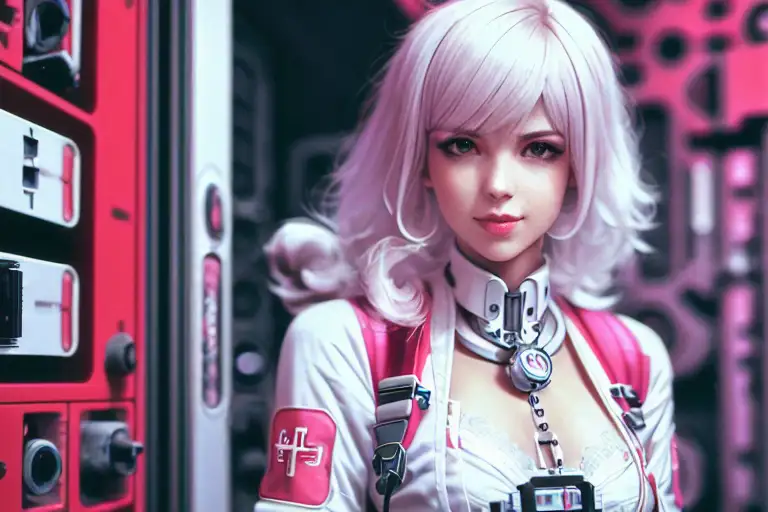
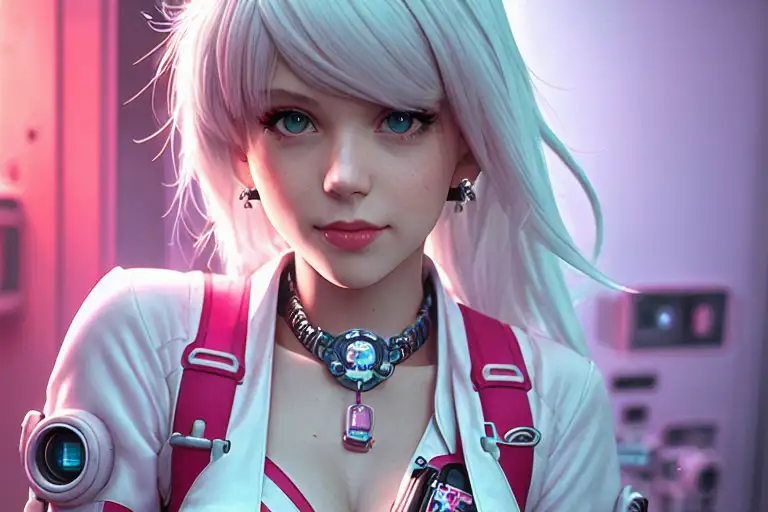
See this amazing style transfer in action:
Reference image:
看看这个这个牛X的风格迁移效果:
参考图像:
T2I adapter – CLIP vision:
sci-fi girl
Below are what this prompt would generate if you turn the ControlNet off.
以下是关闭 ControlNet 时此提示词(prompt)生成的图像。
The function is pretty similar to Reference ControlNet, but I would rate T2IA CLIP vision higher.
其功能与Reference ControlNet 相似,但我会给 T2IA CLIP vision 更高的评价。
修复控制,ControlNet Inpainting
ControlNet inpainting lets you use high denoising strength in inpainting to generate large variations without sacrificing consistency with the picture as a whole.
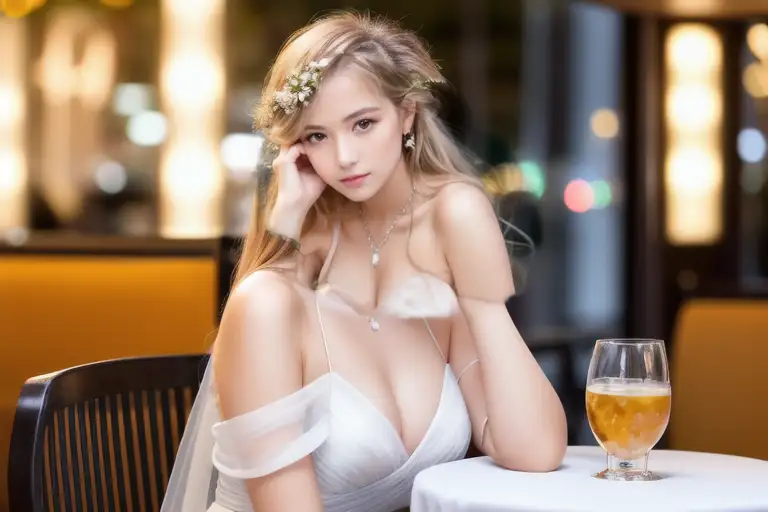
For example, I used the prompt for realistic people.
Model: HenmixReal v4
ControlNet inpainting(修复) 允许你在 inpainting 中使用高降噪强度,以生成较大的变化,同时不牺牲图像整体的一致性。
例如,我使用了现实人物的提示词(prompt)。
提示词(prompt):
photo of young woman, highlight hair, sitting outside restaurant, wearing dress, rim lighting, studio lighting, looking at the camera, dslr, ultra quality, sharp focus, tack sharp, dof, film grain, Fujifilm XT3, crystal clear, 8K UHD, highly detailed glossy eyes, high detailed skin, skin pores
年轻女性的照片,高光头发,坐在餐厅外,穿着连衣裙,边缘光,工作室照明,看着相机,单反,超高质量,清晰对焦,锐利,景深,胶片颗粒,富士XT3,相当清晰,8K UHD,高度细致的光泽眼睛,高细节皮肤,皮肤毛孔。
Negative prompt
反向提示词:
disfigured, ugly, bad, immature, cartoon, anime, 3d, painting, b&w
畸形、丑陋、糟糕、不成熟、卡通、动漫、3D、绘画、黑白。
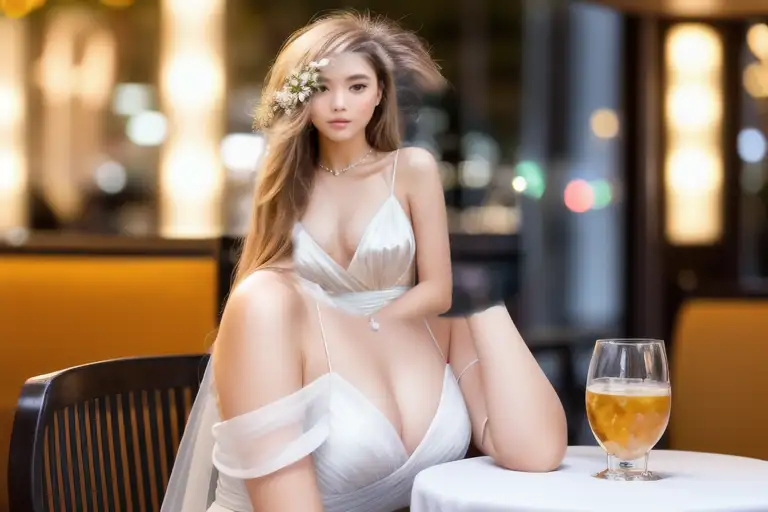
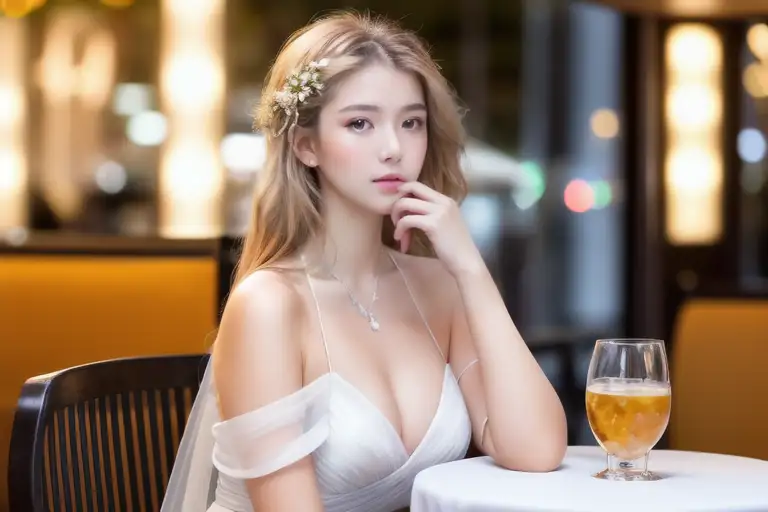
I have this image and want to regenerate the face with inpainting.
比如我有这张图片,准备用 inpainting 来重新生成面部。

If I inpaint the face with a high denoising strength (> 0.4), the result will likely to be globally inconsistent. Below are the unpainted images with denoising strength 1.
如果我以高降噪强度(> 0.4)重绘面部,结果可能会整体不一致。以下是降噪强度为1的未重绘图像。
ControlNet Inpainting is your solution.
ControlNet Inpainting(修复模型) 则可以解决这个问题。
To use ControlNet inpainting:
使用ControlNet inpainting(修复):
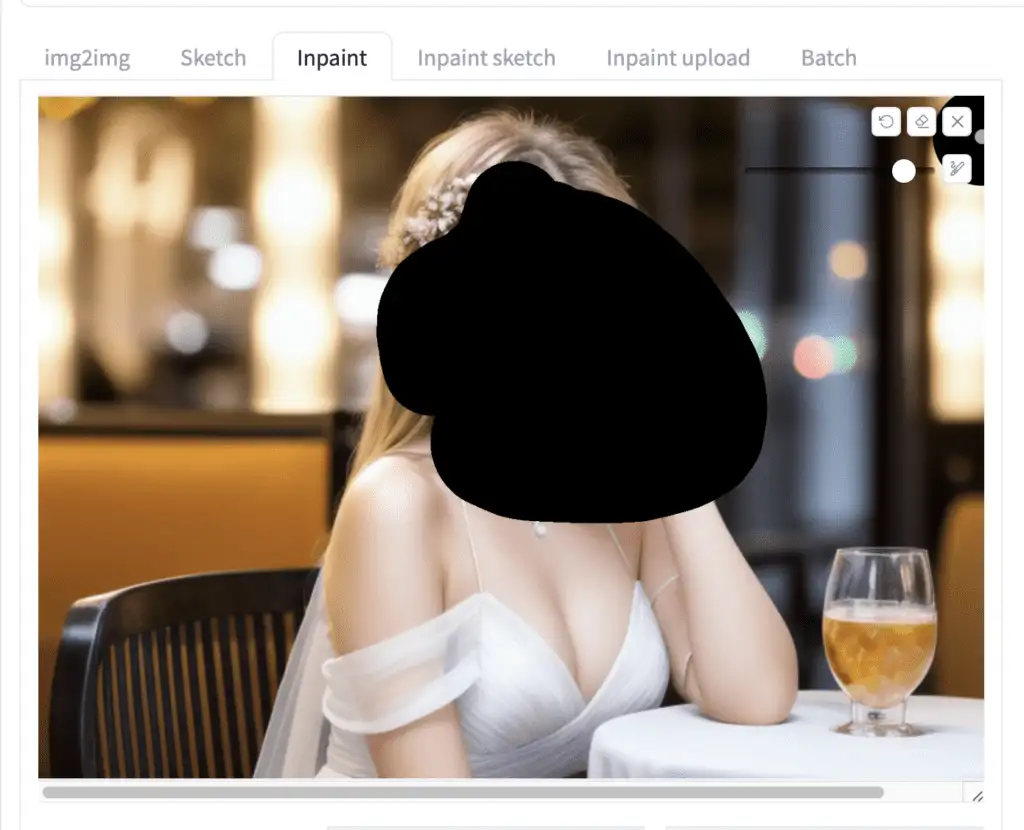
- It is best to use the same model that generates the image. After generating an image on the txt2img page, click Send to Inpaint to send the image to the Inpaint tab on the Img2img page.
- Use the paintbrush tool to create a mask over the area you want to regenerate. See the beginner’s tutorial on inpainting if you are unfamiliar with it.
–
- 最好使用生成图像时使用的相同模型。在 txt2img 页面生成图像后,点击 Send to Inpaint 将图像发送到 Img2img 页面上的 Inpaint 标签。
- 使用画笔工具在你想要重新生成的区域创建一个这遮罩层。如果你不熟悉 inpainting,请参阅初学者教程 inpainting。
- Set Inpaint area to Only masked. (Whole picture also works)
- Set denoising strength to 1. (You won’t normally set this this high without ControlNet.)
- Set the following parameters in the ControlNet section. You don’t need to upload a reference image.
–
- 将 Inpaint area 设置为 Only masked。(Whole picture 也可以)
- 将 denoising strength 设置为1。(通常不会在没有 ControlNet 的情况下设置这么高)
- 在 ControlNet 部分设置以下参数。你不需要上传参考图像。
Enable: Yes
Preprocessor: Inpaint_global_harmonious
Model: ControlNet
Enable: Yes
Preprocessor: Inpaint_global_harmonious
Model: ControlNet
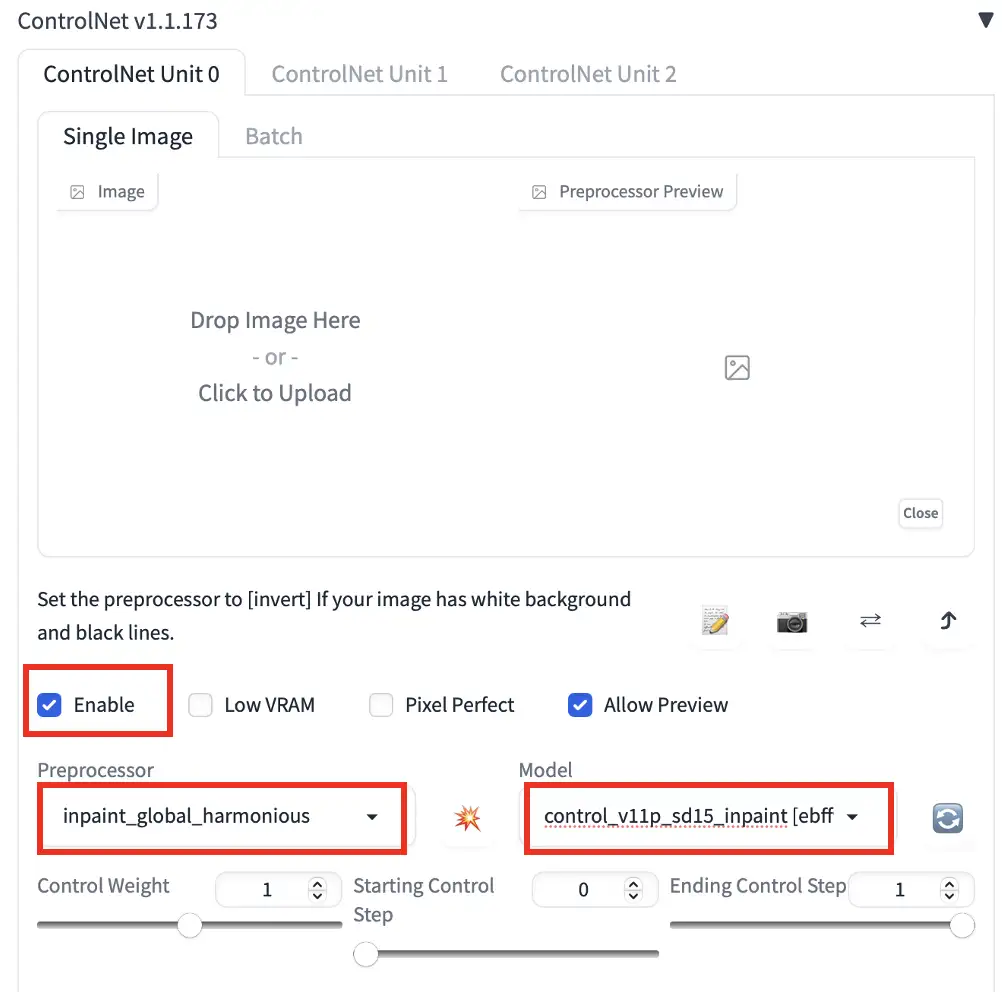
- Press Generate to start inpainting.
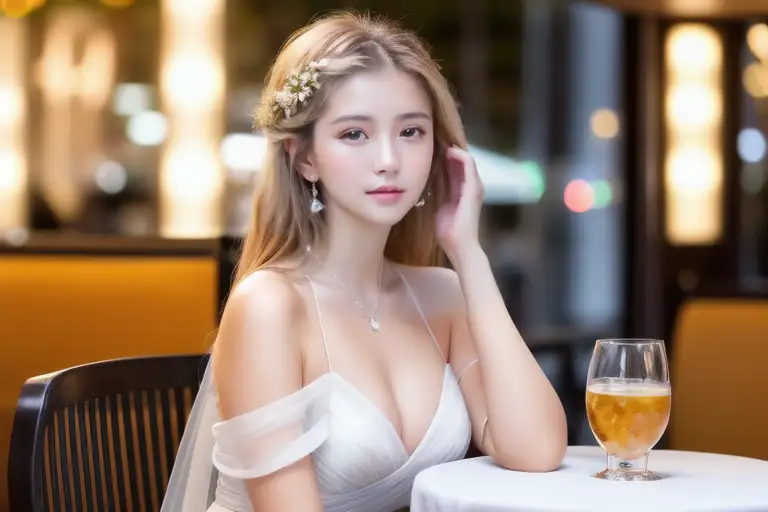
Now I get new faces consistent with the global image, even at the maximum denoising strength (1)!
- 按 Generate 开始 inpainting(修复)。
现在,即使在最大降噪强度(1)下,我也能获得与整体图像一致的新面部!
Currently, there are 3 inpainting preprocessors
- Inpaint_global_harmonious: Improve global consistency and allow you to use high denoising strength.
- Inpaint_only: Won’t change unmasked area. It is the same as Inpaint_global_harmonious in AUTOMATIC1111.
- Inpaint_only+lama: Process the image with the lama model. It tends to produce cleaner results and is good for object removal.
目前,有三个 inpainting 修复预处理器:
- Inpaint_global_harmonious:提高全局一致性,允许使用高降噪强度。
- Inpaint_only:不会改变未遮罩区域。它与 AUTOMATIC1111 中的 Inpaint_global_harmonious 相同。
- Inpaint_only+lama:使用 lama 模型处理图像。它倾向于生成更干净的结果,适合移除对象。
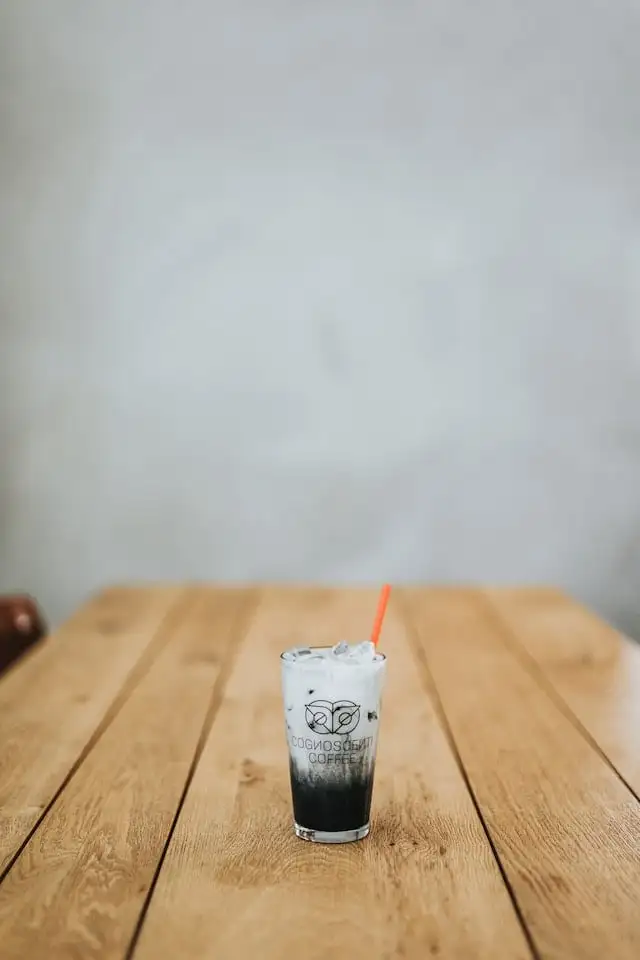
Original image
原始图片:

inpaint+lama
Inpaint+lama model for object removal. An empty prompt was used.
使用 Inpaint+lama 模型进行对象移除,使用了空的提示词(prompt)。
使用ControlNet 复制一张脸 Copying a face with ControlNet
You can use a special IP-adapter face model to generate consistent faces across multiple images.
你可以使用特殊的 IP-adapter 面部模型在多张图像中生成一致的面部。
安装IP-adapter plus 脸部模型, Installing the IP-adapter plus face model
-
Make sure your A1111 WebUI and the ControlNet extension are up-to-date.
-
Download the ip-adapter-plus-face_sd15.bin and put it in stable-diffusion-webui > models > ControlNet.
-
Rename the file’s extension from .bin to .pth. (i.e., The file name should be ip-adapter-plus-face_sd15.pth)
-
确保你的 A1111 WebUI 和 ControlNet 扩展是最新的。
-
下载 ip-adapter-plus-face_sd15.bin 并将其放入 stable-diffusion-webui > models > ControlNet 文件夹。
-
将文件扩展名从 .bin 重命名为 .pth。(即,文件名应为 ip-adapter-plus-face_sd15.pth)
使用安装IP-adapter plus 脸部模型,Using the IP-adapter plus face model
To use the IP adapter face model to copy a face, go to the ControlNet section and upload a headshot image.
要使用 IP-adapter 面部模型复制面部,进入 ControlNet 部分并上传一张头像图像。
Important ControlNet Settings:
- Enable: Yes
- Preprocessor: ip-adapter_clip_sd15
- Model: ip-adapter-plus-face_sd15
注意 ControlNet 设置内容如下:
- Enable: 是
- Preprocessor: ip-adapter_clip_sd15
- Model: ip-adapter-plus-face_sd15
The control weight should be around 1. You can use multiple IP-adapter face ControlNets. Make sure to adjust the control weights accordingly so that they sum up to 1.
控制权重应大约为 1。你可以使用多个 IP-adapter 面部 ControlNet。确保相应调整控制权重,使它们的总和为 1。
With the prompt:
A woman sitting outside of a restaurant in casual dress
Negative prompt:
ugly, deformed, nsfw, disfigured
提示词:
一个穿着休闲服坐在餐厅外的女人
负面提示词:
丑陋、畸形、nsfw、毁容
You get:
你将得到:
Consistent face with multiple IP-adapter face ControlNets.
使用多个 IP-adapter 面部 ControlNet,从而能得到一致的面部效果。
ControlNet 各项配置解释,ALL ControlNet settings explained
You see a lot of settings in the ControlNet extension! It can be a bit intimidating when you first use it, but let’s go through them one by one.
It’s going to be a deep dive. Take a break and go to the bathroom if you need to…
你会在 ControlNet 扩展中看到很多设置!初次使用时看起来可能有点懵逼,没事儿,我们可以注意深入了解下。
不过接下来的深入可能会有些烧脑,你可以提前休息下,上个厕所。
输入控制,Input controls
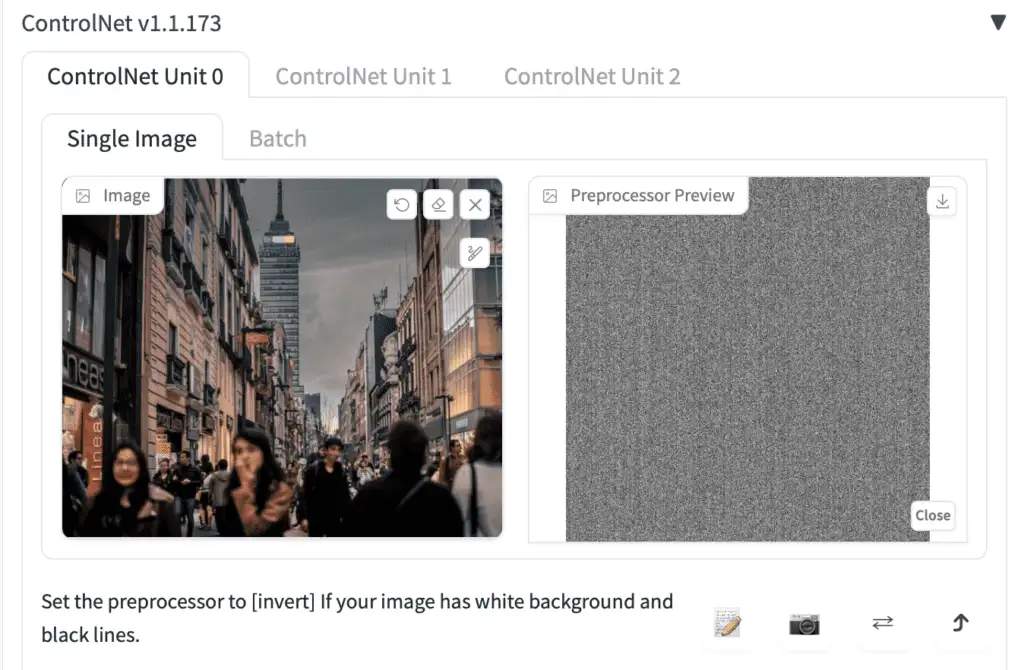
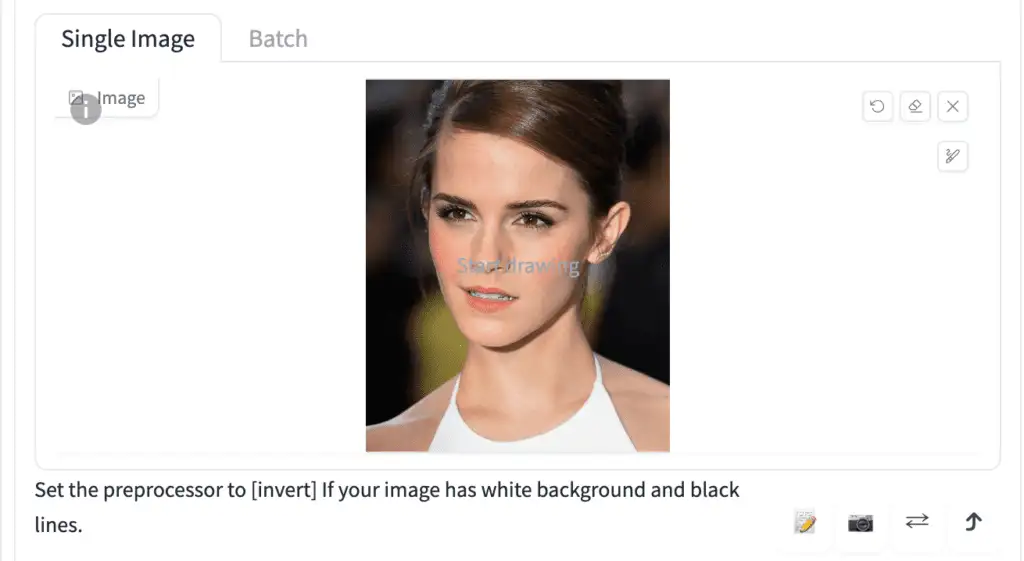
Image Canvas: You can drag and drop the input image here. You can also click on the canvas and select a file using the file browser. The input image will be processed by the selected preprocessor in the Preprocessor dropdown menu. A control map will be created.
图像画布:你可以将输入图像拖放到这里。你也可以点击画布并使用文件浏览器选择一个文件。输入图像将由 Preprocessor(预处理器) 下拉菜单中选择的预处理器处理。一个控制图将被创建。
Write icon: Create a new canvas with a white image instead of uploading a reference image. It is for creating a scribble directly.
书写图标:创建一个带有白色图像的新画布,而不是上传参考图像。用于直接创建涂鸦。
Camera icon: Take a picture using your device’s camera and use it as the input image. You will need to grant permission to your browser to access the camera.
相机图标:使用设备的相机拍照并将其用作输入图像。你需要授予浏览器访问相机的权限。
模型选择,Model selection
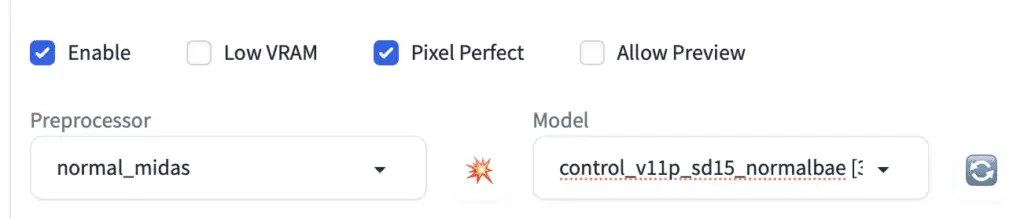
Enable: Whether to enable ControlNet.
启用(Enable):控制是否启用 ControlNet。
Low VRAM: For GPU with less than 8GB VRAM. It is an experimental feature. Check if you are out of GPU memory, or want to increase the number of images processed.
低 VRAM(Low VRAM): 用于显存少于 8GB 的 GPU。这是一个实验性功能。如果你的 GPU 内存不足,或者想增加处理的图像数量,请选中此选项。
Allow Preview: Check this to enable a preview window next to the reference image. I recommend you to select this option. Use the explosion icon next to the Preprocessor dropdown menu to preview the effect of the preprocessor.
允许预览(Allow Preview):选中此选项可在参考图像旁边启用预览窗口。我建议您选择此选项。使用预处理器下拉菜单旁边的爆炸图标,预览预处理器的效果。
Preprocessor: The preprocessor (called annotator in the research article) for preprocessing the input image, such as detecting edges, depth, and normal maps. None uses the input image as the control map.
预处理器(Preprocessor):用于预处理输入图像的预处理器(在研究文章中称为 annotator),例如检测边缘、深度和法线图。None 使用输入图像作为控制图。
Model: ControlNet model to use. If you have selected a preprocessor, you would normally select the corresponding model. The ControlNet model is used together with the Stable Diffusion model selected at the top of AUTOMATIC1111 GUI.
模型(Model):要使用的 ControlNet 模型。如果选择了预处理器,通常会选择相应的模型。ControlNet 模型与 AUTOMATIC1111 GUI 顶部选择的 Stable Diffusion 模型一起使用。
权重控制,Control Weight
Below the preprocessor and model dropdown menus, you will see three sliding bars to let you dial in the Control effect: Control Weight, Starting and ending Control Steps.
在预处理器和模型下拉菜单下方,您会看到三个滑动条,让您调整控制效果:控制权重(Control Weight)、起始和结束控制步骤(Starting and ending Control Steps)。
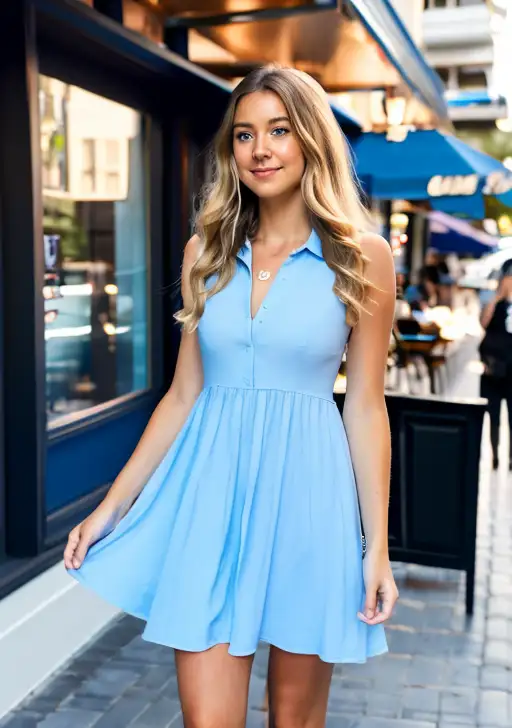
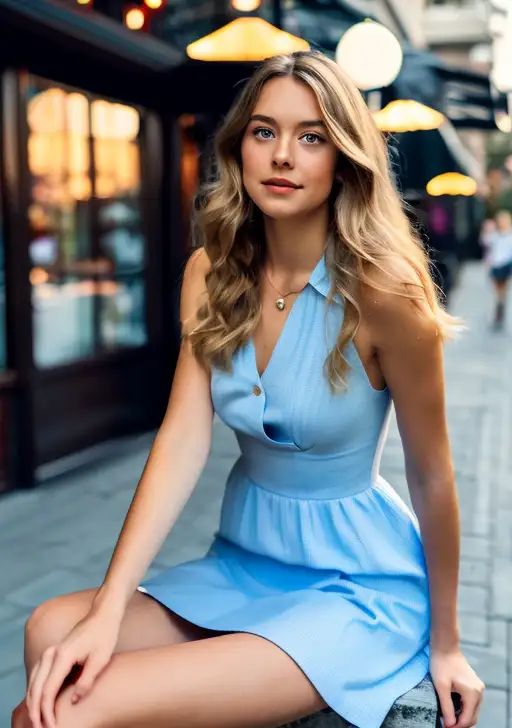
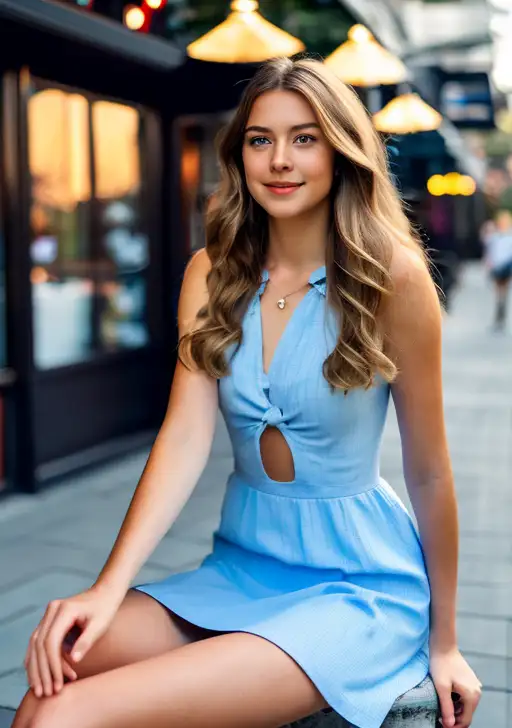
I will use the following image to illustrate the effect of control weight. It’s an image of a girl sitting down.
我将使用以下图片来说明控制权重的效果。这是一个坐着的女孩的图片。
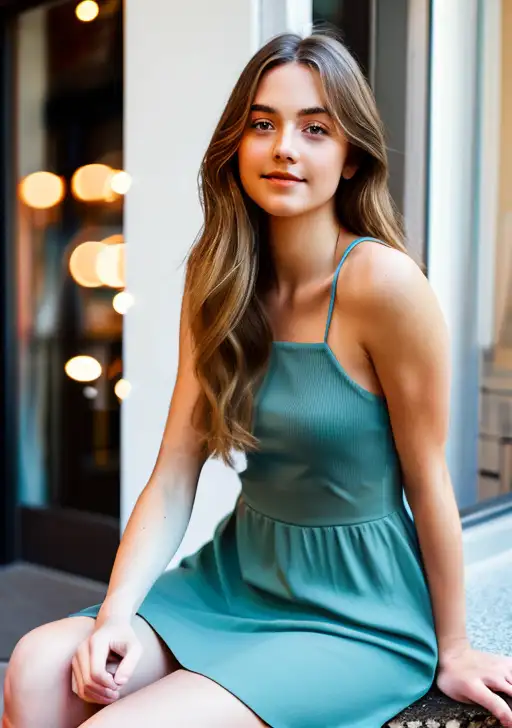
But in the prompt, I will ask to generate a woman standing up.
但在提示词(prompt)中,我将要求生成站立的女人。
full body, a young female, highlights in hair, standing outside restaurant, blue eyes, wearing a dress, side light
整个身体,一个年轻女性,头发上的亮点,站在餐厅外,蓝眼睛,穿着连衣裙,侧光
Weight: How much emphasis to give the control map relative to the prompt. It is similar to keyword weight in the prompt but applies to the control map.
Weight: 相比于提示词(prompt),给控制图一个重点强调程度程度权重。这类似于提示中的关键词权重,但适用于控制图。
The following images are generated using ControlNet OpenPose preprocessor and with the OpenPose model.
以下图片是使用 ControlNet OpenPose 预处理器和 OpenPose 模型生成的。
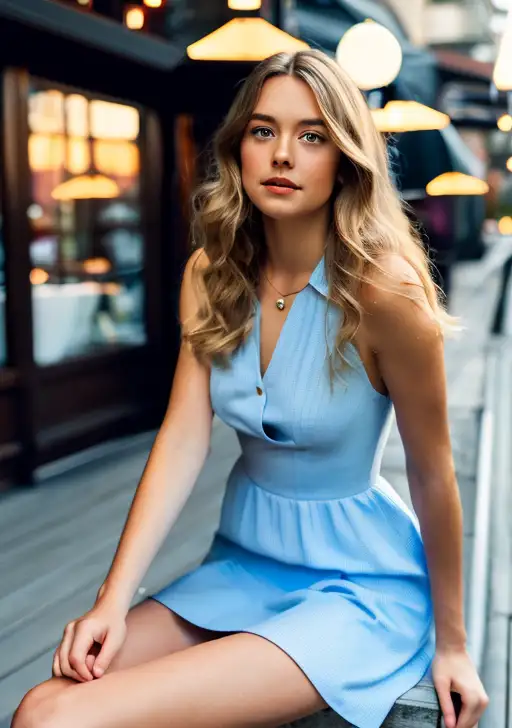
Weight 1
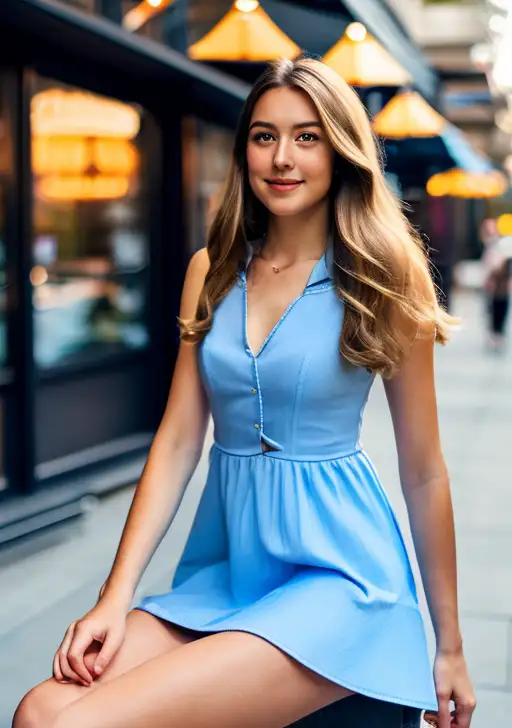
Weight 0.5
Weight 0.3
Weight 0.1
As you can see, Controlnet weight controls how much the control map is followed relative to the prompt. The lower the weight, the less ControlNet demands the image to follow the control map.
我们可以看到,ControlNet 权重控制了控制图相对于提示的影响程度。权重越低,ControlNet 要求图像遵循控制图的程度就越低。
Starting ControlNet step: The step ControlNet first applies. 0 means the very first step.
开始 ControlNet 步骤:ControlNet 首次应用的步骤。0 表示第一个步骤。
Ending ControlNet step: The step ControlNet ends. 1 means the last step.
结束 ControlNet 步骤:ControlNet 结束的步骤。1 表示最后一个步骤。
Let’s fix the starting step fixed at 0 and change the ending ControlNet step to see what happens.
让我们将开始步骤固定为 0,并改变结束 ControlNet 步骤,看看会发生什么。
Ending ControlNet step: 1

Ending ControlNet step: 0.3
Ending ControlNet step: 0.2
Ending ControlNet step: 0.1
Since the initial steps set the global composition (The sampler removes the maximum amount of noise in each step, and it starts with a random tensor in latent space), the pose is set even if you only apply ControlNet to as few as 20% of the first sampling steps.
由于初始步骤设置了全局构图(采样器在每个步骤中去除最大数量的噪声,并且它从潜在空间中的随机张量开始),即使你仅将 ControlNet 应用于前 20% 的采样步骤,人的姿势也已经被确定了。
In contrast, changing the ending ControlNet step has a smaller effect because the global composition is set in the beginning steps.
相比之下,改变 结束 ControlNet 步骤 的影响较小,因为全局构图是在初始步骤中设置的。
控制模式,Control Mode

Balanced: The ControlNet is applied to both conditioning and unconditoning in a sampling step. This is the standard mode of operation.
平衡(Balanced):ControlNet 在一个采样步骤中同时应用于条件化和非条件化。这是标准操作模式。
My prompt is more important: The effect of ControlNet is gradually reducing over the instances of U-Net injection (There are 13 of them in one sampling step). The net effect is your prompt has more influence than the ControlNet.
提示词更重要(My prompt is more important):ControlNet 的效果会在 U-Net 注入的实例中逐渐减弱(在一个采样步骤中有 13 个实例)。总体效果是你的提示比 ControlNet 的影响更大。
ControlNet is more important: Turn off ControlNet on unconditioning. Effectively, the CFG scale also acts as a multiplier for the effect of the ControlNet
ControlNet 更重要:在非条件化中关闭 ControlNet。实际上,CFG 缩放也会作为 ControlNet 效果的乘数。
.
Don’t worry if you don’t fully understand how they actually work. The option labels accurately state the effect.
如果你不完全理解它们的实际运作原理也没关系。选项标签准确地说明了效果。
尺寸调整模式,Resize mode

Resize mode controls what to do when the size of the input image or control map is different from the size of the images to be generated. You don’t need to worry about these options if they are in the same aspect ratio.
Resize mode(调整尺寸模式) 控制输入图像或控制图(control map)的尺寸与要生成的图像的尺寸不同时应采取的操作。如果它们具有相同的长宽比,则无需担心这些选项。
I will demonstrate the effect of resize modes by setting text-to-image to generate a landscape image, while the input image/control map is a portrait image.
我将通过将文本转图像设置为生成横向图像,而输入图像/控制图(control map)为纵向图像,来演示调整模式的效果。
Just Resize: Scale the width and height of the control map independently to fit the image canvas. This will change the aspect ratio of the control map.
Just Resize(仅调整尺寸):独立地缩放控制图的宽度和高度,以适应图像画布。这将改变控制图的长宽比。
The girl now needs to lean forward so that she’s still within the canvas. You can create some interesting effect with this mode.
现在,女孩需要向前倾斜,以便仍然在画布内。您可以利用这种模式创建一些有趣的效果。

Control map
Generated image
生成的图像
Just Resize scales the control map to fit the image canvas.
Just Resize(只调整尺寸) 将控制图(control map)缩放以适应图像画布。
Crop and Resize: Fits the image canvas to be within the control map. Crop the control map so that it is the same size as the canvas.
Crop and Resize(裁剪并调整) :使图像画布适应控制图(control map)。裁剪控制图(control map),使其与画布大小相同。
Because the control map is cropped at the top and the bottom, so does our girl.
由于控制图(control map)在顶部和底部被裁剪,所以我们的女孩也被裁剪了。
Control map
控制图

Generated image
生成图片
Crop and resize fits the image canvas to and crops the control map.
Crop and resize(裁剪并调整) 将图像画布适应并裁剪控制图(control map)。
Resize and fill: Fit the whole control map to the image canvas. Extend the control map with empty values so that it is the same size as the image canvas.
Resize and fill(调整并填充):将整个控制图(control map)适应图像画布。使用空值扩展控制图(control map),使其与图像画布大小相同。
Compared to the original input image, there are more spaces on the side.
与原始输入图像相比,侧面有更多空间。
Control map
控制图
Generated image
生成的图片
Resize and fill fits the whole control map to the image canvas and extends the control map.
Resize and fill(调整并填充) 将整个控制图(control map)适应图像画布并扩展控制图(control map)。
OK, now (hopefully) you know all the settings. Let’s explore some ideas for using ControlNet.
好的,现在(希望)你已经了解了所有的设置。让我们探索一些使用 ControlNet 的想法。
多重控制,Multiple ControlNets
You can use ControlNets multiple times to generate an image. Let’s walk through an example.
你可以多次使用 ControlNets 来生成图像。让我们通过一个例子来说明。
Model: Protogen v2.2
Prompt:
An astronaut sitting, alien planet
模型: Protogen v2.2
提示词:
一名坐在外星球上的宇航员
Negative prompt:
disfigured, deformed, ugly
反向提示词:
变形的、畸形的、丑陋的
This prompt generates images with varieties of composition.
这个提示会生成具有多种构图的图像。
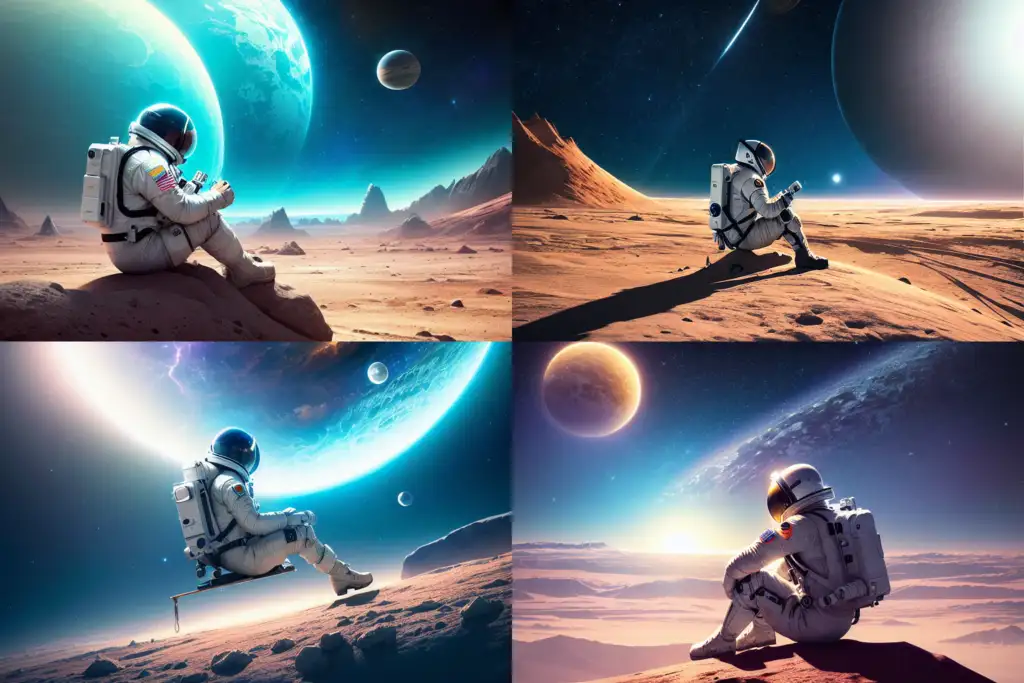
Let’s say I want to control the composition of the astronaut and background independently. We can use multiple (in this case 2) ControlNets for this.
假设我想独立控制宇航员和背景的构图。我们可以使用多个(在这种情况下是2个) ControlNets 来实现这一点。
I will use this reference image for fixing the pose of the astronaut.
我将使用这张参考图像来固定宇航员的姿势。

Settings for ControlNet 0:
- Enable: Yes
- Preprocessor: OpenPose
- Model: control_xxxx_openpose
- Resize mode: Resize and Refill (Since my original reference image is in portrait)
ControlNet 0(控制网络 0)设置:
- Enable(启用): 是
- Preprocessor(预处理器): OpenPose
- Model(模型): control_xxxx_openpose
- Resize mode(调整模式): 调整并填充(因为我的原始参考图像是纵向的)

I will use the following reference image for the background.
我将使用以下参考图像作为背景。

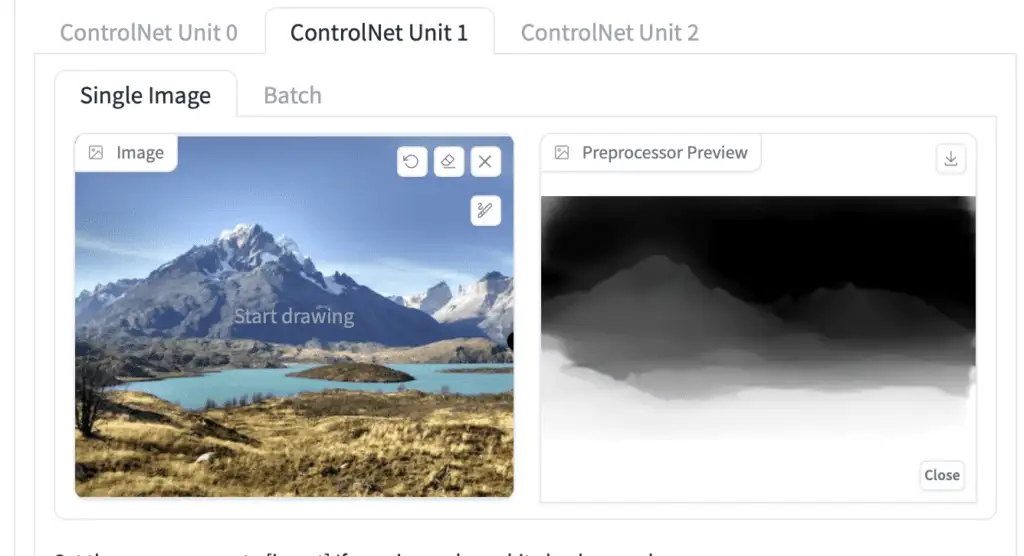
The depth models are perfect for this purpose. You will want to play with which depth model and setting gives the depth map you want.
深度模型非常适合做这个事情,你可以尝试不同的深度模型和设置,以获得你想要的深度图。
Settings for ControlNet 1:
- Enable: Yes
- Control Weight: 0.45
- Preprocessor: depth_zeo
- Model: control_XXXX_depth
- Resize mode: Crop and resize
ControlNet 1(控制网络 1)设置:
- Enable(启用): 是
- Control Weight(控制权重): 0.45
- Preprocessor(预处理器): depth_zeo
- Model(模型): control_XXXX_depth
- Resize mode(调整模式): 裁剪并调整
Now I can control the composition of the subject and the background independently:
现在我可以独立控制主体和背景的构图了。


Tips:
- Adjust ControlNet weights if one of them does not do its job.
- Pay attention to the resize mode if you have reference images of different sizes of the final image.
提示:
- 如果其中某一个ControlNet没有达到预期效果,调整ControlNet的权重。
- 如果你有不同尺寸的参考图像和最终图像,请注意调整模式。
使用ControlNet的一些脑洞,Some ideas for using ControlNet
复制体态体姿,Copying human pose
Perhaps the most common application of ControlNet is copying human poses. This is because it is usually hard to control poses… until now! The input image can be an image generated by Stable Diffusion or can be taken from a real camera.
也许 ControlNet 最常见的应用是复制人类姿势。这是历史上,人体的姿势是很难控制的……
直到现在,终于解决了,找一个Stable Diffusion 生成的图像、也可以来自真实相机拍摄的照片,就可以使用ControlNet 复制其中人体的姿势,是不是很厉害!
OpenPose model
To use ControlNet for transferring human poses, follow the instructions to enable ControlNet in AUTOMATIC1111. Use the following settings.
要将 ControlNet 用于转换人体姿势,请按照说明启用 AUTOMATIC1111 中的 ControlNet。使用以下设置。
Preprocessor: openpose
Model: control_…._openpose
Make sure you have checked Enable.
确保已勾选Enable(启用)。
Here are a few examples.
以下是一些示例。
示例1:从图中复制一个人的体态,Example 1: Copying pose from an image
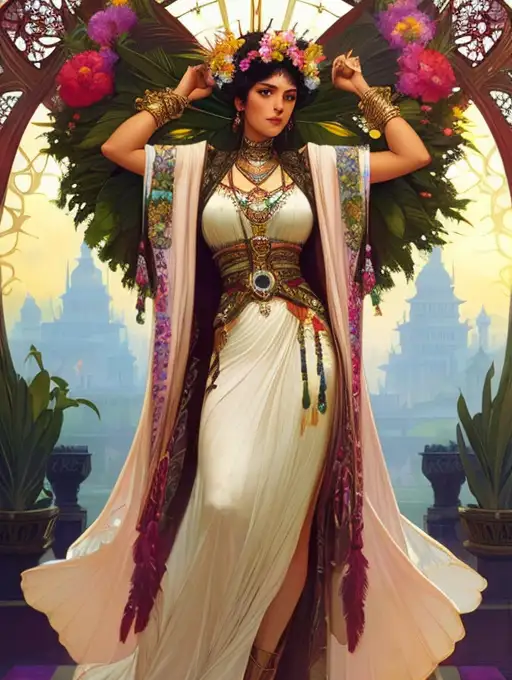
As a basic example, let’s copy the pose of the following image of a woman admiring leaves.
看一个基本的示例,让我们复制下面这张图像中的女人欣赏树叶的姿势。
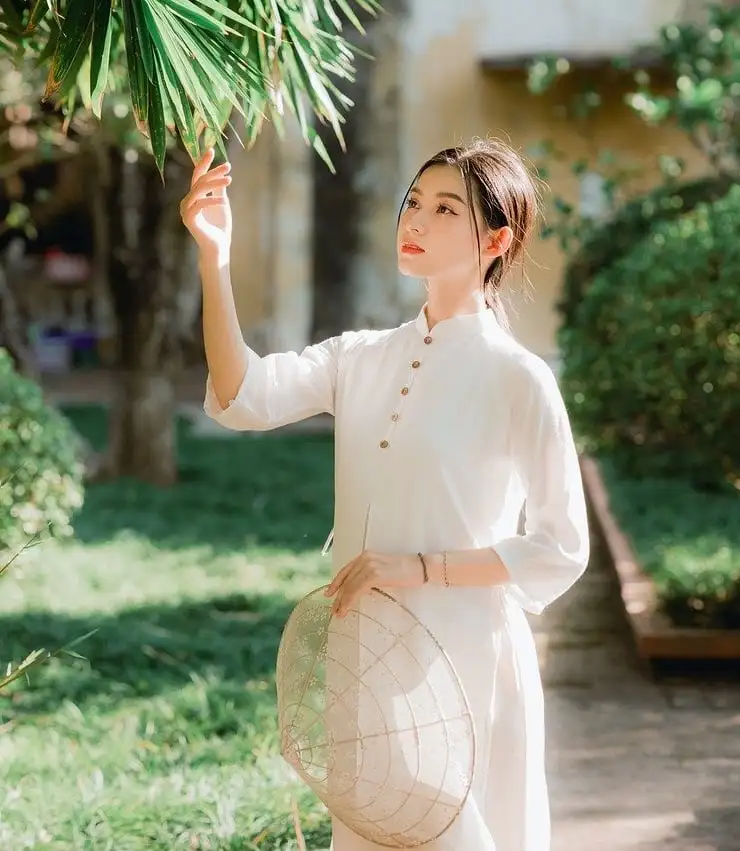
Input image
输入图片
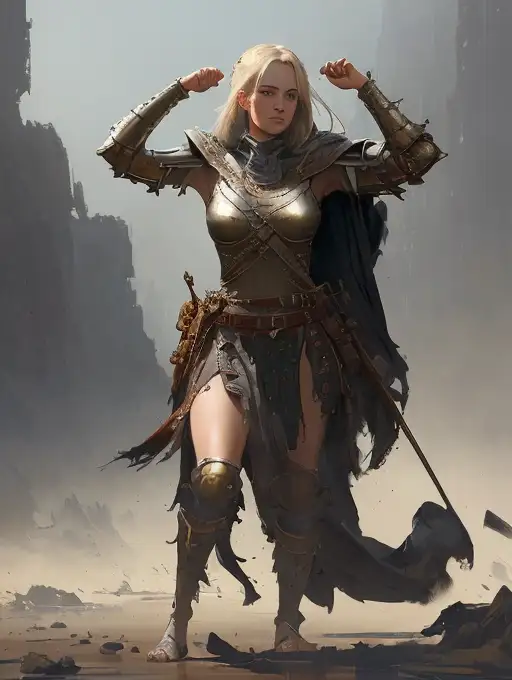
Using various models and prompts, you can dramatically change the content but keep the pose.
使用不同的模型和提示,你可以很明显的改变图片中的内容,但人的姿势仍然可以保持不变。

Dreamlike Photoreal model
Anything v3 model
DreamShaper model
Anything v3 model
示例2:杂糅一个电影场景,Example 2: Remix a movie scene
You can recast the iconic dance scene in Pulp Fiction to some yoga exercises in the park.
你可以将《低俗小说》中标志性的舞蹈场景重新演绎成公园里的瑜伽练习。
This uses ControlNet with DreamShaper model.
这使用了 DreamShaper 模型 的 ControlNet。
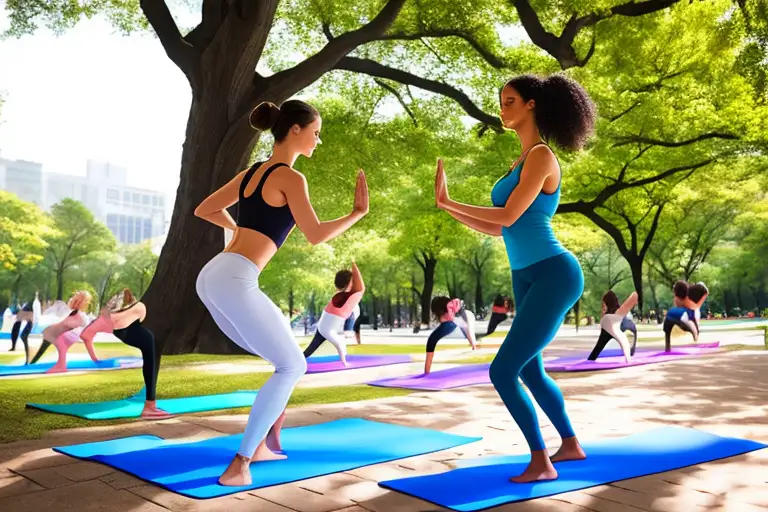
Prompt: photo of women doing yoga, outside in a park. Negative prompt: disfigured, ugly, bad, immature
提示词(prompt):在公园外做瑜伽的女性照片。
负面提示:变形,丑陋,糟糕,不成熟
This is with the same prompt, but using Inkpunk Diffusion model. (You will need to add the activation keyword nvinkpunk to the prompt)
这是使用Inkpunk Diffusion 模型的相同提示。(您需要将激活关键词nvinkpunk添加到提示中)
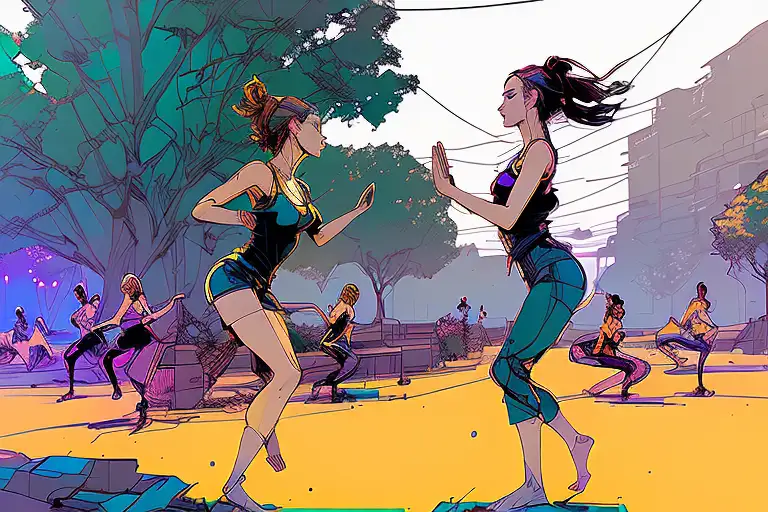
Same prompt as ink punk diffusion model.
相同的提示词,使用 Inkpunk Diffusion 模型时候的效果。
使用ControlNet 风格化图片,Stylize images with ControlNet
使用提示词,Using prompts
Below are with v1.5 model but various prompts to achieve different styles. ControlNet with various preprocessing was used. It is best to experiment and see which one works best.
以下是使用 v1.5 模型,但使用不同的 提示词(prompt) 来实现不同的风格。使用了不同的预处理的 ControlNet。最好进行实验,看看哪种效果最好。
Pixel Art, Canny
像素风格,边缘预处理器
3D rendering, Canny
3D渲染,边缘预处理器
Black and white, HED
黑白,HED样式
water color, Normal
水采,Normal预处理
Using keywords in prompt to stylize image with ControlNet.
使用提示词(prompt)中的关键词来使用 ControlNet 对图像进行风格化。
使用模型,Using models
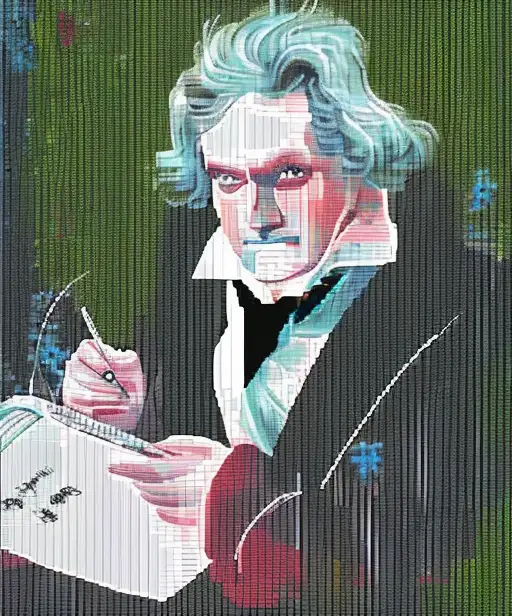
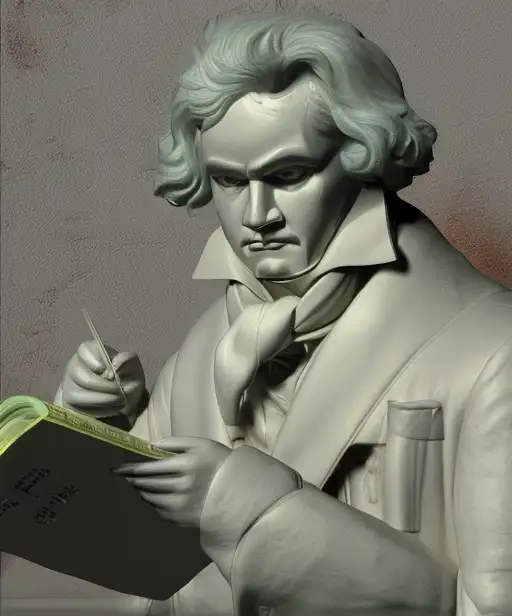
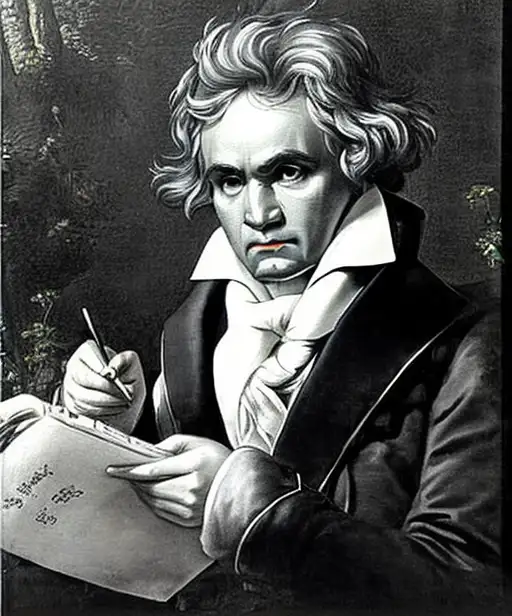
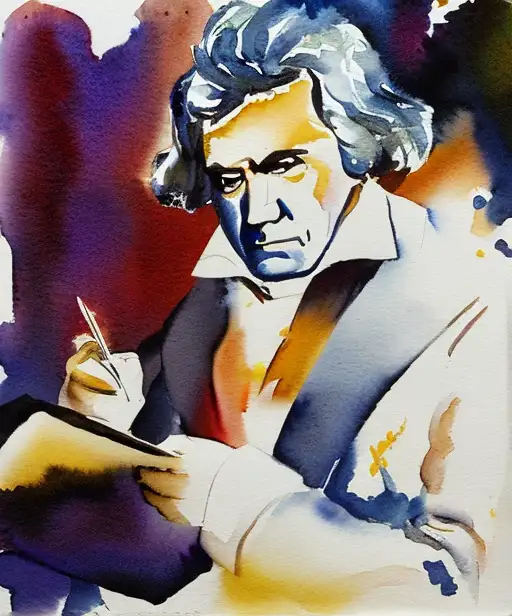
You can also use models to stylize images. Below are generated using the prompt “Painting of Beethoven” with Anythingv3, DreamShaper, and OpenJourney models.
你也可以使用模型来对图像进行风格化。以下是使用提示“贝多芬的画作”,分别使用Anythingv3、DreamShaper和OpenJourney模型生成的图像。
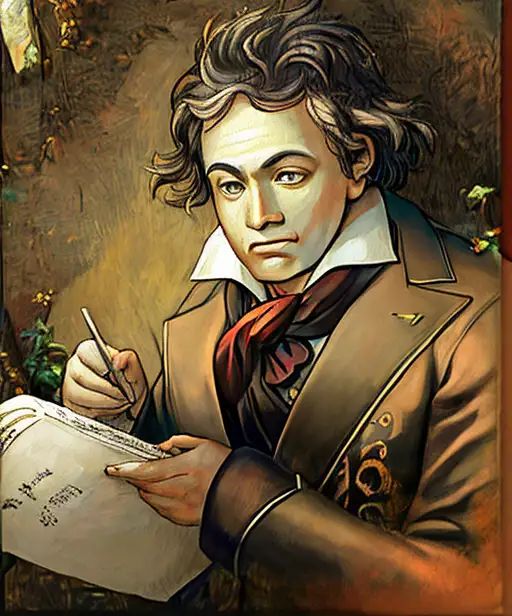
Anything v3
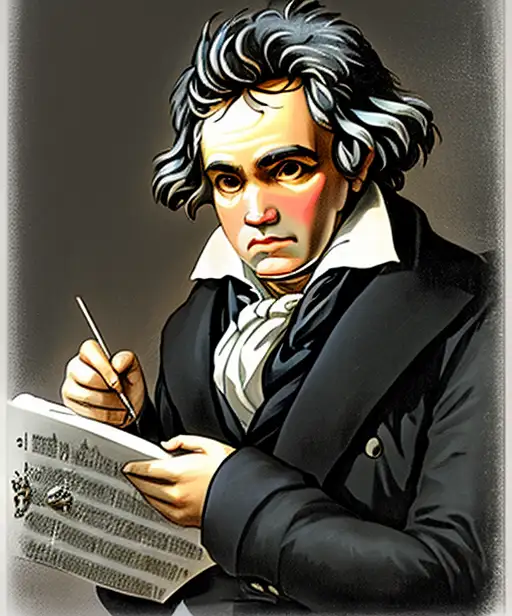
DreamShaper
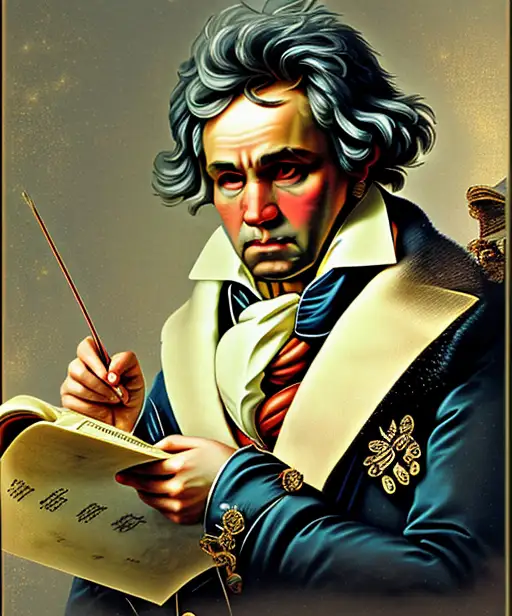
OpenJourney
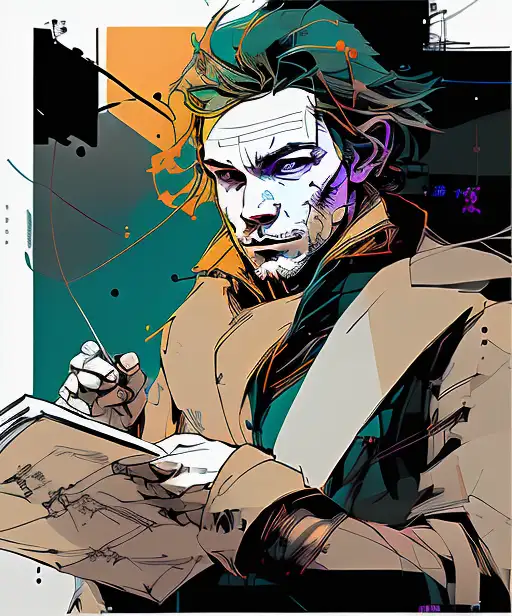
Inkpunk Diffusion
通过Magic Pose来控制体态,Controlling poses with Magic Pose
Sometimes you may be unable to find an image with the exact pose you want. You can create your custom pose using software tools like Magic Poser (credit).
有时你可能找不到具有你想要的确切姿势的图像。你可以使用诸如 Magic Poser 这样的软件工具来创建自定义姿势。(来源)
Step 1: Go to the Magic Poser website.
第一步:进入 Magic Poser 网站。
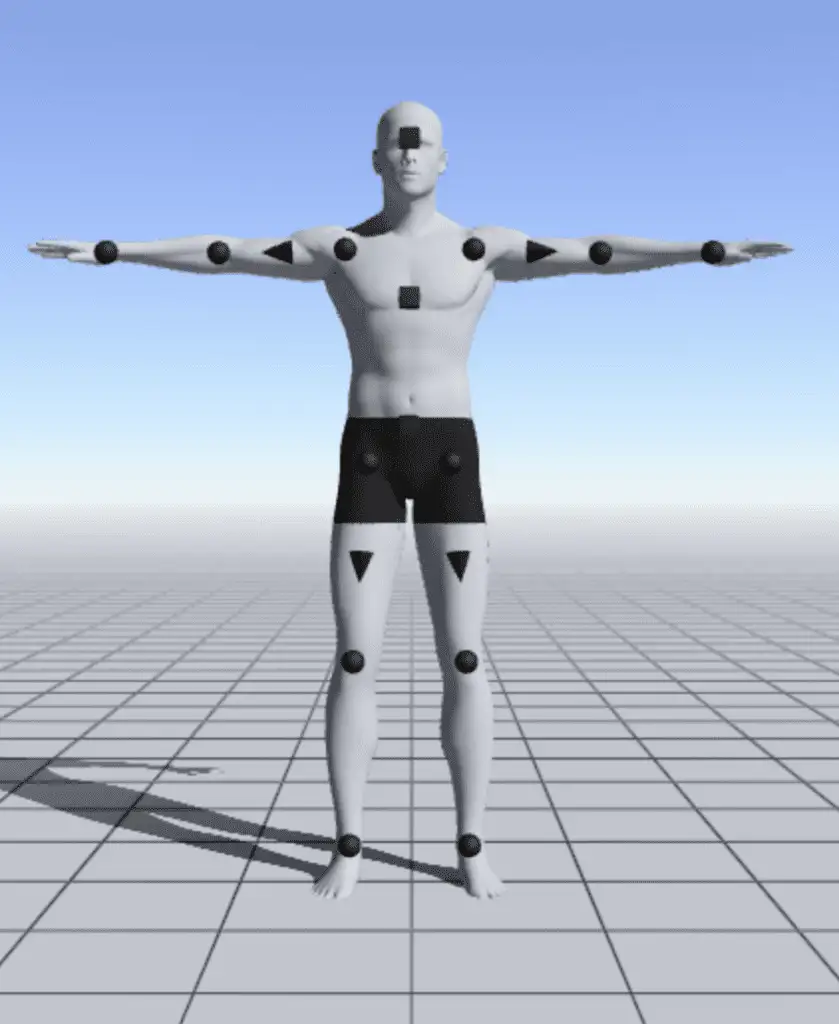
Step 2: Move the keypoints of the model to customize the pose.
第二步:打开冰箱,不对。是你自己挪动定制一下人体模特的关键身体部位姿势;
Step 3: Press Preview. Take a screenshot of the model. You should get an image like the one below.
第三步:点击预览,然后截图。你就可以得到类似下面这样的一张图。
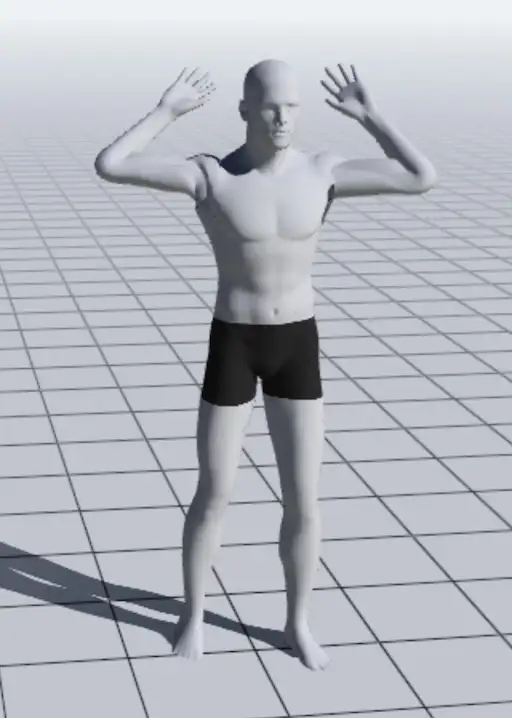
Human pose from Magic Poser.
来自 Magic Poser 的人体姿势。
Step 4: Use OpenPose ControlNet model. Select the model and prompt of your choice to generate images.
步骤 4:使用 OpenPose ControlNet 模型。选择你喜欢的模型和提示词prompt 来生成图像。
Below are some images generated using 1.5 model and DreamShaper model. The pose was copied well in all cases.
以下是使用1.5 模型和DreamShaper模型生成的一些图像。我们可以看到,无论哪种case场景,人体的姿势都被很好地复制了。

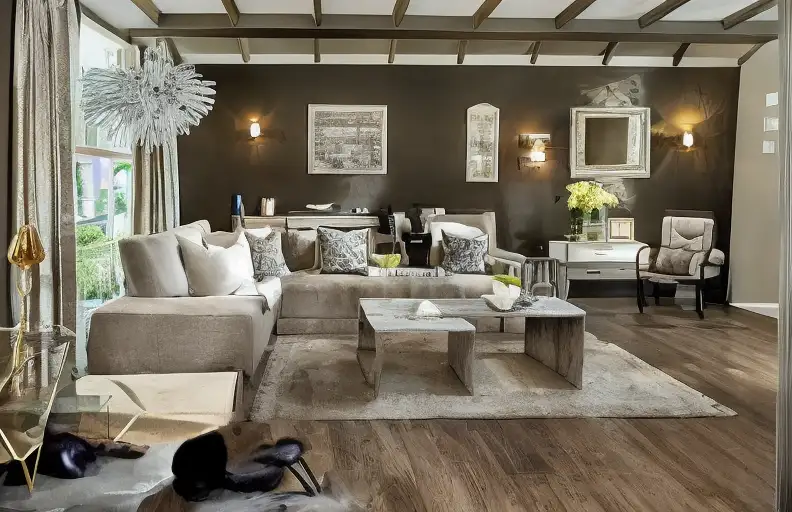
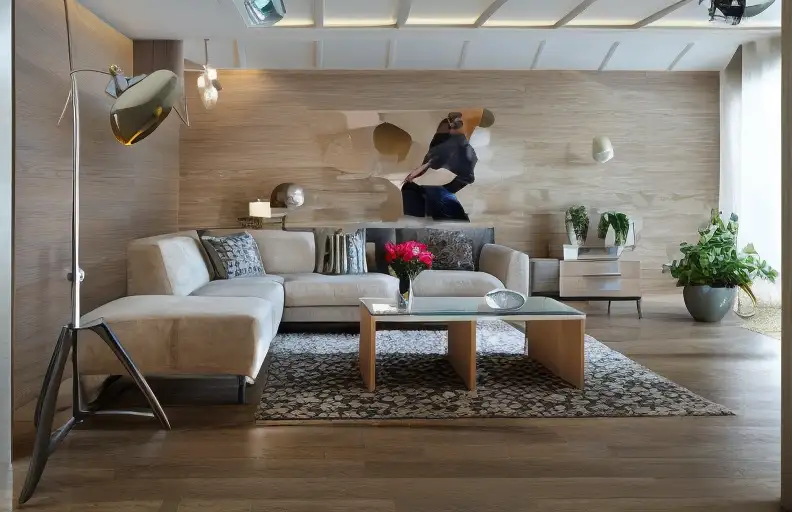
室内设计的一些脑洞,Interior design ideas
You can use Stable Diffusion ControlNet’s straight-line detector MLSD model to generate interior design ideas. Below are the ControlNet settings.
你可以使用 Stable Diffusion ControlNet 的直线检测器(预处理器) MLSD 模型来生成室内设计的想法。以下是 ControlNet 的设置。
Preprocessor: mlsd
Model: mlsd
Start with any interior design photos. Let’s use the one below as an example.
Preprocessor(预处理器): mlsd
Model(模型): mlsd
Start with any interior design photos. Let’s use the one below as an example.
随便照一张室内设计的照片,比如咱们以下面的照片为例。
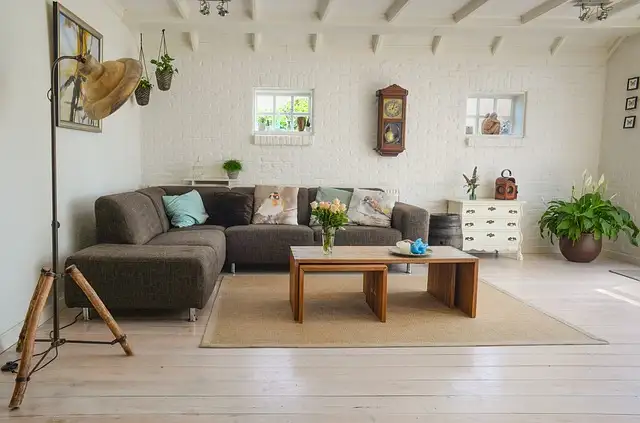
Input image for interior design.
室内设计的输入图像。
Prompt:
提示词:
award winning living room
屡获殊荣的客厅
Model: Stable Diffusion v1.5
模型:Stable Diffusion v1.5
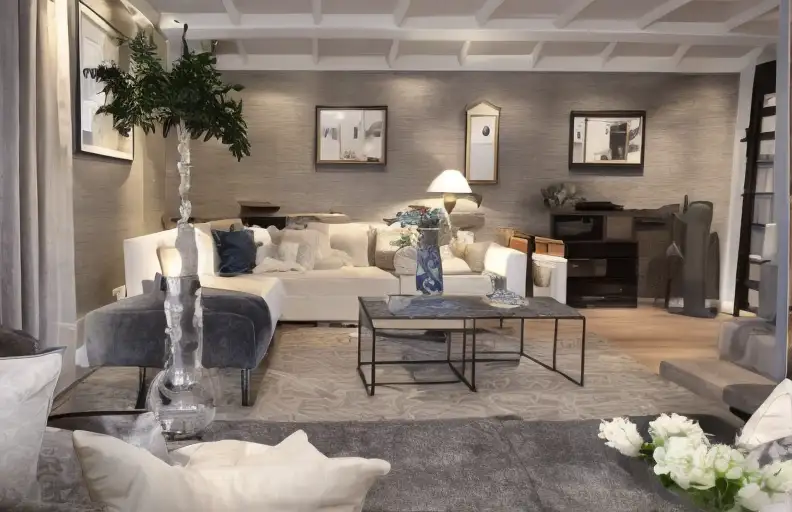
Below are a few design ideas generated.
以下是生成的一些设计结果。
Alternatively, you can use the depth model. Instead of straight lines, it will emphasize preserving the depth information.
或者,你也可以使用深度Depth 模型。与直线模型不同,它会强调保留深度信息。
Preprocessor: Depth Midas
Model: Depth
Generated images:
生成的图像:
Stable Diffusion 深度模型和 ControlNet 的区别,Difference between the Stable Diffusion depth model and ControlNet
Stability AI, the creator of Stable Diffusion, released a depth-to-image model. It shares a lot of similarities with ControlNet, but there are important differences.
稳定人工智能(Stability AI)发布了一个depth-to-image模型,这个模型与 ControlNet 有很多相似之处,但也有重要的区别。
Let’s first talk about what’s similar.
- They are both Stable Diffusion models…
- They both use two conditionings (a preprocessed image and text prompt).
- They both use MiDAS to estimate the depth map.
首先让我们讨论一下它们的相似之处。
The differences are
- Depth-to-image model is a v2 model. ControlNet can be used with any v1 or v2 models. This point is huge because v2 models are notoriously hard to use. People have a hard time generating good images. The fact that ControlNet can use any v1 model not only opened up depth conditioning to the v1.5 base model, but also thousands of special models that were released by the community.
- ControlNet is more versatile. In addition to depth, it can also condition with edge detection, pose detection, and so on.
- ControlNet’s depth map has a higher resolution than depth-to-image’s.
它们的区别在于:
- depth-to-image模型是一个 v2 模型。ControlNet 可以与任何 v1 或 v2 模型一起使用。这一点非常重要,因为 v2 模型因为难以使用而臭名昭著。人们很难生成出色的图像。ControlNet 可以使用 任何 v1 模型不仅打开了深度调节到 v1.5 基础模型 的可能性,还使得成千上万由社区发布的特殊模型都能被应用。
- ControlNet 更加多功能。除了深度之外,它还可以与边缘检测、姿势检测等进行调节。
- ControlNet 的深度图分辨率比深度到图像的要高。
ControlNet如何工作?How does ControlNet work?
This tutorial won’t be complete without explaining how ControlNet works under the hood.
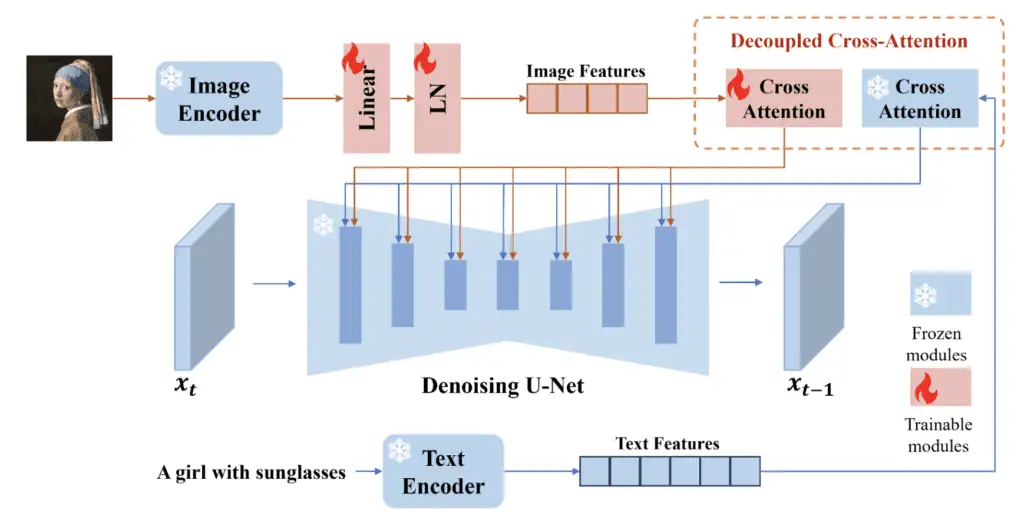
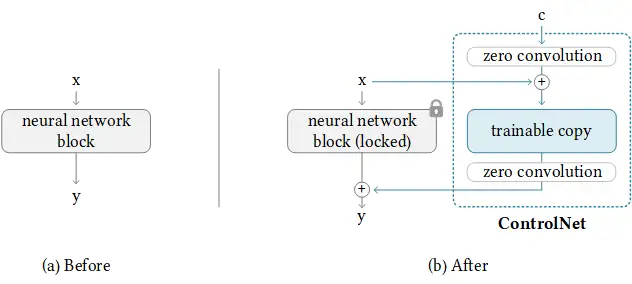
ControlNet works by attaching trainable network modules to various parts of the U-Net (noise predictor) of the Stable Diffusion Model. The weight of the Stable Diffusion model is locked so that they are unchanged during training. Only the attached modules are modified during training.
本篇教程,如果不解释 ControlNet 的内部工作原理,就显得有点不够完整。
ControlNet 通过将可训练的网络模块附加到 Stable Diffusion 模型的各个部分(噪声预测器)上来工作。在训练过程中,Stable Diffusion的权重不会改变,因为它们被锁定了,只有附加的模块在训练过程中可以被改变。
The model diagram from the research paper sums it up well. Initially, the weights of the attached network module are all zero, making the new model able to take advantage of the trained and locked model.
来自研究论文的模型图很好地总结了这一点。最初,附加的网络模块的权重都是零,使得新模型能够充分利用已经训练和锁定的模型。
During training, two conditionings are supplied along with each training image. (1) The text prompt, and (2) the control map such as OpenPose keypoints or Canny edges. The ControlNet model learns to generate images based on these two inputs.
在训练过程中,对每个训练图像提供了两种条件:(1) 文本提示,和(2) 控制图(control map),例如 OpenPose 关键点或 Canny 边缘。ControlNet 模型根据这两个输入学习生成图像。
Each control method is trained independently.
每种控制方法都是独立训练的。
更多相关阅读,More readings
- Some images generated with Magic Poser and OpenPose.
- Research article: Adding Conditional Control to Text-to-Image Diffusion Models (Feb 10, 2023)
- ControlNet v1.0 Github page
- ControlNet v1.1 model files (HuggingFace)
- ControlNet v1.1 Github page
- ControlNet Extension for AUTOMATIC1111 Web-UI