一、Stable Diffusion – Windows系统本地按安装部署
一、前置软件安装
1、Python
目前官方推荐安装 Python 3.10.6版本。
Python 下载地址:https://www.python.org/downloads/
安装完成以后,配置环境变量,在终端查看是否安装成功及安装的版本
Python -V
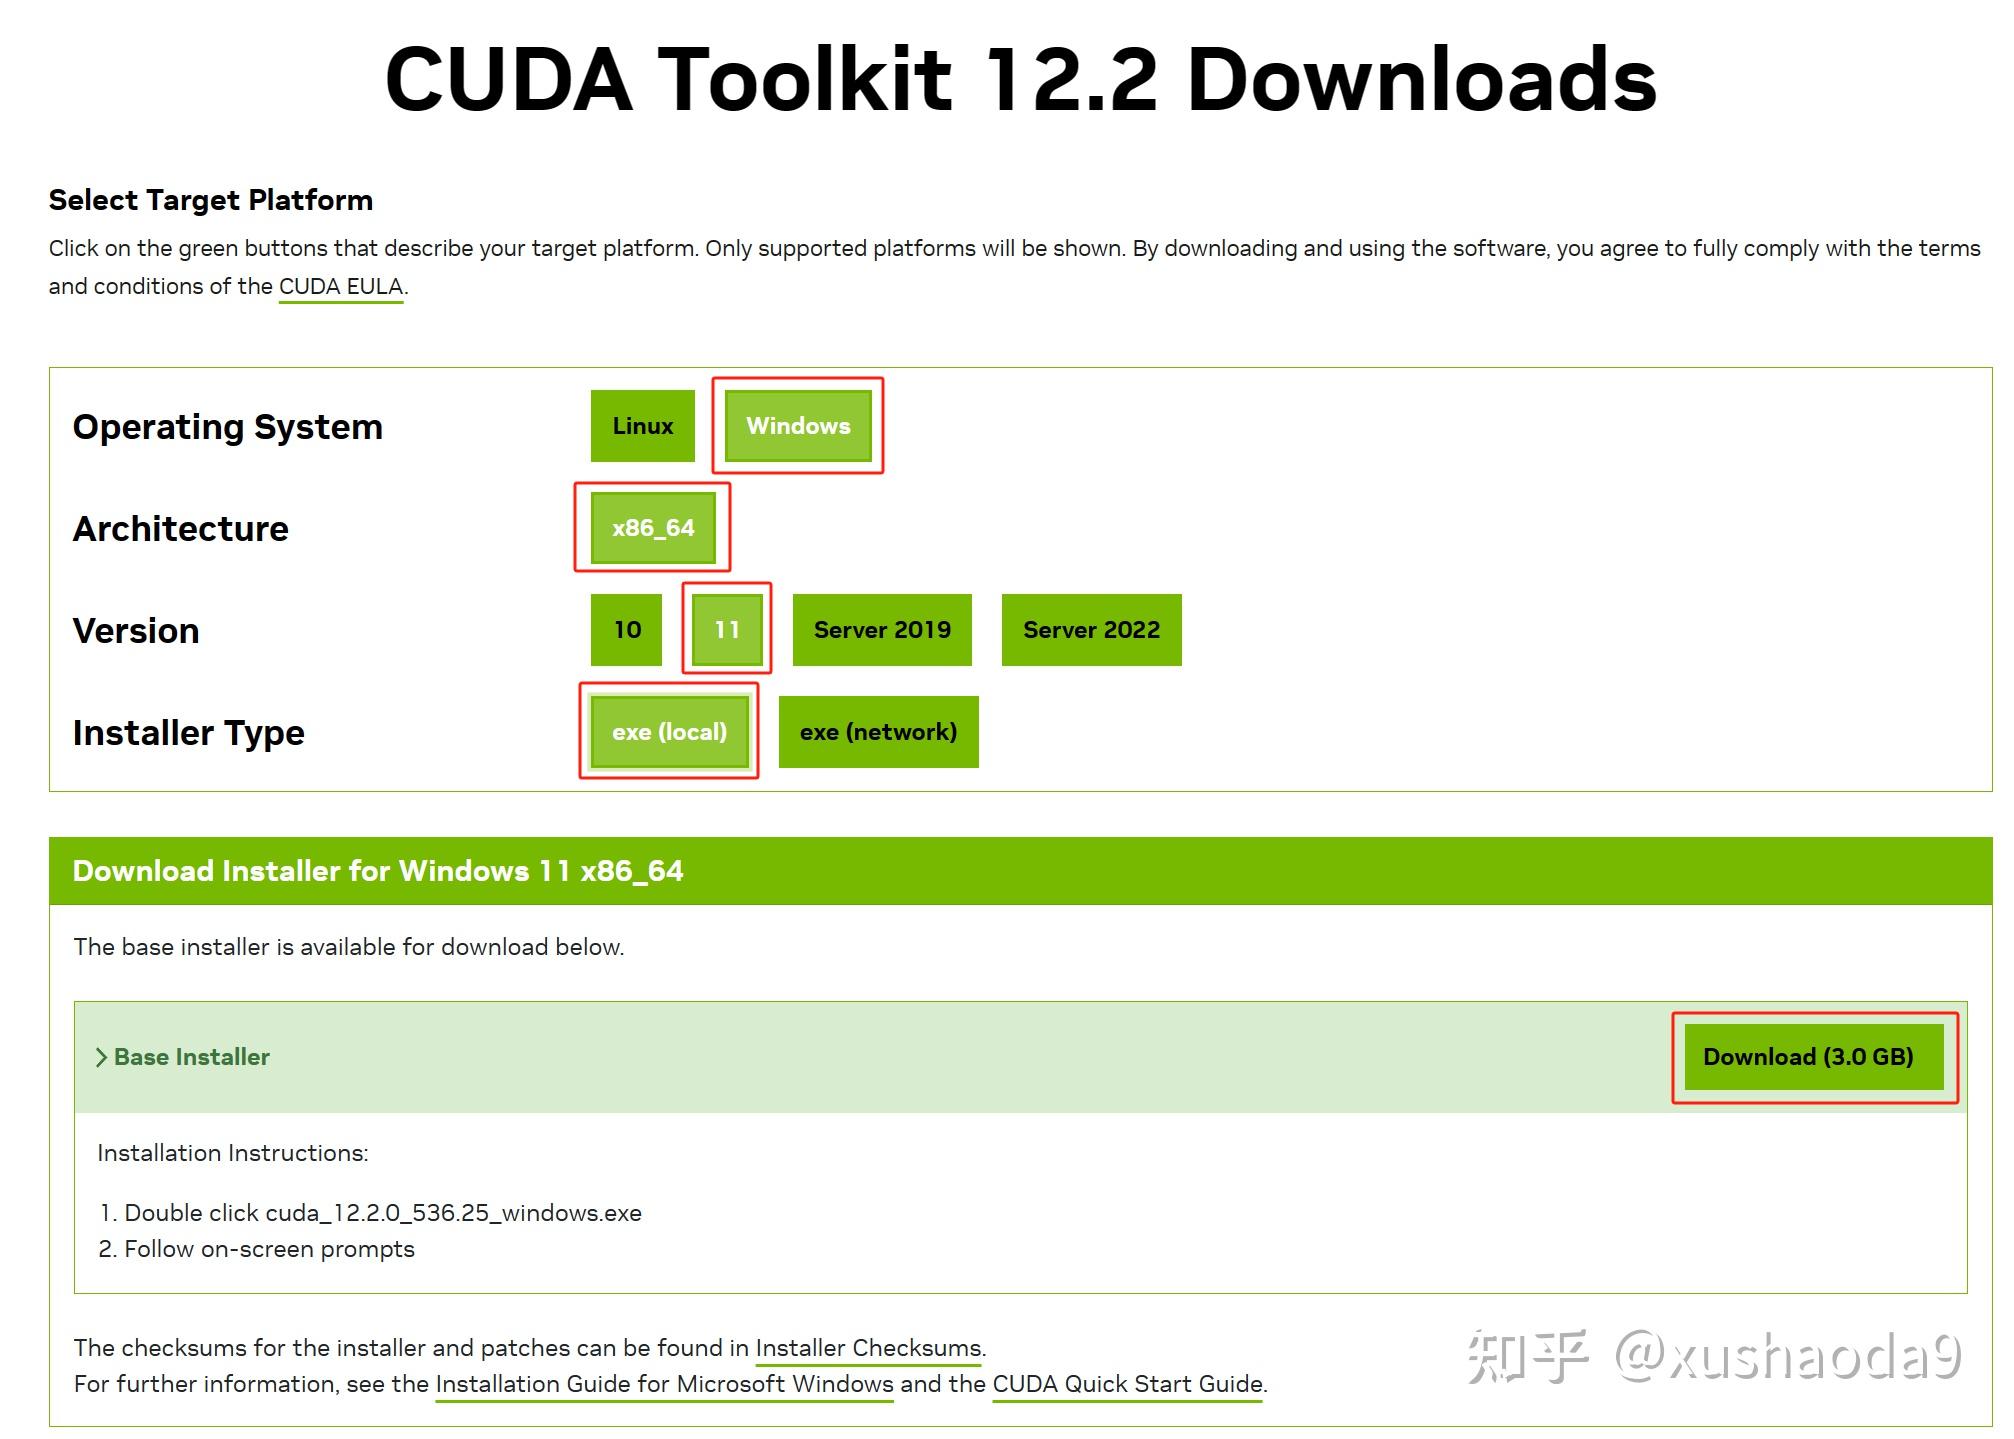
2、CUDA
在终端查询当前电脑显卡适用的CUDA版本
nvidia-smi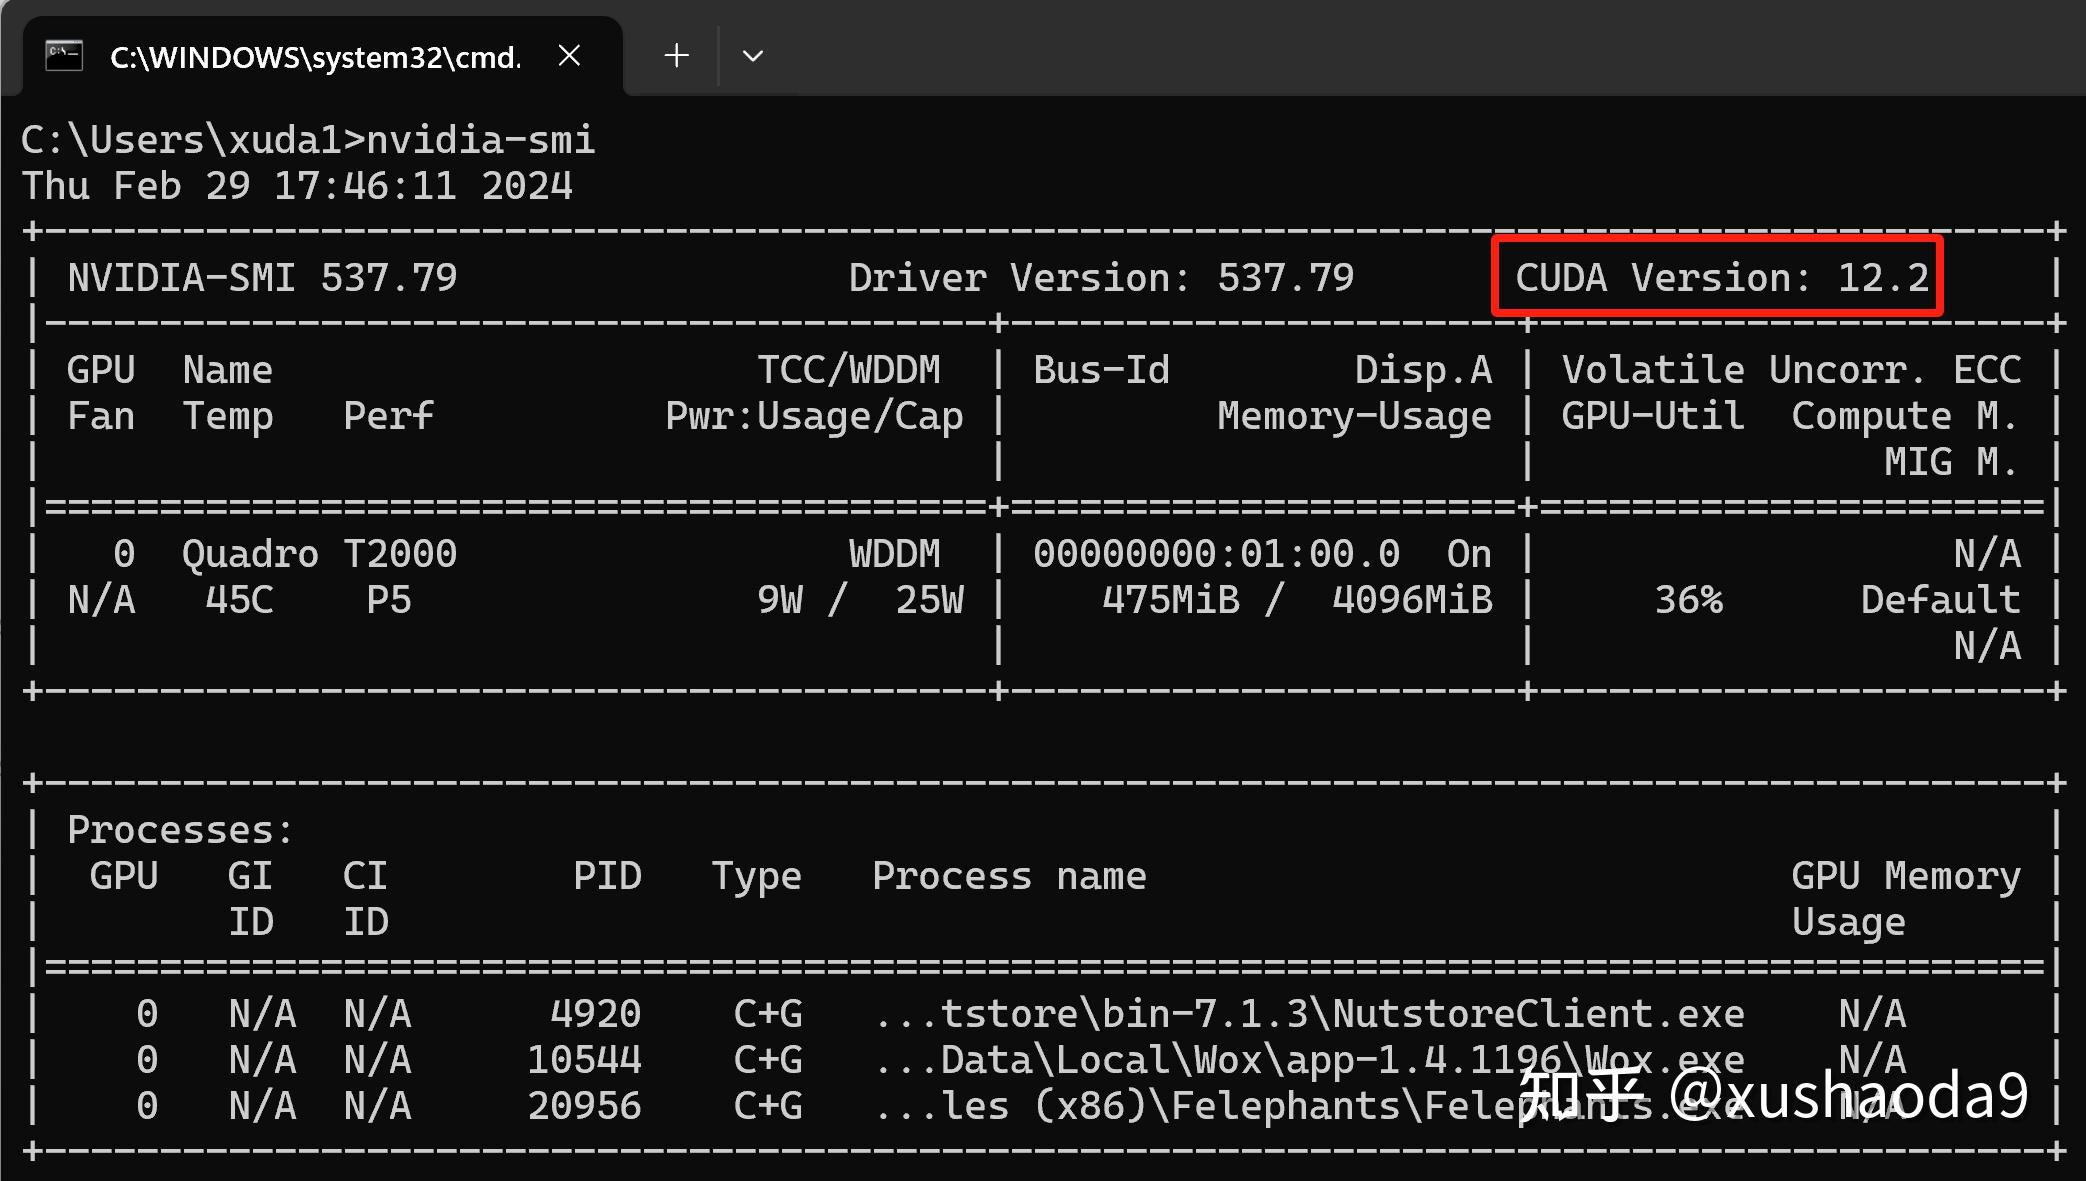
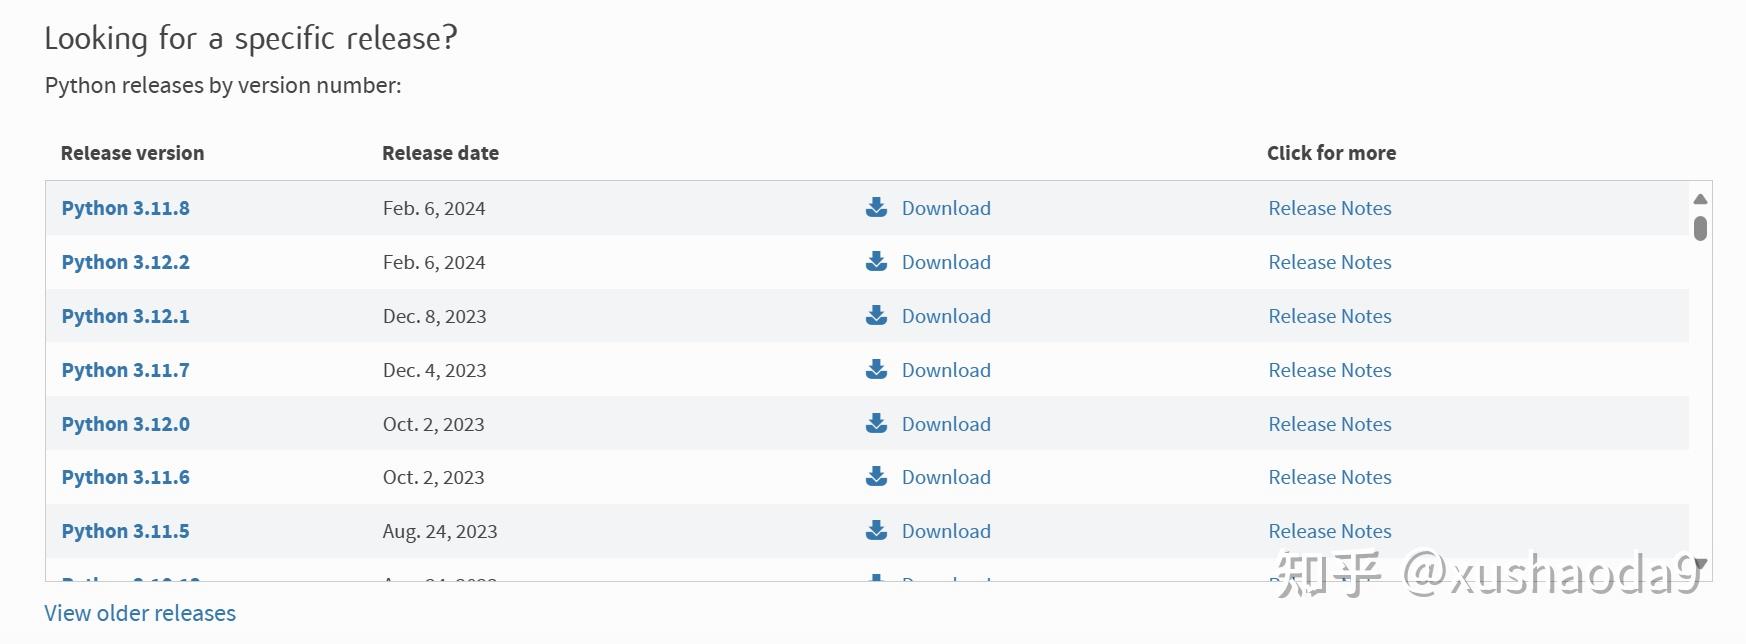
CUDA下载地址,选择需要的版本
https://developer.nvidia.com/cuda-toolkit-archive
选择对应的平台(比如以下为Windows11),下载安装
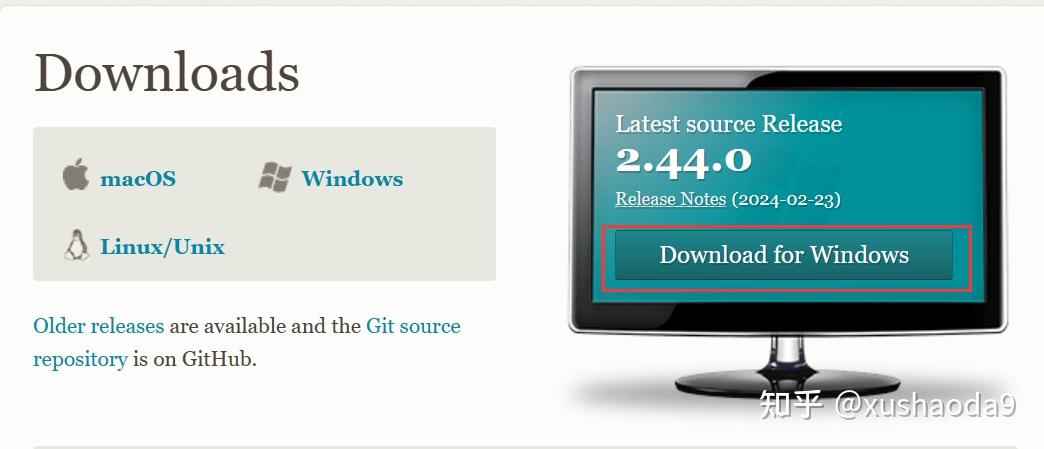
3、Git
Git下载地址:https://git-scm.com/download
二、Stable Diffusion WebUI 安装
1、下载
Stable Diffusion WebUI 项目 GitHub 地址:
GitHub – AUTOMATIC1111/stable-diffusion-webui: Stable Diffusion web UI
Windows 安装,进入终端,cd 到需要安装的位置,比如 D盘-》AiPainting 文件夹,使用 git 获取项目
git clone https://github.com/AUTOMATIC1111/stable-diffusion-webui.git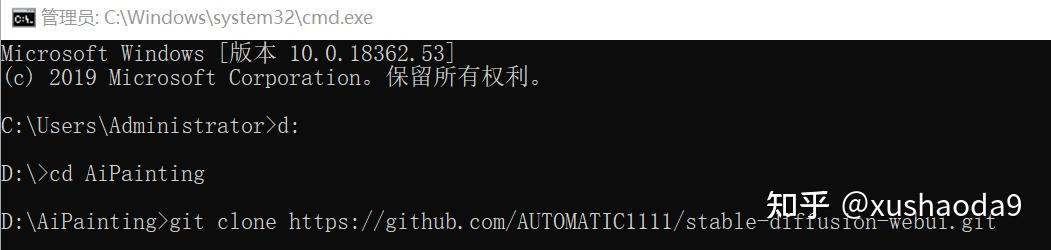
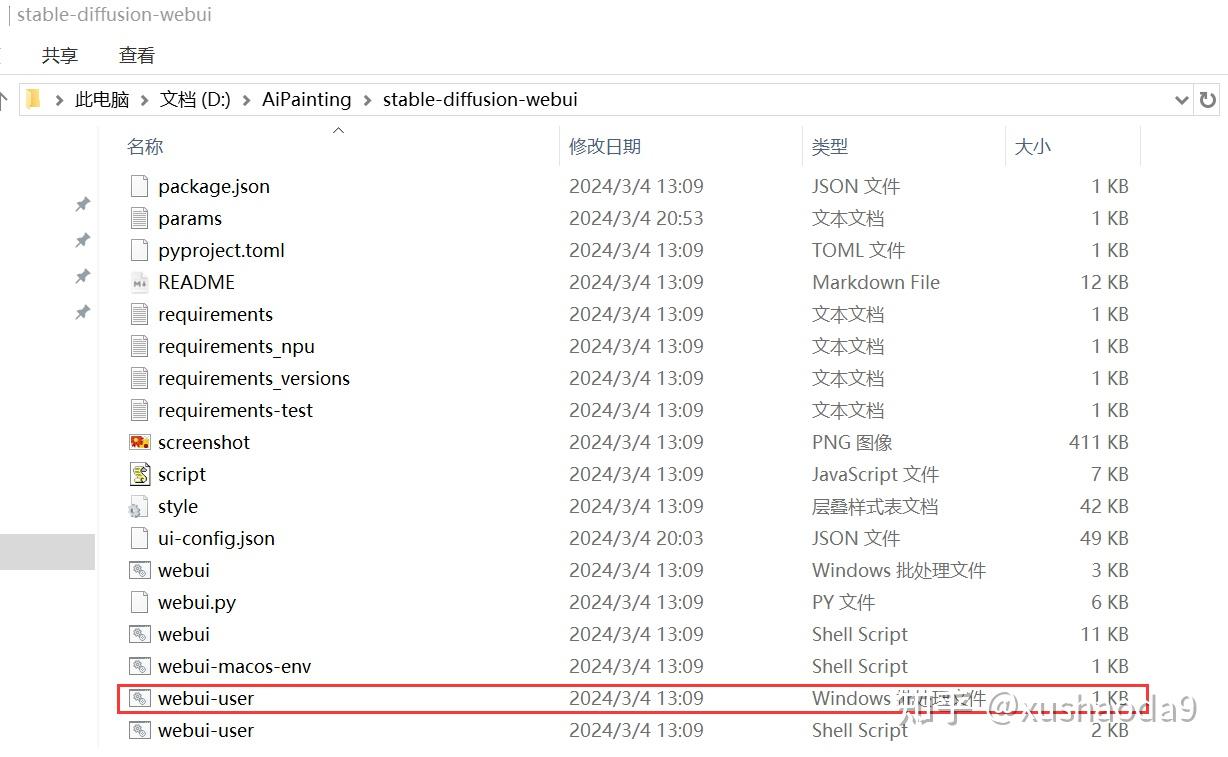
2、安装
双击 stable-diffusion-webui 文件夹下面的 webui-user.bat,开始部署本地环境
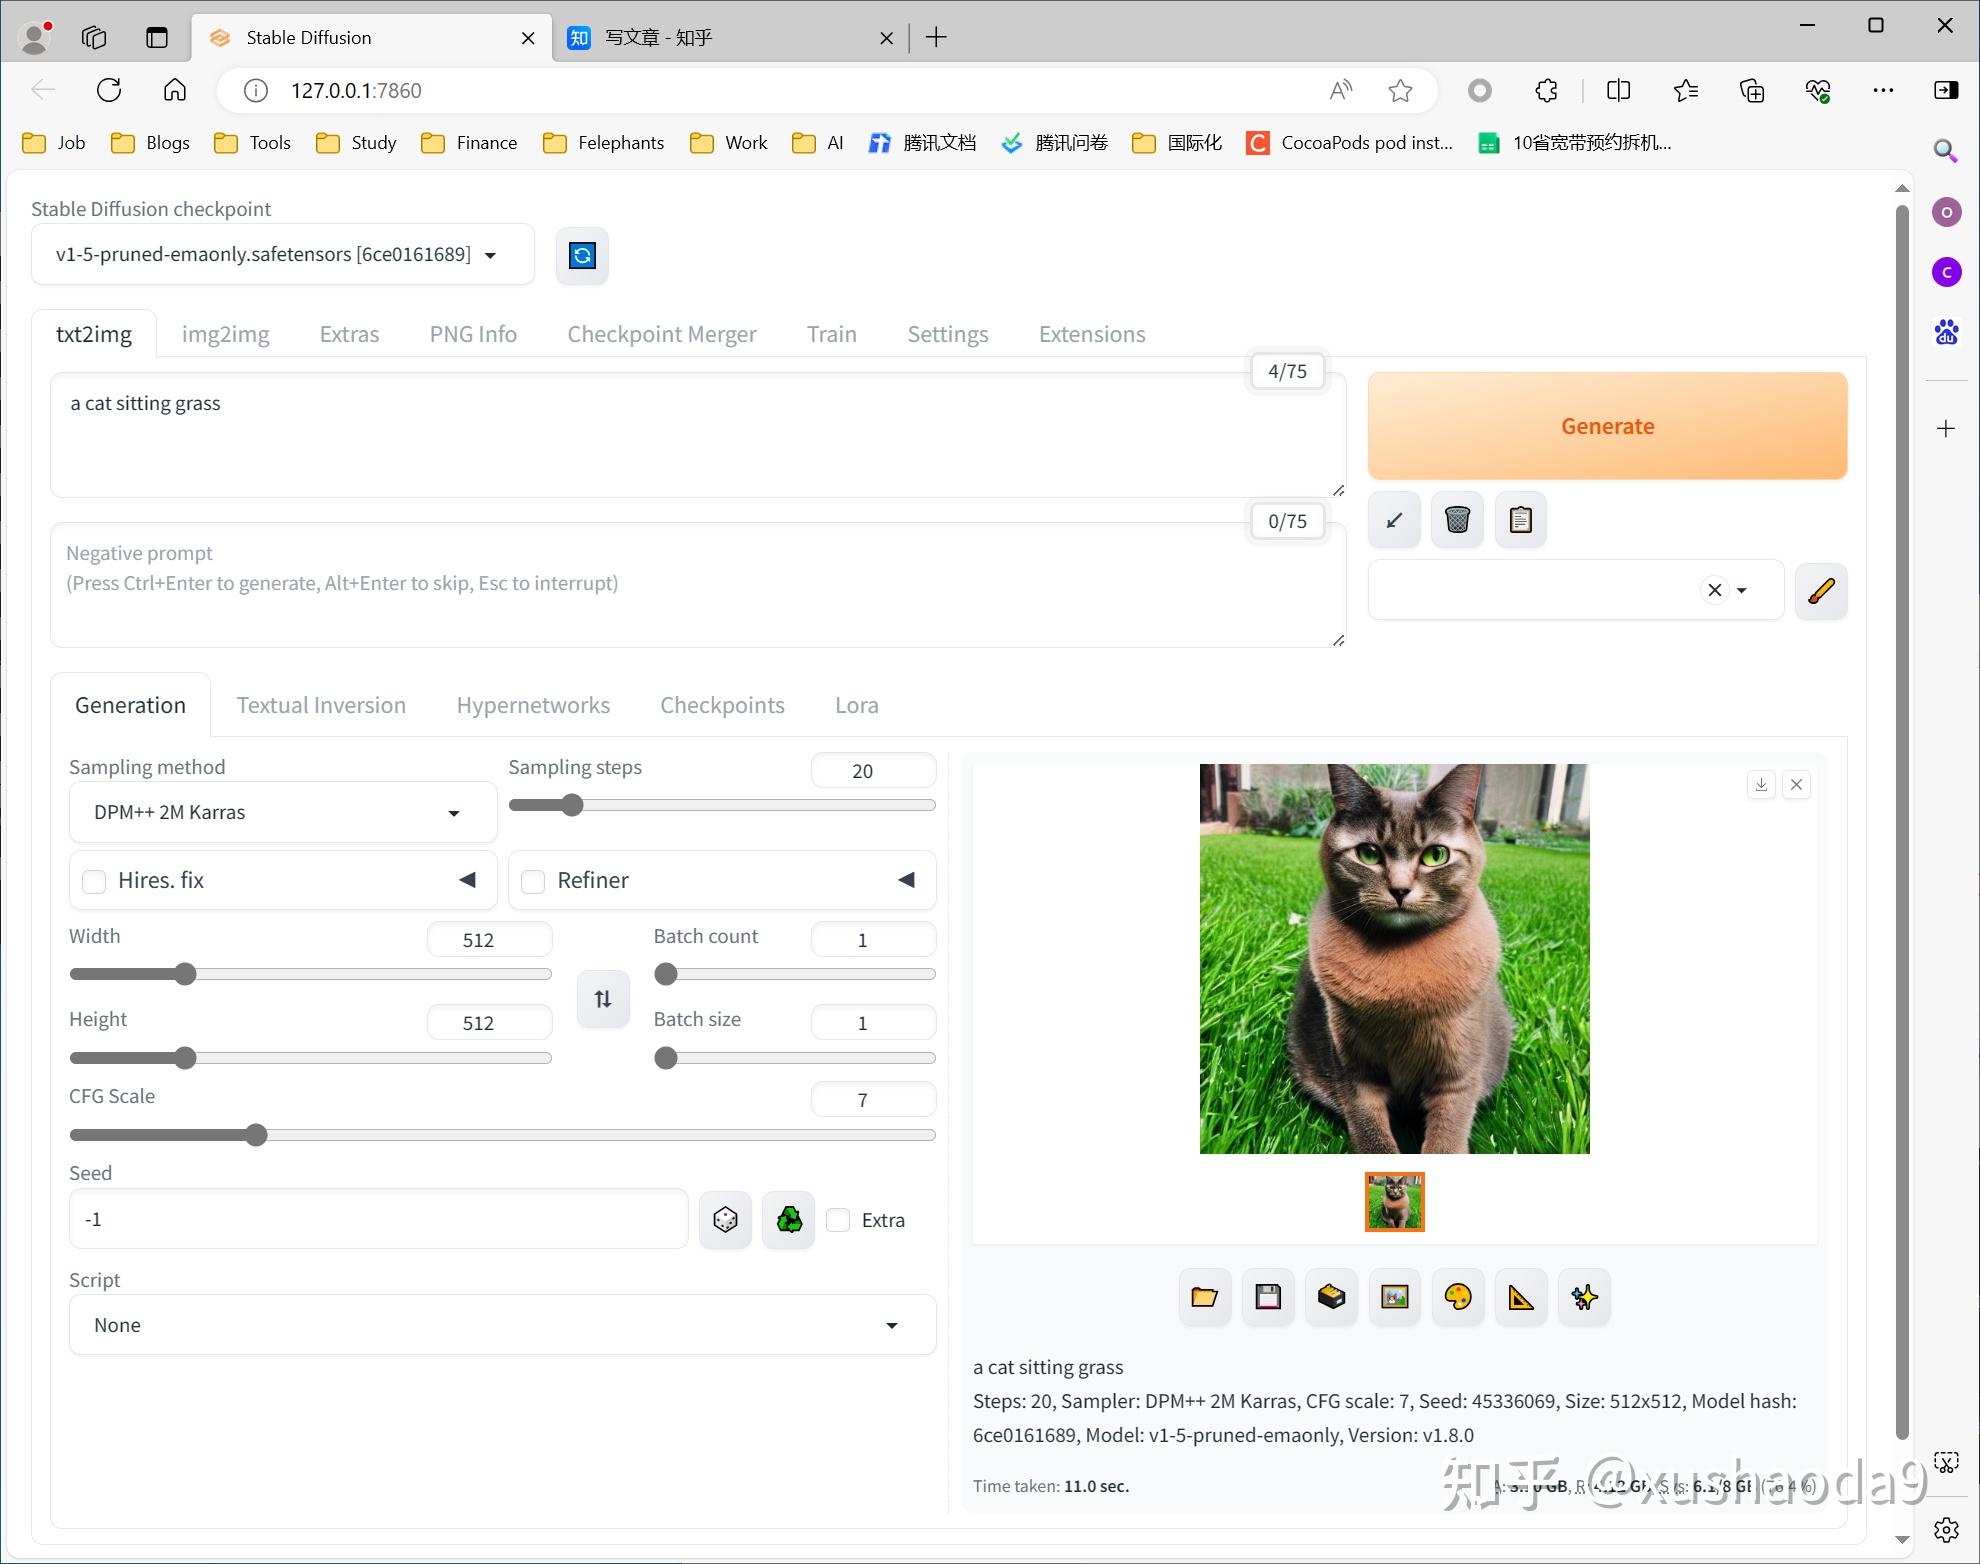
3、启动并画图
安装完成以后,双击 webui-user.bat,会启动终端(启动后不要关闭窗口),然后会自动打开浏览器网页
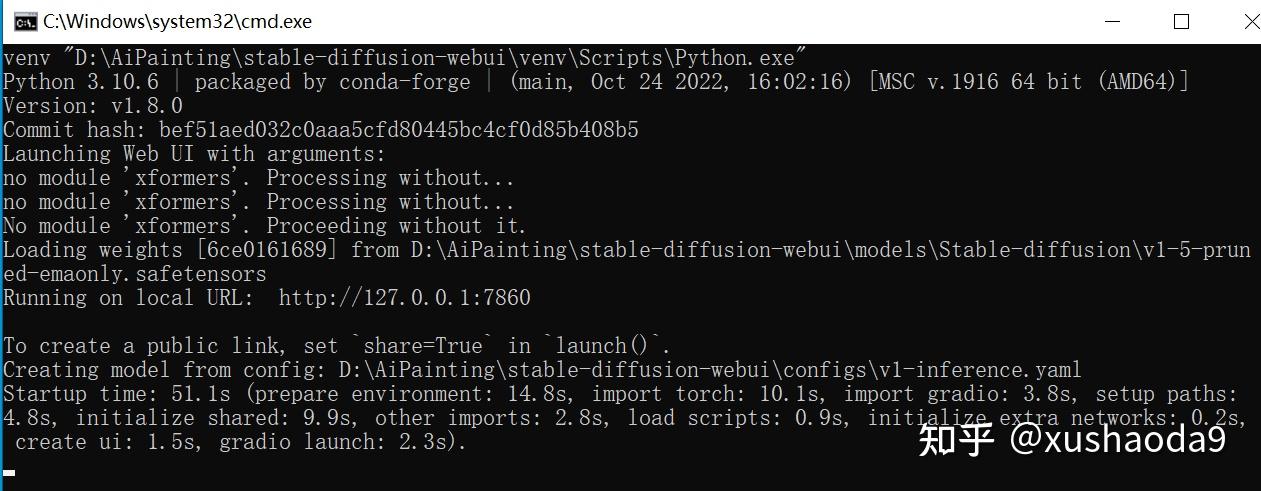
在浏览器中打开的网页里,就可以使用 Stable Diffusion 进行AI绘画了
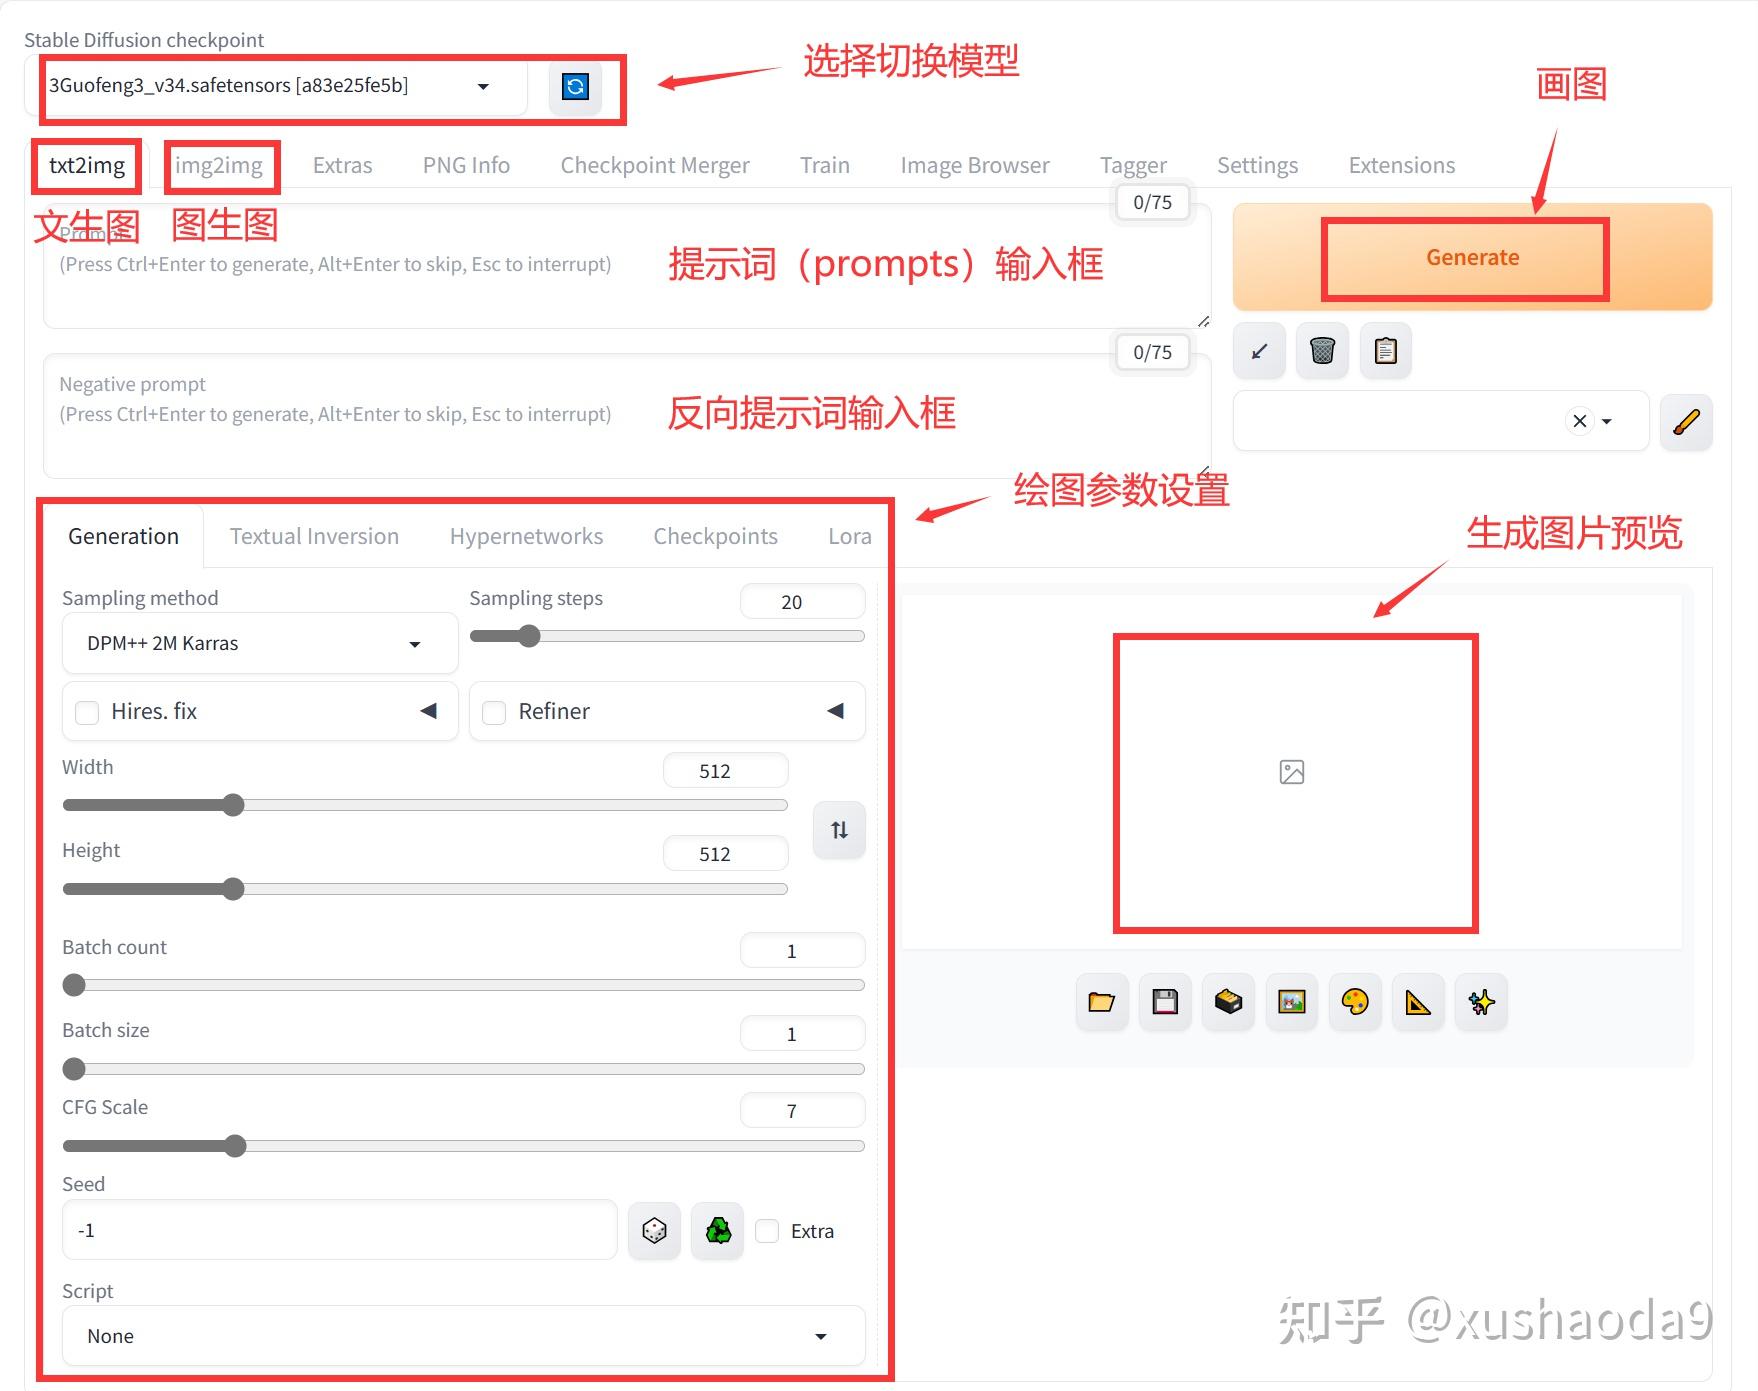
三、Stable Diffusion WebUI界面简介
四、常见问题处理
问题1:Server disconnected without sending a response.
解决办法:关掉VPN试试
问题2:使用 webui-user.bat 启动 Stable Diffusion WebUI 后,绘图报错:
报错提示内容:
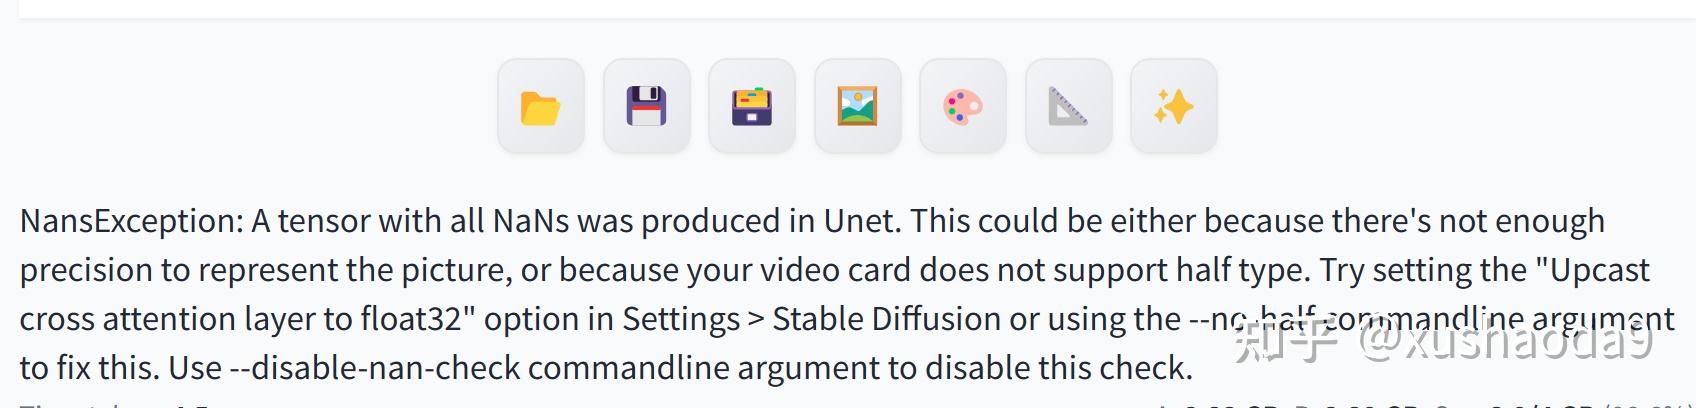
modules.devices.NansException: A tensor with all NaNs was produced in Unet.
This could be either because there's not enough precision to represent the picture,
or because your video card does not support half type.
Try setting the "Upcast cross attention layer to float32" option in Settings > Stable Diffusion
or using the --no-half commandline argument to fix this.
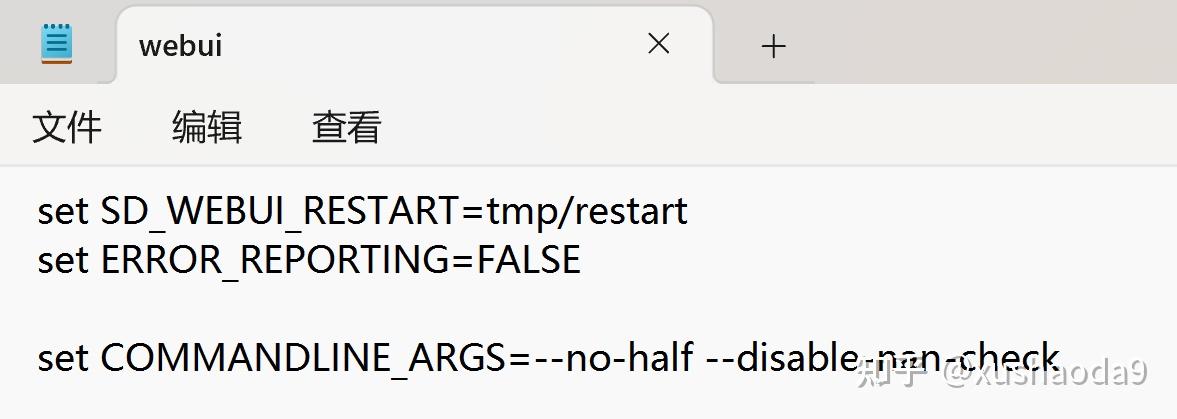
Use --disable-nan-check commandline argument to disable this check.解决办法:
打开根目录stable-diffusion-webui,找到 webui.bat,右击打开编辑
在set ERROR_REPORTING=FALSE 下面增加以下内容:
set COMMANDLINE_ARGS=–no-half –disable-nan-check
保存重启